
Flowers
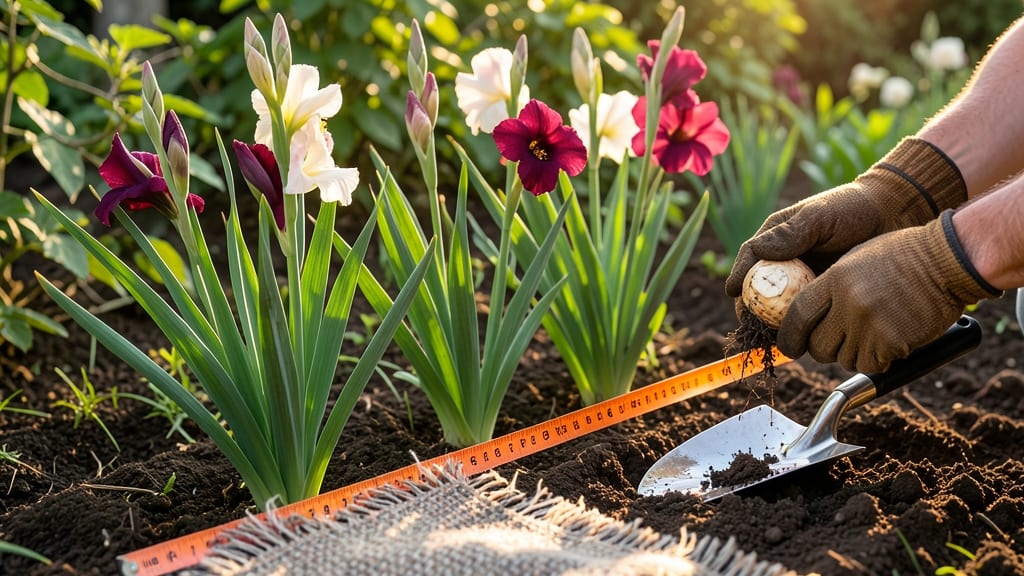
How to arrange gladiolus towers is the secret to turning your garden into a sky-reaching masterpiece—each spike reaching 3 to 5 feet tall and transforming spaces into vertical art. 🌿 I’ve used them to create dramatic focal points, lush borders, and even cascading displays that last 4-6 weeks with proper care. The secret isn’t just planting them in a row; it’s about staggered spacing, color blocking, and strategic companion plants to keep them looking fresh all season. Start with 3-4 bulbs per cluster, spaced 6-12 inches apart in groups, not straight lines. This creates natural waves of blooms instead of a flat, predictable look. For height variation, plant taller varieties at the back and shorter ones in front—think ‘Green Star’ (4 ft) behind ‘Picasso’ (3 ft). Mix in salvias, dahlias, or ornamental grasses to fill gaps and extend the season. By late summer, your garden will feel like a living sculpture—each spike of blooms adding layers of drama. The key is watering at the base (never overhead) and deadheading spent blooms to encourage more flowers. Even in small spaces, a single cluster makes a statement. Works for both formal gardens (structured rows) and wild meadows (loose, natural groupings). Let’s make your glads the star!
📚 In This Guide
- What you need
- Instructions
- Tips and common mistakes
- Wrapping up and next steps
What you need
- ● Gladiolus bulbs/corms: 10–20 (depending on desired height and fullness; choose healthy, firm corms of similar size for uniformity).
- ● Well-draining potting mix or garden soil: 1–2 bags (amend garden soil with compost or perlite for optimal drainage).
- ● Container or garden bed: For containers: 1–2 large pots (12–16 inches deep) with drainage holes.
- ● For gardens: A sunny spot (6+ hours of light) with loose, fertile soil.
- ● Fertilizer: Balanced granular fertilizer (e.g., 10-10-10) or slow-release bulb food.
- ● Watering can or hose: With a gentle spray nozzle for even moisture.
- ○ Stakes or supports (optional but recommended): 6–12 bamboo stakes or floral wire (3–4 feet tall) to prevent flopping.
- ● Hand trowel or bulb planter: For easy planting in containers or gardens.
- ● Pruners or sharp scissors: To trim stems to your desired height (leave 2–3 inches of stem on corms).
- ● Floral foam or chicken wire: For arranging bouquets (if cutting flowers).
- ● Mulch (e.g., straw or shredded bark): To retain moisture and suppress weeds.
- ○ Decorative elements (optional): Gravel, rocks, or companion plants (e.g., salvia or marigolds) for garden beds.
Step-by-Step instructions for planting gladiolus in staggered rows
This arrangement creates a cascading display of blooms that lasts all summer.
🌱 Step 1: Choose and Prepare Your Planting Site
Gladiolus thrive in full sun with at least 6 hours of direct light daily. Select a spot with well-draining soil—they hate soggy roots. I always test drainage by digging a 12-inch deep hole, filling it with water, and waiting to see if it drains within 2 hours. If not, amend the soil with 2-3 inches of compost or sand to improve drainage.
Work the soil to a depth of 12-15 inches, breaking up any compacted layers. Gladiolus corms need loose soil to send down strong roots. If your soil is heavy clay, mix in 1 part perlite to 3 parts soil to create air pockets. The ideal soil pH is 6.0-6.5, but they’ll tolerate slightly acidic soil down to 5.5.
☀️ Step 2: Stagger Planting Dates for Extended Blooms
Here’s the trick to nonstop color: plant 3 sets of corms, each 2 weeks apart. Start with the first batch in early spring, 2-4 weeks before your last frost date, when soil temperatures reach 60°F. I mark the planting spots with stakes to visualize the staggered rows—this ensures each batch gets equal sun exposure.
Dig holes 4-6 inches deep and 6 inches apart in rows spaced 18-24 inches apart. The depth keeps corms from heaving out of the ground in winter. Place 1 corm per hole, pointy end up, and cover with soil. Water gently to settle the soil around the corms without displacing them.
💧 Step 3: Water and Fertilize for Strong Stems
Keep the soil consistently moist but never waterlogged—gladiolus corms rot in soggy conditions. Water 1-2 inches per week, adjusting for rainfall. You’ll know it’s right when the top 2 inches of soil feel damp to touch. Mulch with 2-3 inches of straw or shredded leaves after shoots emerge to retain moisture and suppress weeds.
Feed with a balanced fertilizer (10-10-10) at planting, then again when shoots reach 6 inches tall. I use ½ cup per 10 feet of row, scratching it into the soil around the base. Avoid high-nitrogen fertilizers—they produce lush foliage but weak stems that flop over. Instead, focus on phosphorus and potassium for strong blooms.
✂️ Step 4: Stake and Support for Dramatic Height
As stems grow 12-18 inches tall, insert 2-foot stakes into the soil at the back of each row. Tie stems to the stakes with soft garden twine or plant clips every 6-8 inches to prevent snapping. Gladiolus can grow 4-5 feet tall, so support is critical—especially in windy areas.
Here’s the thing about gladiolus: they grow fastest in warm weather. If you notice stems leaning heavily toward the sun, rotate the stakes a quarter turn weekly to encourage even growth. You’ll see the difference in just a few days—the stems will straighten and thicken as they adjust.
🌿 Step 5: Deadhead and Maintain for Prolonged Blooms
Cut spent blooms 2 inches below the flower head to redirect energy to new buds. I always use clean, sharp pruners to avoid damaging the stems. This encourages 3-5 additional blooms per stem and extends the display by 4-6 weeks. Avoid cutting the foliage until it yellows naturally—this feeds the corm for next year’s growth.
Watch for gladiolus borers, which tunnel into stems and cause wilting. If you spot sawdust-like frass or holes, remove and destroy affected stems immediately. A preventive spray of neem oil every 2 weeks keeps pests at bay without harming beneficial insects. With proper care, your staggered planting will bloom from early summer through fall.
Tips & tricks for perfect gladiolus arrangements
These pro techniques will help you create a stunning, long-lasting display that rivals professional garden centers.
Soil Prep Secret: In Step 1, when amending heavy clay soil, I recommend mixing in 1 part perlite to 3 parts soil by volume—not weight. This creates those crucial air pockets that prevent waterlogging. For the drainage test, use a 12-inch deep hole and wait exactly 2 hours—any longer means you need more sand or compost. I've seen gladiolus corms rot after just 48 hours in poorly draining soil, so don't skip this test!
Staggering Strategy: The 2-week intervals between planting batches in Step 2 are non-negotiable for that cascading effect. Mark your calendar starting 2-4 weeks before your last frost date—I use colorful flags at each planting spot to visualize the progression. Pro tip: Plant the first batch with the tallest varieties (like 'Black Star') and the last batch with shorter ones (like 'Picasso') to create height variation from the beginning.
Support System: In Step 4, when inserting 2-foot stakes, bury them 6 inches deep for maximum stability. I've learned the hard way that shallow stakes bend in wind or when stems brush against them. For extra security, especially in windy areas, use 3 stakes per row instead of one at each end. The quarter turn weekly rotation keeps stems growing straight by preventing them from leaning toward consistent sunlight.
Deadheading Technique: That 2-inch cut below the flower head in Step 5 isn't just arbitrary—it's where new side buds form. Use clean pruners (I sterilize mine with rubbing alcohol between cuts) to prevent disease spread. The 4-6 week extension you'll get from this simple technique is worth the effort, especially if you're planning your garden layout for maximum visual impact all summer.
Pro Tips for Arrange Gladiolus
- These pro techniques will help you create a stunning, long-lasting display that rivals professional garden centers.
- Soil Prep Secret: In Step 1, when amending heavy clay soil, I recommend mixing in 1 part perlite to 3 parts soil by v...
- Staggering Strategy: The 2-week intervals between planting batches in Step 2 are non-negotiable for that cascading ef...
Frequently asked questions
Got questions about arranging gladiolus?
You’re not alone! Here are some of the most common concerns—plus quick, practical answers to help you create stunning, drama-filled displays with ease.
When is the best time to plant gladiolus for the most dramatic blooms?
Plant gladiolus corms in early spring (after the last frost) for summer blooms, or in late summer (6-8 weeks before the first frost) for fall displays. For year-round color, stagger plantings every 2-3 weeks—this ensures a continuous cascade of blooms!
How long does it take for gladiolus to bloom after planting?
With proper care, gladiolus typically bloom 8-10 weeks after planting. Factors like soil temperature, sunlight, and water consistency can speed this up or slow it down. Pro tip: Use a soil thermometer—ideal temps are 60–70°F (15–21°C) for fastest growth!
Can I arrange gladiolus in containers, or do they only work in gardens?
Gladiolus thrive in large containers (at least 12 inches deep) with well-draining soil. Choose deep pots for taller varieties and add a time-release fertilizer to support their height. Just ensure containers get 6+ hours of sunlight daily for best results.
Why aren’t my gladiolus blooming? Troubleshooting tips!
If your gladiolus are tall but not flowering, check these common issues:
- Not enough sunlight: Move to a sunnier spot (they need full sun!).
- Overcrowding: Space corms 6 inches apart for better airflow.
- Poor soil: Amend with compost or a balanced fertilizer (10-10-10).
- Late planting: Corms need 6–8 weeks to establish roots—plant early!
How do I extend the vase life of cut gladiolus?
Cut gladiolus last 1–2 weeks in a vase with these tricks:
- Trim stems diagonally and recut every 2 days.
- Use cool water (change daily) and add a flower food packet.
- Avoid direct sunlight—place in a bright, indirect spot.
- Remove lower leaves submerged in water to prevent bacteria.
Wrapping up and next steps
Arranging gladiolus is all about strategic planning—whether you're creating a bold garden statement or a stunning centerpiece. By selecting the right varieties, preparing the soil, and mastering staggered planting, you’ll enjoy dramatic height and cascading blooms that steal the show. 🌸
Now that you’re armed with these tips, roll up your sleeves and get planting! Start small with a single row or dive into a full garden design—either way, your patience will pay off in vibrant, eye-catching displays. Happy gardening!