
Planting
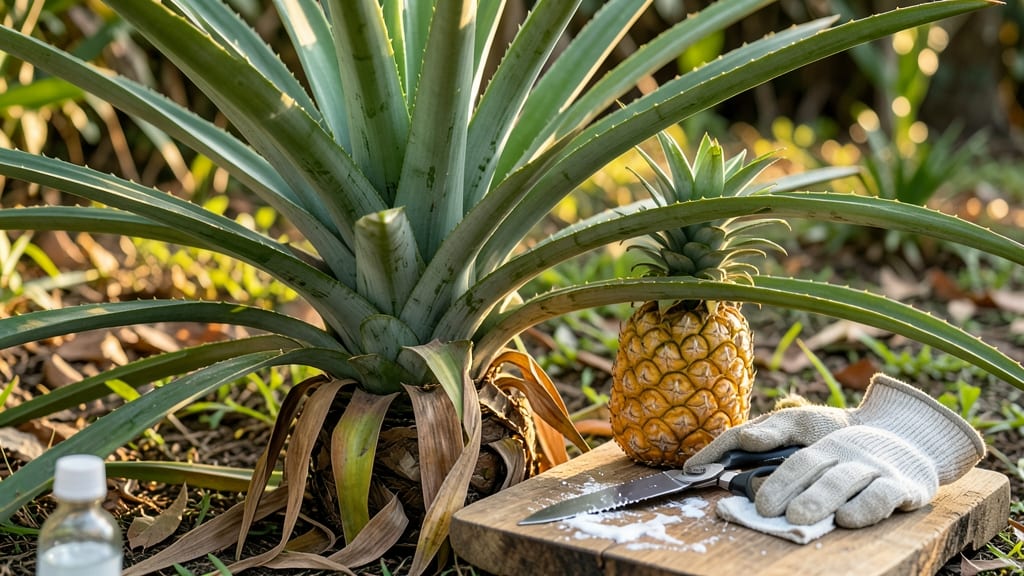
Your first ripe pineapple is ready—now how to cut a pineapple off the plant without wrecking the plant. ✂️ The key is timing, sharp tools, and knowing exactly where to slice. Harvest too early or too late, and you’ll ruin the fruit and the plant’s chance to regrow.
I’ve made every beginner’s mistake, from jagged cuts that invite rot to yanking the fruit off by accident. This method keeps both the pineapple and your plant happy.
You’ll need just three things: a clean, sharp knife (serrated works best), rubbing alcohol or bleach (to sterilize), and gardening gloves (those spines are no joke).
The best time to harvest is when the fruit is golden-yellow at the base, heavy for its size, and the leaves pull out easily. If it’s still green, wait—patience here means sweeter fruit and a healthier plant ready to produce again.
Slice just above the base where the fruit meets the plant, making one clean, straight cut—no sawing back and forth. The mother plant will send up pups (baby plants) in weeks, and with proper care, you could harvest another pineapple in 18-24 months.
The first cut is the hardest part; after that, it’s all about letting nature take over.
Pro tip: Save the top of the pineapple (the crown) to root—it’ll grow into a new plant. Just let it dry for a day, trim the leaves, and plant it in soil.
The real magic? Your original plant will keep producing pups for years, turning one harvest into a lifetime supply. No mess, just rewards.
📚 In This Guide
- What you need
- Instructions
- Tips and common mistakes
- Wrapping up and next steps
What you need
- ● Mature pineapple plant – Ensure it’s at least 18-24 months old and has a brown, woody base with a small, tight crown.
- ● Sharp, sterilized pruning shears or knife – A clean, stainless-steel blade (e.g., Felco pruners or a chef’s knife) to avoid bacterial contamination.
- ● Rubbing alcohol (70% or higher) – For sterilizing tools (1-2 tbsp per wipe).
- ● Garden twine or zip ties – A 12-inch piece to secure the crown if needed.
- ○ Gloves (optional but recommended) – Heavy-duty gardening gloves to protect hands from thorns and sap.
- ○ Pruning sealant (optional) – A tree wound sealant (e.g., Tanglefoot) to protect the cut area if keeping the plant alive.
- ● Horticultural spray (e.g., copper fungicide) – To prevent rot if the plant stays in the ground.
- ● Newspaper or cardboard – To lay under the plant and catch sap/dirt.
- ● Hydrogen peroxide (3%) – For disinfecting the cut surface if propagating.
- ● Planting pot (6+ inches deep) – If you plan to root the crown for a new pineapple plant.
Step-by-Step instructions for harvesting pineapple from the plant
Here's how to remove pineapple cleanly while protecting your plant for future harvests.
🪴 Step 1: Identify the Right Time to Harvest
Wait until the pineapple develops its signature golden-yellow color and fragrant sweet scent—this usually takes 18-24 months from flowering. The base will turn slightly yellow too, and the fruit will feel heavy for its size. If you harvest too early, the fruit won't be sweet enough, but leaving it too long risks overripening.
Gently squeeze the fruit—it should yield slightly but not feel mushy. The leaves at the top should also start turning brown and crispy. This is your signal that the pineapple is ready. I always check in the morning when the scent is strongest, as this is the most reliable indicator.
✂️ Step 2: Gather Your Tools and Prepare the Workspace
You'll need a sharp pruning shears or knife, rubbing alcohol or bleach to sterilize tools, and a clean cutting surface. I like to work on a plastic tray or newspaper to catch any sap. Wipe down your tools with rubbing alcohol first—this prevents bacterial infections that can harm your pineapple plant.
Have a small container of water and a spray bottle nearby too. The pineapple stem will "bleed" clear sap when cut, and keeping a damp cloth handy helps clean up messes quickly. Work in a well-ventilated area, as the sweet aroma attracts insects that might damage your plant.
🌱 Step 3: Cut the Fruit Cleanly at the Base
Position your knife or shears at a 45-degree angle, about 1 inch below the fruit where the stem meets the plant. This angled cut prevents water from pooling on the wound, which could rot the plant. Apply gentle but firm pressure—don't saw back and forth, as this crushes the stem and creates jagged edges.
The sap will flow freely at first, but it stops quickly once the cut is complete. Twist the fruit slightly as you cut to avoid tearing the stem. Leave the 1-inch stem attached to the fruit—this protects the fruit during transport and storage. I always make a second horizontal cut about ½ inch above the first to create a flat surface for placing the fruit.
💧 Step 4: Clean the Cut and Protect the Plant
Once the fruit is removed, you'll see a fresh cut on the plant. Wipe away any excess sap with a damp cloth, then sprinkle a pinch of cinnamon powder over the wound. Cinnamon acts as a natural antiseptic and helps prevent fungal infections. Avoid using flour or sugar substitutes—these can attract pests.
Water the plant lightly at the base, but don't soak the cut area. The roots need moisture, but the wound should stay dry for 24 hours to heal properly. I usually wait 3-4 days before fertilizing again, giving the plant time to recover from the harvest stress.
☀️ Step 5: Store and Enjoy Your Fresh Pineapple
Place the pineapple in a cool, dry spot away from direct sunlight for 2-3 days to ripen further. The longer stem you left attached helps the fruit soften naturally. Once fully ripe, store it in the refrigerator for up to 5 days, or enjoy it fresh immediately for peak flavor.
Don't peel the pineapple until you're ready to eat it—this preserves its juiciness. If you notice brown spots on the fruit after cutting, simply slice them off before serving. The plant will produce new flower stalks within 6-12 months, so you can look forward to another harvest soon!
Tips & tricks for harvesting pineapples safely
Real talk: Harvesting pineapples cleanly takes confidence—not brute force. Here's how to avoid the messy mistakes I made my first few times.
Knife Angle Matters: That 45-degree angle in Step 2 isn't arbitrary—it creates a stable base. I learned this the hard way after watching pineapples roll away mid-cut. For extra stability, place a damp towel under the fruit before cutting. The slight friction helps keep it in place while you work, especially if your cutting board is slippery.
Ripeness Test: The instructions mention checking for a fragrant smell at the base, but here's what nobody tells you—the leaves should also pull back with just a gentle tug. If they resist, the fruit needs more time. I once tried harvesting a pineapple that was only "mostly ripe" and ended up with a mealy, flavorless center. That 2-3 day ripening period in Step 3 is worth the wait for maximum sweetness.
Leaf Trimming Hack: When you're trimming the crown leaves in Step 3, leave that ½-inch base attached—it's not just about preventing juice leaks. Those tiny leaf bases act like natural plugs, keeping the fruit fresher longer. I started saving the trimmed leaves too, because they make great garnishes for tropical drinks or cocktails (just blanch them first to soften).
Storage Wisdom: The 2-3 day ripening period at room temperature is non-negotiable for flavor, but here's my pro move: After those 2-3 days, if you're not ready to slice, transfer the pineapple to the fridge immediately. It'll keep for the full 2 weeks while continuing to ripen slowly—just bring it back to room temperature for 1-2 hours before serving to restore its natural sweetness.
Pro Tips for Cut A Pineapple Off The Plant
- Real talk: Harvesting pineapples cleanly takes confidence—not brute force. Here's how to avoid the messy mistakes I m...
- Knife Angle Matters: That 45-degree angle in Step 2 isn't arbitrary—it creates a stable base. I learned this the hard...
- Ripeness Test: The instructions mention checking for a fragrant smell at the base, but here's what nobody tells you—t...
Frequently asked questions
Got questions about harvesting your pineapple? You’re not alone! Here are some of the most common concerns—and their simple solutions—to make your pineapple harvest a breeze.
How do I know when my pineapple is ready to harvest?
Look for a golden-brown base where the fruit meets the plant and a sweet, fragrant smell. The leaves should also start turning yellow. If you gently tug, the pineapple should release easily—if not, wait a few more days!
Can I harvest a pineapple before it’s fully ripe?
Yes, but it won’t be as sweet! If you need it sooner, harvest when the fruit is mostly green but firm. Store it in a cool, dry place for a week to ripen. For the best flavor, patience is key—let it ripen fully on the plant.
What’s the best tool to cut a pineapple off the plant?
A sharp, sterilized knife or pruning shears work best. Avoid dull tools—they can crush the fruit or leave jagged edges. For extra clean cuts, dip the blade in rubbing alcohol before use. Safety first!
Should I cut the leaves off after harvesting?
Yes! Trim the leaves 1-2 inches above the fruit to prevent rot and pests. Leave a small stem (about 1 inch) to help the pineapple heal. If you plan to regrow the plant, leave a few healthy leaves intact.
What if my pineapple won’t come off the plant?
Don’t force it! If it’s stubborn, wait another 2-3 days. If the fruit is overripe (soft or mushy), it’s best to harvest it gently to avoid mess. For stubborn cases, twist slowly while pulling upward—use a clean saw if needed (last resort!).
How do I store a freshly harvested pineapple?
Store it in a cool, dry place (like a pantry) for up to a week. For longer storage, refrigerate the whole, uncut pineapple (it’ll last 2-3 weeks). Once cut, keep it in the fridge for 3-5 days. Avoid washing until ready to eat!
Wrapping up and next steps
Cutting a pineapple straight from the plant is a rewarding experience—fresh, juicy, and mess-free! 🌱 With the right tools, a steady hand, and patience, you’ve now mastered the art of harvesting your own tropical treasure.
Whether you’re growing pineapples for their sweet flavor or just the joy of nurturing a unique plant, your hard work has paid off.
Now that you’ve got your pineapple, why not share the bounty? Gift a slice to a neighbor, whip up a tropical smoothie, or even propagate the plant’s pups for future harvests. Happy growing—and enjoy that sweet, sun-ripened taste! 🍍✨