
Pruning
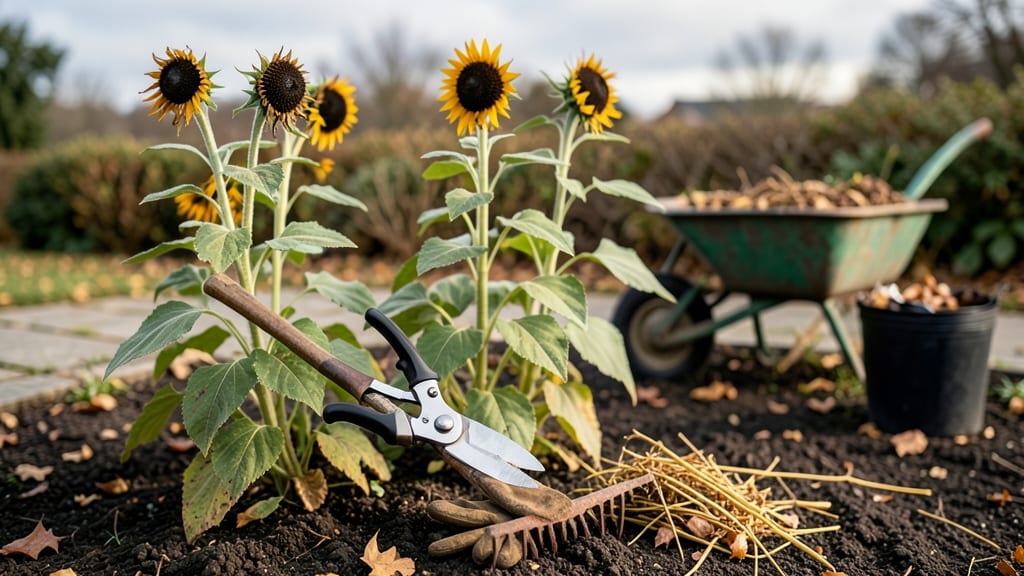
Your Black-Eyed Susans are already putting on a show—but how to cut back Black-Eyed Susans for winter is the secret to ensuring they thrive even more boldly next season. ✨ Cutting them back now isn’t just cleanup; it’s a secret weapon for bigger, bolder blooms in spring.
I’ve learned the hard way that skipping this step leads to weak stems and fewer flowers, so let’s fix that together.
The best time to prune is after the first hard frost but before the ground freezes—typically November through early December in most zones. Grab your pruners (clean, sharp ones!) and cut the stems back to 4-6 inches tall, leaving the crown intact.
This prevents disease and gives the roots a chance to recharge for next year’s growth.
What you’ll end up with is a neater garden bed and plants that bounce back stronger in spring. The key is patience—don’t rush it, and avoid pruning too early when pests might still be lurking. Think of it like tucking your plants in for a cozy winter nap.
Works for all Rudbeckia varieties, whether you’re in a snowy climate or a mild winter zone. Here’s how to do it right—no guesswork, just results. Let’s get those stems trimmed!
📚 In This Guide
- What you need
- Instructions
- Tips and common mistakes
- Wrapping up and next steps
What you need
- ● Pruning shears or loppers: Choose bypass pruners (for clean cuts) or loppers (for thicker stems). Size: 6-8" blades for shears, 8-12" for loppers.
- ● Garden gloves: A pair of cut-resistant, breathable gloves (e.g., nitrile-coated for grip). Quantity: 1 pair.
- ○ Disinfectant (optional but recommended): 70% isopropyl alcohol or a gardening disinfectant spray to sterilize tools between cuts. Quantity: Small bottle or spray.
- ● Garden twine or burlap: For tying back stems if needed (e.g., 3-4 ft sections). Quantity: 1 roll.
- ● Heavy-duty trash bags: For collecting debris. Quantity: 2-3 bags.
- ● Wheelbarrow or bucket: To haul clippings away. Size: 2-3 cubic feet capacity.
- ● Hedge shears: For shaping larger patches of Black Eyed Susans (e.g., 12-18" blades).
- ● Mulch (straw or shredded leaves): 2-3 inches to protect roots post-pruning.
- ● Hand saw: For stubborn, thick stems (e.g., 8-10" pruning saw).
- ● Knee pads: If you’re on the ground for extended periods.
- ● Label markers: To tag plants if you’re experimenting with varieties.
Step-by-Step instructions for cutting back Black Eyed Susans
Here's my foolproof method for winterizing these tough perennials—it keeps them healthy and ready to burst into those signature golden blooms next spring.
✂️ Step 1: Time Your Cutbacks Perfectly
Wait until after the first hard frost has blackened the foliage completely. This usually happens in late fall when temperatures consistently dip below 30°F for several nights. Cutting too early removes the plant's natural food stores, while waiting too long risks disease from lingering wet foliage.
I like to check my plants after a 2-3 week frost period. The stems should feel crispy to the touch, and the leaves will have turned brown or black. This is your cue that the plant has entered dormancy and is ready for trimming.
✂️ Step 2: Cut Back to the Ground Level
Use clean, sharp pruners to cut the stems back to within ½ inch of the soil line. This removes all dead foliage while leaving the crown intact—where next year's growth will emerge. I always sterilize my pruners with rubbing alcohol between cuts to prevent spreading any potential diseases.
Don't worry about cutting too low—Black Eyed Susans are tough perennials that regenerate easily from their base. If you accidentally cut into the crown, don't panic; just make sure you're leaving at least ¼ inch of healthy growth above the soil.
🪴 Step 3: Remove and Dispose of Debris
Gather all the cut stems and foliage into a pile. This prevents overwintering pests from using the dead plant material as shelter. I like to compost the debris, but only if my compost pile gets hot enough to kill any potential pathogens—otherwise, I dispose of it in yard waste.
Resist the urge to leave the cut stems in place over winter. The damp, decaying material can harbor fungal diseases that will attack your plants come spring. Clear the area completely to give your Black Eyed Susans a fresh start.
💧 Step 4: Apply a Light Mulch Layer
Spread a 2-3 inch layer of organic mulch—like shredded leaves or straw—around the base of the plants. This protects the crown from extreme temperature fluctuations and retains soil moisture. I avoid heavy mulch in winter because it can smother the plant or trap too much moisture.
Leave a small gap between the mulch and the stems to prevent rot. You'll see the mulch settle slightly over winter, so don't worry if it looks a bit thin at first. This layer also helps suppress weeds, giving your Black Eyed Susans a head start in spring.
☀️ Step 5: Monitor for Spring Growth
In early spring, when you see new growth emerging, it's time to remove the mulch. This usually happens around late February to early March, depending on your climate. The new shoots will be bright green and tender, signaling that the plant is waking up from dormancy.
Once the mulch is removed, you can add a balanced fertilizer to encourage robust growth. I like to wait until the plants are about 4-6 inches tall before fertilizing, as this gives them enough energy to establish strong roots first.
Tips & tricks for perfect Black Eyed susan winter care
Here's what I've learned after years of perfecting this winter prep routine—these small details make all the difference for next year's blooms.
Timing is Everything: The 30°F threshold is your golden rule, but don't just rely on thermometers. I check for three signs: crispy stems, completely blackened leaves, and at least 2-3 weeks of consistent cold nights. This ensures the plant has fully entered dormancy and stored its energy reserves. If you're in a transitional climate, wait for that second frost to be extra safe.
Pruning Precision: When cutting back in Step 2, I use a visual trick—aim to leave just the top of the crown visible above the soil line. The crown is that thick, woody base where next spring's growth will emerge. If you're unsure where it is, look for the point where the stems thicken noticeably as they get closer to the ground. And always sterilize those pruners between cuts—rusty tools can introduce fungal spores that overwinter and attack your plants.
Mulch Mastery: That 2-3 inch mulch layer in Step 4 isn't just for insulation—it's your first line of defense against spring weeds. I prefer straw over leaves because it breaks down more slowly and won't compact as much. The key is to mound it slightly higher than the surrounding soil to create better insulation, but leave that small gap at the stem to prevent rot. Think of it like tucking your plants in with a cozy blanket that still lets them breathe.
Pro Tips for Cut Back Black Eyed Susans For Winter
- Here's what I've learned after years of perfecting this winter prep routine—these small details make all the differen...
- Timing is Everything: The 30°F threshold is your golden rule, but don't just rely on thermometers. I check for three ...
- Pruning Precision: When cutting back in Step 2, I use a visual trick—aim to leave just the top of the crown visible a...
Frequently asked questions
Got questions about prepping your Black Eyed Susans for winter?
You’re not alone! Here are answers to the most common ones—so you can tackle winterization with confidence.
When is the best time to cut back Black Eyed Susans for winter?
Cut them back after the first hard frost (typically late fall to early winter) but before the ground freezes solid. This ensures the plant has entered dormancy but hasn’t been damaged by extreme cold. Aim for late November or December in most U.S. climates—just check your local frost dates!
Should I cut Black Eyed Susans all the way to the ground?
No need to go too aggressive! Trim back the stems to about 6–8 inches above the ground. This removes dead foliage while leaving enough growth to protect the crown from freezing. Over-cutting can stress the plant and reduce next year’s blooms.
What if I miss the window and the stems are already frozen?
Don’t panic! Wait until early spring (when new growth starts) to trim back any remaining dead stems. The plant will bounce back—just avoid pruning too late in spring, as it can delay flowering. A little late prep is better than none!
Can I leave the cut stems in my garden, or should I remove them?
You can leave them temporarily, but for a cleaner look and to reduce pests, remove and compost the debris. If you’re short on time, mulch the area with 2–3 inches of shredded leaves or straw to insulate the roots. Just avoid piling mulch directly against the stems.
Will cutting back Black Eyed Susans affect next year’s flowers?
Not at all! In fact, proper winter pruning encourages healthier growth and more vibrant blooms the following season. These perennials thrive when given a fresh start—just avoid heavy pruning in early spring, as the plant needs its energy to rebound after winter.
What if my Black Eyed Susans look sad after winter?
Give them time! If they’re slow to regrow in spring, check for compacted soil or overwatering (they prefer well-draining soil). A light fertilizer in early spring can also give them a boost. Most plants perk up once temperatures warm up—patience is key!
Wrapping up and next steps
Cutting back your Black Eyed Susans in late fall or early winter isn’t just about tidying up—it’s setting the stage for next year’s vibrant blooms.
By following these simple steps, you’ll protect your plants from harsh weather, encourage healthier growth, and enjoy those iconic golden-yellow flowers even more in spring. 🌼
Now that you’re ready to tackle the task, grab your pruners and get to work—your future garden will thank you! For extra care, consider mulching around the base to shield roots from freezing temps. Happy pruning! ✂️🌿