
Watering
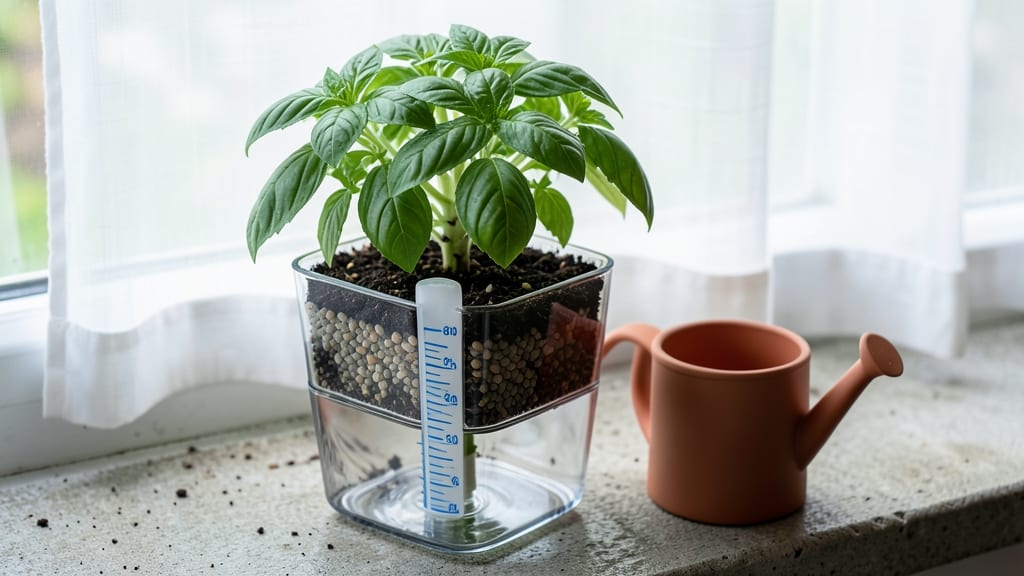
Fill self-watering pots by adding potting mix to the top chamber, then pour water into the reservoir until it reaches the wick level. Avoid overfilling to prevent root rot while ensuring consistent moisture for healthy plant growth.
Filling self-watering containers properly keeps your plants thriving without guesswork. 💧 The key is balancing the reservoir level with your plant's thirst—too much water can suffocate roots, while too little leaves them parched.
I've found that most wick systems work best when the water level sits just below the soil surface, allowing the wick to draw moisture upward naturally. This method eliminates the need for daily watering while preventing the common pitfall of soggy soil that many gardeners face.
For container gardens, I recommend checking water levels every 3-5 days depending on your climate. Succulents and herbs need less frequent watering than leafy greens or flowering plants. The beauty of these systems is their self-regulating nature—once set up correctly, they maintain even moisture distribution that mimics natural rainfall patterns.
Just remember to use room-temperature water to avoid shocking plant roots.
💡 In This Article
- How Wick-Based Watering Systems Distribute Moisture
- Best Practices for Refilling and Maintaining Self-Watering Pots
How wick-based watering systems distribute moisture
The magic behind self-watering pots lies in capillary action, a natural process where water moves through narrow spaces (like the wick) against gravity.
Think of it like a straw sucking up soda—except here, the wick's porous material creates tiny channels that draw water upward from the reservoir to the soil. This system ensures roots get moisture consistently without relying on manual watering.
The wick typically sits at the bottom of the soil chamber, where it absorbs water and distributes it evenly across the root zone.
Proper water levels are critical because the wick only works when submerged. If the reservoir is too low, the wick dries out and stops feeding moisture to the roots. Conversely, overfilling can drown roots by creating a waterlogged zone where oxygen can't reach.
For most plants, the reservoir should be filled until the wick's tip is just covered—about 1-2 inches below the soil surface. This balance prevents root rot while maintaining steady hydration.
For example, a 6-inch pot might need around 1 cup of water in the reservoir, while a 12-inch container could require 2-3 cups, depending on the plant's thirst.
Different plants have unique moisture needs, so adjust the wick length or reservoir size accordingly.
Succulents and cacti thrive with shorter wicks (or none at all) since they store water in their leaves, while leafy greens like lettuce or basil benefit from longer wicks that keep the soil consistently damp. 💧 The key is observing your plant's response—yellowing leaves often signal overwatering, while wilting indicates the wick isn't drawing enough moisture.
For heavy drinkers like tomatoes or peppers, consider using a larger reservoir to extend the time between refills.
Temperature also affects how quickly water evaporates from the soil. In hot climates, the wick may need to work harder to keep up with moisture loss, so check water levels more frequently. Conversely, cooler weather slows evaporation, reducing the need for frequent refills.
A simple trick is to weigh your pot—if it feels noticeably lighter, it's time to top off the reservoir. This method works better than guessing because it accounts for both water loss and the plant's actual consumption rate.
One common mistake is using tap water straight from the faucet, which can shock plant roots due to its chlorine content. Let water sit for 24 hours before filling the reservoir to allow chlorine to dissipate.
Additionally, avoid placing self-watering pots in direct sunlight for extended periods, as the heat can accelerate evaporation and cause the wick to dry out faster. For optimal performance, position your pots in partial shade or near a window with indirect light.
For advanced gardeners, consider upgrading to a multi-wick system for larger pots. These setups use multiple wicks to distribute water more evenly, reducing the risk of dry spots in the soil. Just ensure all wicks are the same length and material to maintain consistent moisture flow.
With the right setup, your self-watering pot can provide up to 2 weeks of hydration for most plants, making it a game-changer for busy gardeners or frequent travelers.