
How To
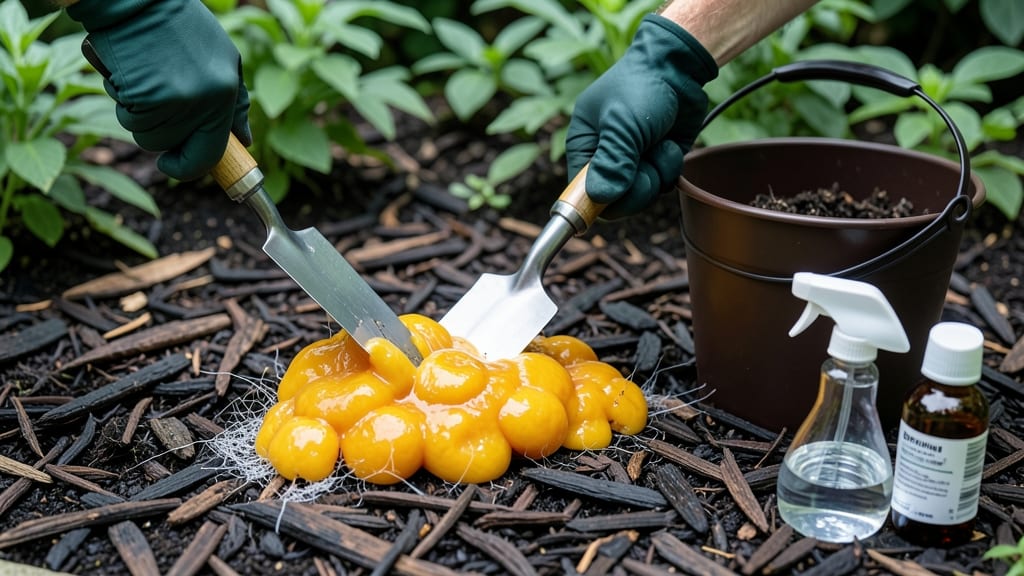
How to get rid of slime mold in mulch—that neon-green, slimy mess—is easier than you think, and you can restore your garden’s clean look without harsh chemicals. I’ve battled this unsightly fungus before, and the boil-and-scrape method works faster than anything else. This technique clears it up in minutes, so you can revive your garden beds without harming your plants.
The problem starts when mulch stays too damp, creating the perfect breeding ground for slime mold. It thrives in shaded, poorly ventilated areas, turning your garden bed into a gooey eyesore.
The good news? Proper moisture control and airflow prevent it from coming back, and the boil-and-scrape method tackles it without damaging your plants.
With this method, you’ll scrape away the mold, then boil water to kill any lingering spores. Within an hour, your mulch bed looks fresh again, and your garden beds stay healthy. The key is acting fast—once it spreads, it’s harder to remove without disrupting your plants.
This approach works for organic mulch like wood chips, straw, or shredded leaves, and it’s safe for all garden types. Once you’ve cleared it, focus on improving airflow and moisture balance to keep it from returning. Your garden will thank you!
The Hidden Triggers Behind Slime Mold
Slime mold in mulch isn’t just an unsightly nuisance—it’s a fascinating (if frustrating) response to specific environmental conditions. Understanding why it thrives helps you prevent future outbreaks and tackle it more effectively. Here’s the science behind its sudden appearance in your garden beds.
Slime molds—like Fuligo septica (dog vomit slime) or Arcyria denudata (ion slime)—are water-loving organisms. They thrive when mulch stays damp for extended periods, creating the perfect breeding ground. Here’s how it happens:
- Overwatering or rain: Mulch acts like a sponge, retaining moisture. If it stays soggy for days (especially in shaded areas), slime molds release spores and spread as a bright orange or yellow slimy mass. Pro tip: 🌡️ Aim for 1–1.5 inches of water per week (including rainfall) and avoid waterlogging.
- Compacted soil: Hard, clay-heavy soil blocks drainage, trapping water in the mulch layer. Slime molds exploit this stagnant environment. Fix it: Aerate soil annually with a garden fork to improve airflow.
- Thick mulch layers: More than 2–3 inches of mulch can suffocate the soil, slowing evaporation and keeping the base damp. Thin it out to 1–2 inches for better drying.
Slime molds feed on decomposing plant material, so a mulch pile packed with leaves, grass clippings, or wood chips is an all-you-can-eat buffet. Here’s the breakdown:
- Fresh mulch buildup: Newly added mulch (especially untreated wood chips or straw) contains high levels of cellulose, a slime mold’s favorite snack. Solution: Let mulch age for 3–6 months before applying to reduce food sources.
- Leaf litter & plant waste: Piles of fallen leaves or rotting vegetation create microclimates with 90%+ humidity, ideal for slime mold spores to germinate. Action step: Rake away thick leaf layers and compost them separately.
- Old mulch breakdown: Over time, mulch decomposes into a nutrient-rich sludge. Slime molds hitch a ride on this decaying organic matter. Prevent it: Refresh mulch annually or mix in sand or perlite to speed up decomposition.
Slime molds are shade-seeking because they hate direct sunlight. While they need moisture, UV rays can dry them out or kill their spores. Here’s how shade creates the perfect hideout:
- Dense plantings or tall structures: Areas under shrubs, trees, or fences stay consistently damp and dark, mimicking a slime mold’s natural rainforest habitat. Fix: Thin out overgrown plants to improve airflow.
- North-facing beds: These spots receive less than 4 hours of sunlight daily, keeping mulch cooler and wetter longer. Workaround: Choose drought-tolerant mulch (like pine straw) in shaded areas.
- Mulch piled against fences/walls: Without sunlight, trapped moisture lingers. Solution: Keep mulch at least 6 inches away from structures to allow drying.
Slime molds are cold-weather opportunists. They lie dormant in spores until conditions warm up (but not too much!). Here’s the temperature sweet spot:
- Cool, humid mornings (50–70°F): Ideal for spore germination. Afternoon warmth dries out the mulch, but if nights stay damp, slime molds explode in growth. Monitor: Use a soil thermometer to track mulch temps.
- Spring & fall outbreaks: These seasons offer perfect moisture + mild temps without extreme heat. Prevent: Reduce watering in early spring to let soil dry.
- Sudden rain after dry spells: A heavy downpour wakes up dormant spores in mulch, leading to rapid slime mold blooms. Strategy: Water deeply but infrequently to avoid shocking the soil.
Key takeaway: Slime mold is rarely a sign of poor gardening—it’s just nature’s way of recycling excess organic matter. By controlling moisture, sunlight, and debris, you can starve it out before it becomes a problem. 🚫💦
Quick Fixes for Slime Mold Woes
Slime mold in mulch isn’t just unsightly—it can spread rapidly if left unchecked. The good news? With the right approach, you can tackle it effectively, whether it’s a minor outbreak or a full-blown infestation.
Below, we’ll map out practical solutions tailored to the root causes we covered earlier, from immediate removal to long-term prevention.
---
If your mulch is already covered in bright orange, yellow, or black slime mold, act fast with this two-step method:
1. 🍳 Scrape It Off - Use a stiff-bristled brush, plastic scraper, or even a putty knife to gently remove the slime mold from the mulch. - Avoid digging into the soil—this can spread spores.
Instead, focus on the surface layer of mulch. - Pro Tip: Wear gloves—some slime molds can irritate skin!
2. 👨🍳 Boil the Scrapings - Collect the removed slime mold in a bucket or heavy-duty bag and boil it for at least 10 minutes. - Boiling kills spores, preventing reinfestation. Never compost the slime mold—it can survive and spread.
3. 🌱 Refresh the Mulch - Replace the top 1-2 inches of contaminated mulch with fresh, dry mulch (cedar or pine works well). - Avoid piling mulch too thickly—3-4 inches is ideal to discourage moisture buildup.
---
Slime mold thrives in damp, shaded conditions. Adjust your garden setup to make it less inviting:
- 🌡️ Improve Drainage - If your garden has poor drainage, amend the soil with compost or sand to help water flow through. - Avoid overwatering—stick to deep watering 1-2 times per week instead of daily shallow watering.
- ✨ Increase Airflow - Space plants properly (follow spacing guidelines for each variety). - Prune overgrown foliage to allow sunlight and air to circulate. - Consider mulch alternatives like gravel or landscape fabric in high-moisture areas.
- 🎯 Choose the Right Mulch - Avoid organic mulches (like wood chips) in shady, humid spots—opt for inorganic options (gravel, rubber mulch) if slime mold is recurrent. - If using organic mulch, select coarse, fast-draining types (cedar or pine needles).
---
If you prefer non-toxic solutions, these methods can help:
- 🍄 Hydrogen Peroxide Spray (3%) - Mix 1 part hydrogen peroxide with 3 parts water in a spray bottle. - Lightly mist the affected mulch—the peroxide breaks down slime mold spores without harming plants. - Caution: Test on a small area first—some plants may react.
- 🌿 Vinegar Solution (For Light Infestations) - Combine 1 part white vinegar with 1 part water in a spray bottle. - Spray directly on the slime mold (avoid spraying directly on plants—vinegar can burn foliage). - Reapply every 3-4 days until the mold disappears.
- 🌞 Sunlight Exposure - Slime mold hates sunlight. If possible, move potted plants to a sunnier spot or thin out dense mulch to let light in.
---
To keep slime mold from returning, follow this maintenance routine:
| Task | How Often | Why It Works | |------------------------|---------------------|-------------------------------------------| | Rake & Fluff Mulch | Every 2-3 weeks | Prevents compaction and improves airflow | | Check Moisture Levels | Before watering | Avoids over-saturation | | Inspect for Slime Mold | Weekly (after rain) | Catches outbreaks early | | Replace Old Mulch | Annually (spring) | Prevents buildup of spores |
--- Final Tip: 💡 The key to beating slime mold is consistency. Combine immediate removal with preventive care, and you’ll keep your mulch—and garden—looking fresh all season long!
Frequently asked questions
Is slime mold harmful to my plants or garden?
No, slime mold is completely harmless to plants—it doesn't damage roots, leaves, or flowers. It's just nature's way of breaking down organic matter. The real issue is its unsightly appearance, which can make your garden look messy. Focus on removing it for cosmetic reasons rather than plant health.
Can I use bleach to kill slime mold in mulch?
Bleach is too harsh for mulch and can harm beneficial soil organisms. Instead, use a 1:3 hydrogen peroxide solution (3% concentration) or a vinegar-water mix (1:1 ratio). These options kill spores without damaging plants or soil life when used properly.
How do I know if my slime mold will come back after treatment?
If you don't address the root causes—like excess moisture or poor airflow—it will likely return within 2-4 weeks. Monitor your mulch's moisture levels and adjust your watering schedule. Thin mulch layers (1-2 inches) and improve drainage to prevent recurrence.
What's the best mulch to prevent slime mold?
For high-risk areas, use inorganic mulches like gravel, rubber mulch, or pine straw—they drain better than wood chips. If you prefer organic options, choose cedar mulch (naturally resistant to mold) or keep layers thin (1-2 inches) and well-aerated.
Will slime mold spread to other parts of my garden?
Yes, spores can travel via wind, water, or tools, but it spreads slowly. To prevent cross-contamination, sterilize tools with rubbing alcohol between garden sections, and avoid moving contaminated mulch. Focus on treating the infected area first.