
Size
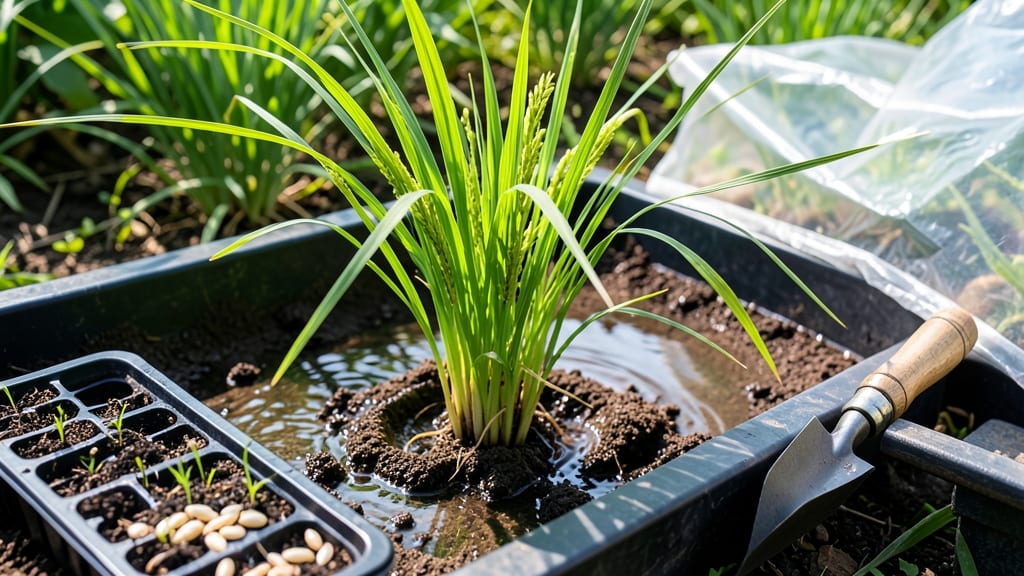
How to grow rice step by step—your first golden grains could be just 120 days away. 🌱 Growing rice at home feels like a big dream—until you realize it’s just water, patience, and the right variety. I started with a single 5-gallon bucket last season, and now my backyard produces enough for rice bowls all winter. The secret isn’t fancy equipment—it’s controlling water like a pro. Too little, and roots suffocate; too much, and weeds take over. But once you master the 2-3 inch flood depth, the plants thrive, sending up lush green stalks that turn golden by harvest time. Even beginners can pull this off with the right steps. You’ll end up with fragrant, plump grains straight from your own plot—nothing like store-bought rice. The smell of freshly harvested rice, drying in the sun, is the best reward. Plus, you’ll learn skills that apply to any flooded crop. Works for small containers or larger plots, as long as you have steady water access. Let’s get those seeds soaking!
📚 In This Guide
- What you need
- Instructions
- Tips and common mistakes
- Wrapping up and next steps
What you need
- ● Rice Seeds: Choose a variety suited to your climate (e.g., Jasmine, Basmati, or Carolina Gold). Start with 1–2 lbs per 100 sq ft for direct planting.
- ● Water Source: A reliable supply for flooding fields (e.g., pond, well, or irrigation system). Aim for 1–2 inches of standing water during growth.
- ● Soil: Rich, clay-heavy soil with a pH of 5.0–7.0. Test and amend with compost or fertilizer if needed.
- ● Fertilizer: Nitrogen-rich: 10–20 lbs per 100 sq ft (e.g., urea or chicken manure).
- ● Phosphorus/Potassium: Follow package rates for balanced growth.
- ○ Seedling Trays or Nursery Beds: For pre-germination (optional for direct planting). Use peat pots or biodegradable trays.
- ● Hand Trowel or Transplanter: For planting seedlings or direct seeding.
- ● Water Pump/Irrigation System: To maintain flood levels (e.g., solar-powered pump for sustainability).
- ● Weed Barrier or Mulch: Black plastic sheeting or straw to suppress weeds in early stages.
- ● Harvest Tools: Sharp scythe or sickle for cutting stalks.
- ● Rake or gloved hands for threshing (removing grains from husks).
- ● Soil Test Kit: To monitor nutrient levels and pH.
- ● Pest Control: Neem oil or row covers for insects; ducks or fish to naturally manage pests.
- ● Drying Racks or Greenhouse: For post-harvest drying (critical to prevent mold).
- ● Journal/Notebook: To track planting dates, water levels, and growth milestones!
Step-by-step instructions for growing rice in flooded fields
Here's my battle-tested method for growing rice from seed to harvest in flooded paddies.
🌱 Step 1: Prepare the Soil and Flood the Field
Clear the field of weeds and level the ground to create a perfectly flat surface. Rice thrives in standing water, so aim for a depth of 2-4 inches once flooded. I like to work the soil when it's moist but not soggy—this prevents compaction that can suffocate roots later.
Apply balanced fertilizer (10-10-10 ratio) at 100 pounds per acre and work it into the top 6 inches of soil. Flood the field 1-2 weeks before planting to establish the water level and allow any remaining weeds to surface. Drain and reflood just before sowing to create a clean slate.
🌱 Step 2: Plant Rice Seeds or Transplants
For direct seeding, scatter seeds evenly across the flooded field at a rate of 80-100 pounds per acre. Press them lightly into the waterlogged soil—just enough to ensure contact without burying them too deep. I use my hands to create shallow furrows if the field is particularly uneven.
If using transplants, space them 3-4 inches apart in rows 6-8 inches apart. Flood the field to a depth of 1-2 inches immediately after transplanting to reduce shock. Keep the water level consistent—fluctuations stress young plants and stunt growth.
💧 Step 3: Maintain Water Levels and Fertilize
Monitor water levels daily. Rice needs 2-4 inches of standing water throughout most of its growth cycle. Use a simple stick gauge to check depth—mark your desired level and adjust as needed. Too little water stresses roots, while too much can lead to nutrient loss and disease.
Apply a second fertilizer dose 3-4 weeks after planting, this time using a higher nitrogen blend (34-0-0) at 50 pounds per acre. Split the remaining nitrogen applications evenly over the next 4-6 weeks, always following the label instructions. Avoid over-fertilizing—excess nitrogen can cause excessive leaf growth at the expense of grain development.
☀️ Step 4: Control Weeds and Pests Naturally
Rice fields are prime real estate for weeds, so stay vigilant. I use a combination of manual weeding (early season) and shallow flooding (later season) to suppress growth. Flooding to 3-4 inches for 2-3 weeks after planting suffocates most weeds without chemicals.
Watch for pests like rice water weevils and stem borers. Introduce natural predators like ducks or dragonflies if possible. For organic growers, apply neem oil or pyrethrin-based sprays early in the season as a preventive measure. Never let infestations go unchecked—once stem borers move in, they can devastate a crop in weeks.
⏰ Step 5: Harvest at Peak Maturity
Rice is ready for harvest when the grains turn golden-brown and the stems begin to yellow. This typically occurs 90-120 days after planting, depending on the variety. I test maturity by cutting a few heads—if the grains pop easily when pressed between fingers, they're ready.
Drain the field completely 2-3 days before harvest to allow the soil to firm up. Use a mechanical reaper or hand sickle to cut the stalks, leaving a 1-2 inch stubble. Bundle the cut rice and leave it to dry in the sun for 3-5 days. Once fully dry, thresh the grains by hand or with a flail machine, then winnow to remove chaff.
Tips & tricks for perfect rice cultivation
Here's what I've learned from years of trial and error in flooded rice fields.
The Soil Prep Secret: When working the soil in Step 1, focus on creating a fine, crumbly texture rather than deep tillage. Use a broadfork or shallow tilling tool to break up only the top 6 inches—this preserves soil structure while preventing compaction. I've found that walking on freshly tilled soil can undo all your hard work, so avoid stepping on the field once you've leveled it.
Water Depth Precision: The 2-4 inch water depth recommendation in Steps 1 and 3 isn't arbitrary—it's the sweet spot for oxygen balance. Use a simple PVC pipe with measurement marks to check depths consistently. Too shallow (under 2 inches) stresses roots, while too deep (over 4 inches) can lead to nutrient loss. I keep a spare pipe in my toolbox and check depths twice daily during critical growth stages.
Transplanting Technique: For Step 2 transplants, here's a pro move: hold each seedling by the leaves (not the stem) when spacing them 3-4 inches apart. This prevents stem damage that can lead to disease. I also recommend transplanting on a cloudy day—the cooler temperatures reduce shock. If you must transplant in direct sun, work during early morning or late afternoon to minimize stress on young plants.
Harvest Timing: The 90-120 day window in Step 5 is your target, but don't rely solely on days—watch for these visual cues instead. The golden-brown grains should separate easily from the husk when pressed between fingers (this is called "milkiness" in rice terminology). If you harvest too early, grains will be chalky; too late, and they'll shatter during threshing. I always test 2-3 stalks from different areas of the field to confirm uniformity.
Pro Tips for Grow Rice Step By Step
- Here's what I've learned from years of trial and error in flooded rice fields.
- The Soil Prep Secret: When working the soil in Step 1, focus on creating a fine, crumbly texture rather than deep til...
- Water Depth Precision: The 2-4 inch water depth recommendation in Steps 1 and 3 isn't arbitrary—it's the sweet spot f...
Frequently asked questions
Got questions about growing rice?
You’re not alone! Here are answers to the most common queries to help you navigate from seed to harvest with confidence.
How long does it take to grow rice from planting to harvest?
Most rice varieties take 90 to 150 days to mature, depending on the type (short-season, medium, or long-grain). Fast-maturing varieties like Teqing can be ready in as little as 80 days, while specialty grains like jasmine may need 120+ days. Check your seed packet for exact timelines!
What do I do if my rice plants turn yellow or wilt?
Yellowing or wilting rice often signals nutrient deficiency (like nitrogen), overwatering, or pests/diseases. Start by checking water levels—rice needs 1–2 inches of standing water. Add a balanced fertilizer (high in nitrogen early on) and inspect leaves for holes or spots. If issues persist, rotate crops next season to prevent soil depletion.
Can I grow rice without flooding the field?
Yes! Upland rice varieties thrive in well-drained soil with regular watering (1–2 inches per week). These are drought-tolerant and ideal for containers or small plots. Just ensure the soil stays moist but not soggy. Popular upland types include Azucena and _IR64_—perfect for beginners or dry climates.
What’s the best temperature range for growing rice?
Rice loves warmth! Optimal temperatures range from 68°F to 95°F (20°C–35°C). Seeds germinate best at 77–95°F (25–35°C), while active growth thrives at 77–86°F (25–30°C). Avoid planting in frost-prone areas or when night temps drop below 50°F (10°C), as cold can stunt growth.
How do I know when rice is ready to harvest?
Rice is harvest-ready when 75–80% of the grains turn golden-brown and the remaining 20–25% are still green. Gently shake a panicle (seed cluster)—if grains fall easily, it’s time! Avoid harvesting too early (undercooked rice) or too late (shattering). Use a sharp sickle or scythe to cut stalks 2–3 inches above the ground.
Wrapping up and next steps
Growing rice from seed to harvest is a rewarding journey that connects you to the roots of one of the world’s most vital crops! 🌱 By following these step-by-step guidelines—from preparing your field to nurturing seedlings and mastering the flood-and-drain technique—you’ll unlock the secrets of a bountiful harvest.
Whether you’re a backyard farmer or scaling up, patience and precision are your best tools.
Now that you’re armed with knowledge, take the next step: start small with a test plot or dive into optimizing your water management. Every grain you grow is a celebration of hard work—and soon, you’ll be savoring the fruits of your labor! 🍚✨