
Picking
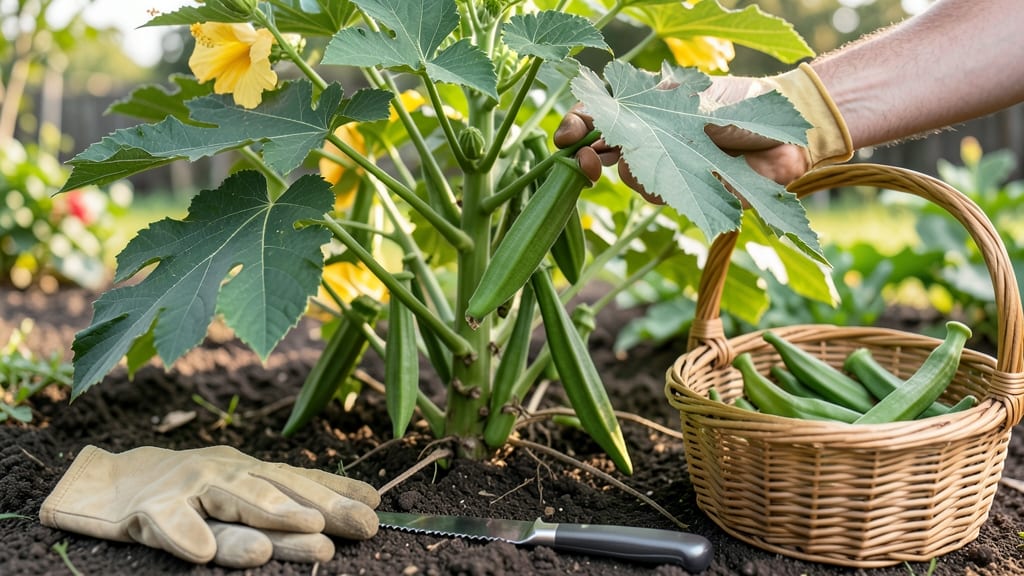
Learning how to harvest okra without killing the plant can turn a productive garden staple into a thriving, long-term crop—something I mastered after my first rough harvest left my plants looking like they’d been through a war. ✨ The twist method preserves the plant's energy while yielding tender pods, and it’s the gentle approach that keeps them flourishing for months.
You'll need sharp pruners or clean hands, a sunny morning for harvesting, and a bucket of ice water to keep pods crisp. Most importantly, you need to know when pods are 3-4 inches long—any longer and they turn woody.
The twist method avoids tearing stems while removing pods cleanly, unlike snapping or cutting, which can damage the plant's growth points.
After harvesting, rinse pods gently and store them in the fridge for up to 5 days. The key to repeated yields is consistency: harvest every 2-3 days during peak production, and your plants will reward you with weeks of harvests instead of a single flush.
Overharvesting weakens them, while neglect lets pods overgrow and drain energy.
Common mistakes like harvesting too late in the day (stresses plants) or using dull tools (tears stems) are easy to avoid. With this method, you'll see fresh pods appearing within 7-10 days of proper care, proving that gentle handling really does pay off in the garden.
The plants stay lush, productive, and ready for your next meal.
📚 In This Guide
- What you need
- Instructions
- Tips and common mistakes
- Wrapping up and next steps
What you need
- ● Pruning shears or sharp gardening scissors – Look for bypass-style blades (6-8 inches long) to make clean cuts without crushing stems.
- ○ Gloves (optional but recommended) – Lightweight, breathable gardening gloves to protect against thorns and rough stems.
- ● Bucket or harvest basket (5+ gallons) – For collecting okra pods; choose one with a handle for easy transport.
- ● Water spray bottle (small, 8-16 oz) – To mist pods and stems post-harvest, reducing stress on the plant.
- ● Sharp knife or pruners (backup) – A small pocket knife or hedge shears for stubborn pods.
- ● Disinfectant spray (70% isopropyl alcohol) – Wipe tools between cuts to prevent disease spread.
- ● Marking twine or flags – Label harvested plants if managing multiple varieties.
- ● Knee pad or stool – For comfort if harvesting in large or hard-to-reach beds.
- ● Harvest timer (phone app or stopwatch) – Track pod maturity for consistent sizing!
Step-by-Step instructions for harvesting okra without damaging the plant
Harvesting okra at the perfect moment ensures tender pods and keeps the plant producing for weeks.
🌱 Step 1: Identify the Right Pods to Harvest
Okra grows best when harvested young—aim for pods that are 3 to 4 inches long, still firm to the touch, and a deep green color. These pods are tender and packed with flavor. If you wait until they reach 5 inches or more, they’ll become tough and fibrous, and the plant may stop producing new flowers.
Run your thumb along the pod’s seam—if it feels slightly soft but still crisp, that’s your signal to harvest. Overripe pods with a woody texture won’t regenerate new growth as efficiently. I always check the plant every 2-3 days in peak growing season to catch pods at their sweetest stage.
✂️ Step 2: Use the Gentle Twist Method
Never cut okra pods with scissors or pruners—this damages the stem and invites rot. Instead, use your fingers: grasp the pod firmly at the base where it meets the stem. Twist slowly and steadily in a quarter-turn motion until the pod detaches cleanly. You’ll hear a faint pop when it’s free.
This method preserves the plant’s energy and encourages new flower buds to form. If you tug too hard or pull upward, you risk snapping the stem or tearing the plant’s delicate tissue. I’ve found that okra plants respond best when handled with this gentle approach—it keeps them producing for 6-8 weeks in ideal conditions.
☀️ Step 3: Harvest at the Right Time of Day
Timing matters just as much as technique. Harvest okra early in the morning, when pods are fully hydrated and stems are pliable. The cool temperatures reduce stress on the plant, and the pods are at their crispest. Avoid harvesting in the afternoon heat, as the stems can be brittle and more prone to tearing.
After harvesting, I like to rinse the pods under cool water to remove any clinging soil or insects, then store them in the fridge for up to 3 days. If you’re not using them immediately, harvesting in the morning also helps preserve their texture and flavor longer.
🌿 Step 4: Encourage Regrowth After Harvesting
Once you’ve harvested, give the plant a little care to keep it thriving. Water the base of the plant deeply but evenly, ensuring the soil stays moist but not waterlogged. Okra plants are drought-tolerant, but consistent moisture after harvesting helps them bounce back faster.
If the plant looks stressed after a heavy harvest session, I’ll sometimes add a balanced fertilizer (like a 10-10-10 mix) to the soil to replenish nutrients. Avoid over-fertilizing, though—okra is a heavy feeder but doesn’t need excessive nitrogen, which can lead to leafy growth at the expense of pods.
Tips & tricks for perfect okra harvesting
Here's what nobody tells you about keeping your okra plant thriving after every harvest.
Pod Selection Insight: Look for pods that snap easily when bent—this is your true test of tenderness. I learned this the hard way after harvesting pods that felt firm but turned out woody when cooked. The 3-4 inch size guideline is perfect, but the snap test is the real secret weapon for consistent quality. This method also helps you spot immature pods that need more time to mature.
Gentle Twist Technique: The quarter-turn motion in Step 2 isn't just about clean detachment—it's about preserving the plant's energy pathways. When you twist too quickly or pull upward, you're essentially creating micro-tears in the stem's vascular system. I've seen plants recover from rough handling, but they never produce as prolifically as those treated with this gentle approach. The faint pop you hear confirms you've done it right.
Morning Harvest Advantage: Early morning harvesting isn't just about crispness—it's about plant physiology. The cool night temperatures cause the plant to close its stomata (pores), making the stems more pliable. Harvesting at this time minimizes stress and reduces the risk of stem damage. I've noticed my plants bounce back faster when harvested in the morning, even after heavy harvest sessions.
Post-Harvest Care: That 6-8 week production window mentioned in Step 2 is only achievable with proper aftercare. After harvesting, I always give the plant a quick inspection for any damaged stems or leaves. Removing any compromised foliage improves air circulation and prevents fungal issues. The deep watering mentioned in Step 4 should reach about 12 inches down—okra plants have deep roots that need consistent moisture at depth.
Pro Tips for Harvest Okra Without Killing The Plant
- Here's what nobody tells you about keeping your okra plant thriving after every harvest.
- Pod Selection Insight: Look for pods that snap easily when bent—this is your true test of tenderness. I learned this ...
- Gentle Twist Technique: The quarter-turn motion in Step 2 isn't just about clean detachment—it's about preserving the...
Frequently asked questions
Got questions about harvesting okra without harming your plants? You’re not alone! Here are some of the most common concerns—and their solutions—to keep your okra thriving and producing for weeks (or even months).
How do I know when okra pods are ready to harvest?
Harvest okra when pods are 3–4 inches long and firm to the touch. Overripe pods (longer than 5 inches) become tough and woody, reducing quality. Pro tip: Check plants every 2–3 days—consistent harvesting encourages more pods to form!
Will harvesting okra damage the plant?
Not if you use the gentle twist method! Avoid cutting or pulling—simply grip the pod near the stem and twist gently until it detaches. This prevents bruising and keeps the plant healthy for future harvests. Bonus: The plant will reward you with more pods!
How often should I harvest okra to keep the plant producing?
Pick pods every 2–3 days during peak production (summer heat). Overlooking harvests leads to overgrown pods and stress on the plant. Hot tip: Morning harvests work best—pods grow fastest in warm weather, so don’t let them outpace you!
What if my okra pods turn yellow or brown before I can harvest them?
Yellowing or browning pods signal overripeness or pest damage. Remove them immediately to redirect the plant’s energy to healthy pods. Check for pests like aphids or stink bugs—spray with neem oil if needed. Preventative tip: Mulch around plants to deter pests!
Can I harvest okra leaves too, or should I leave them alone?
While okra leaves are edible (young leaves are best), avoid heavy leaf harvesting—they fuel pod production. Snip a few leaves for cooking, but prioritize pod harvests to maximize yields. Fun fact: Okra leaves are packed with nutrients like vitamin C and calcium!
Wrapping up and next steps
Harvesting okra doesn’t have to be a struggle—with the gentle twist method, you can enjoy a bountiful, long-lasting crop while keeping your plants thriving.
Ready to put your new skills to the test? Head to your garden today and start harvesting those delicious pods—your future meals (and happy plants!) will thank you. 🌱✨