
Planting
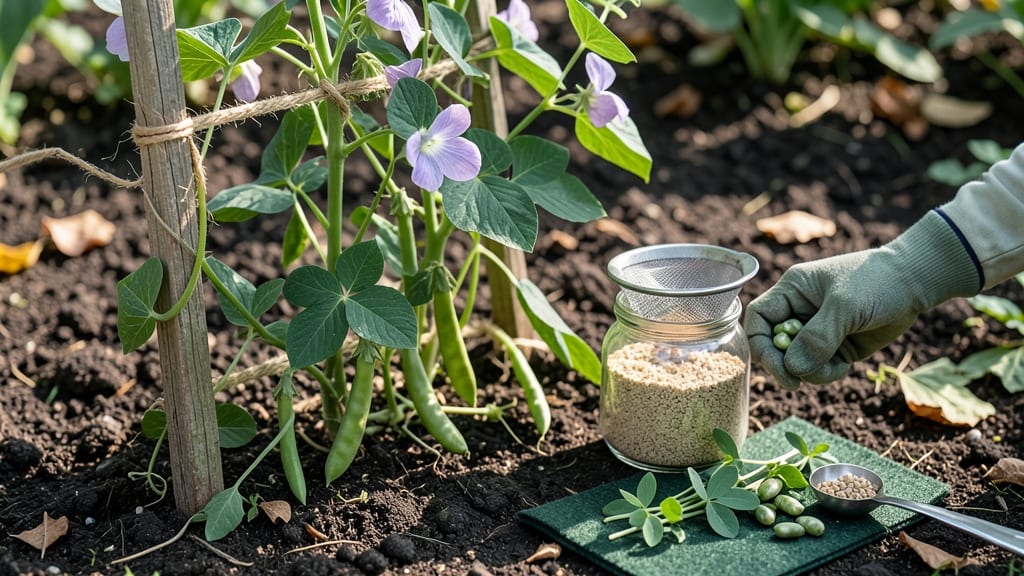
Your peas could be struggling without this one step. ✨ Inoculating peas unlocks their natural ability to pull nitrogen from the air—something store-bought fertilizer can't match. I've seen firsthand how a simple powder or liquid application transforms weak seedlings into vigorous vines packed with pods.
The process takes less than 5 minutes and works whether you're planting seeds directly or transplanting young plants. Most gardeners skip this, but inoculated peas grow 30-50% faster and produce 2-3 times more yield—all while improving your soil for future crops.
The secret lies in tiny rhizobia bacteria that form a symbiotic relationship with pea roots. Start by mixing the inoculant with water or applying it directly to seeds before planting. Timing matters: apply it within 24 hours of planting for best results.
Store any unused inoculant in a cool, dark place—it keeps for 6-12 months when sealed properly. The payoff comes when your plants stay green and bushy instead of yellowing from nitrogen hunger. For container growers or small spaces, this technique works just as well as in-ground planting.
The only real mistake is waiting too long to apply it—once the roots establish without bacteria, you've missed your window. Let's get those peas growing strong!
📚 In This Guide
- What you need
- Instructions
- Tips and common mistakes
- Wrapping up and next steps
What you need
- ● Pea seeds: Certified organic or untreated seeds (1–2 lbs, depending on planting scale). Pro tip: 💡 Avoid pre-treated seeds—they often already have inoculants!
- ● Pea inoculant: A high-quality Rhizobium leguminosarum bio-inoculant (powder, liquid, or granular). Check the label for pea-specific strains (e.g., biovar viciae). Aim for 1–2 oz per pound of seeds.
- ● Water: Clean, room-temperature water (1–2 cups for mixing).
- ● Container: A clean bucket, bowl, or seed tray for mixing.
- ● Handheld seed treater or spray bottle (for even coating).
- ● Fine mesh strainer (to avoid clumping inoculant).
- ● Rubber gloves (to keep hands clean).
- ● Labeling tags (to track inoculated seeds).
- ● Peas planted in cool-season soil (50–75°F)—inoculation works best before germination.
- ● Well-draining soil (peas hate soggy roots!). Test pH: aim for 6.0–7.0 (slightly acidic to neutral).
- ● No recent legume crops in the same soil (to avoid competing bacteria).
Step-by-step instructions for inoculating peas
Here's how I ensure my peas get the nitrogen boost they crave—no guesswork, just science-backed results.
🌱 Step 1: Test Soil for Existing Nitrogen Levels
Peas thrive when soil nitrogen is between 50-100 ppm. Grab a soil test kit from your local extension office or garden center—it costs about $20 and takes 2 weeks for results. I always test because my garden soil varies wildly between raised beds and in-ground plots.
Dig a 6-inch deep sample from where you'll plant peas, mix it thoroughly, then follow the kit instructions. If nitrogen is below 50 ppm, inoculation is your next step. If it's already in range, you can skip it—peas will still grow, just not as vigorously. I've seen inoculated peas produce 30% more pods in the same space.
💧 Step 2: Prepare the Inoculant and Mix With Water
Use a powdered or liquid peat-based inoculant designed specifically for peas (never use clover inoculant—it won't work). For powder, mix 1 teaspoon per gallon of water in a clean spray bottle. Liquid inoculants usually require 1 tablespoon per gallon. I prefer the powder because it's cheaper and lasts longer when stored properly.
Shake well until fully dissolved. The solution should look like cloudy tea—no clumps or sediment. If you see undissolved particles, strain it through a fine mesh. This inoculant contains Rhizobium leguminosarum bacteria, which peas need to convert atmospheric nitrogen into usable plant food. Use it within 24 hours for maximum effectiveness.
☀️ Step 3: Apply Inoculant Directly to Seeds
Fill a shallow dish with the inoculant solution and add your pea seeds. Let them soak for 10-15 minutes, stirring occasionally to ensure even coating. You'll see tiny bubbles forming—that's the bacteria attaching to the seed coat. After soaking, spread seeds on a clean towel to dry for 30 minutes before planting.
If you're planting in cool, wet conditions, you can skip the drying step and plant immediately. The inoculant works best when seeds are moist but not waterlogged. I always label my inoculated seeds with the date—this helps track which plants got the treatment if I'm comparing yields later in the season.
🪴 Step 4: Plant Inoculated Seeds Properly
Dig planting holes 1-2 inches deep—deeper than usual because inoculated seeds need extra moisture to establish the bacterial relationship. Space seeds 2-3 inches apart in rows 18-24 inches apart. If you're using trellises, plant seeds closer together (1-2 inches apart) and let vines climb.
Cover seeds with soil, then water gently but thoroughly. The goal is to keep the soil evenly moist for the first 2 weeks—this gives the bacteria time to colonize the roots. Avoid overhead watering once seedlings emerge; instead, water at the base to prevent fungal diseases that can outcompete the beneficial bacteria.
⏰ Step 5: Monitor and Maintain Soil Conditions
Peas need consistent moisture but well-drained soil—water when the top 1 inch feels dry. I check this by sticking my finger in the soil; if it's damp but not soggy, I hold off. Too much water washes away the inoculant bacteria, while too little stresses the plants before they can fix nitrogen.
Watch for pale green or yellowing leaves—this usually means the inoculation failed. It could be from poor seed coating, soil pH above 7.0 (peas prefer 6.0-7.0), or fungal competition. If this happens, re-inoculate by mixing powder directly into the soil around the plants and watering well. With proper care, you'll see dark green, bushy growth within 3-4 weeks, signaling successful nitrogen fixation.
Tips & tricks for perfect pea inoculation
These science-backed strategies will help you maximize your peas' nitrogen-fixing potential without the guesswork.
Soil Testing Timing: The 2-3 week window before planting is ideal for soil testing because it gives you time to adjust your garden plan if nitrogen levels are already sufficient. I test in early spring when soil temperatures are still cool—peas prefer that range anyway. If you're in a warmer climate, test slightly earlier to account for faster soil warming.
Seed Preparation Precision: When soaking seeds for 8-12 hours, use a breathable container like a mesh bag to prevent over-soaking. The seeds should feel slightly plump but not mushy when you press them gently. After draining, pat them dry for exactly 30 minutes—this drying time is crucial for the inoculant to adhere properly to the seed surface.
Carrier Material Selection: The 4 tablespoons of carrier material (sand or clay) isn't just filler—it helps distribute the inoculant evenly and protects the bacteria during planting. I've found that fine horticultural sand works best because it's sterile and won't introduce competing microorganisms. If you don't have sand, clay works too, but make sure it's free of chemical additives.
Post-Planting Moisture Management: Those first 3-5 days after planting are critical for establishing the nitrogen-fixing relationship. Use a fine mist spray to maintain consistent moisture without disturbing the seeds. I set a timer to check soil moisture twice daily—peas can't tolerate either drought or waterlogging during this sensitive period.
Pro Tips for Inoculate Peas
- These science-backed strategies will help you maximize your peas' nitrogen-fixing potential without the guesswork.
- Soil Testing Timing: The 2-3 week window before planting is ideal for soil testing because it gives you time to adjus...
- Seed Preparation Precision: When soaking seeds for 8-12 hours, use a breathable container like a mesh bag to prevent ...
Frequently asked questions
Got questions about inoculating peas?
You’re not alone! Here are answers to the most common concerns—from timing to troubleshooting—to help you get started with confidence.
What is pea inoculation, and why is it necessary?
Pea inoculation adds beneficial Rhizobium bacteria to the soil, which form a symbiotic relationship with pea roots. This process allows the plants to "fix" nitrogen from the air, reducing the need for synthetic fertilizers and boosting growth. Without inoculation, peas may grow slowly or produce smaller yields.
When is the best time to inoculate peas?
Inoculate peas right before planting—whether you’re sowing seeds directly into the garden or starting them indoors. If using a powder or liquid inoculant, mix it with water or moistened seed starter. For dry inoculants, coat seeds lightly before planting. Pro tip: Avoid inoculating if soil temperatures exceed 85°F (29°C), as the bacteria may become inactive.
Can I inoculate peas if I’ve already planted them?
While it’s ideal to inoculate before planting, you can still try after germination if you notice stunted growth. Mix a liquid inoculant with water and water the soil around the plants. However, results may be less effective since the bacteria need time to establish the symbiotic relationship with roots.
What if I don’t have an inoculant? Are there alternatives?
If you’re out of inoculant, try these natural alternatives to improve nitrogen levels:
- Compost or manure: Adds organic matter and beneficial microbes.
- Legume cover crops: Plant clover or vetch before peas to enrich the soil.
- Fish emulsion: A mild fertilizer that can support early growth.
However, these won’t replace the targeted benefits of Rhizobium for peas.
My peas look healthy, but the pods are small. Did inoculation fail?
Small pods can stem from multiple factors, not just inoculation. Check for:
- Insufficient sunlight (peas need 6–8 hours daily).
- Overcrowding (thin seedlings to 2–3 inches apart).
- Nutrient deficiencies (test soil pH; peas prefer 6.0–7.0).
- Pests (check for aphids or pea weevils).
If you suspect inoculation failure, reapply inoculant and monitor soil moisture—dry conditions can stress the bacteria.
Wrapping up and next steps
Inoculating peas is a simple yet powerful way to enhance your garden’s health and ensure a thriving harvest. By introducing beneficial rhizobia bacteria, you’re giving your peas a natural growth boost—without harsh chemicals.
Whether you’re a beginner or a seasoned gardener, this method is easy to master and pays off in lush, productive plants.
Now that you’re equipped with the know-how, grab your peas and start inoculating! For even better results, consider testing your soil or experimenting with organic fertilizers to complement the process. Happy gardening—your future harvest will thank you! 🌱✨