
Shrubs
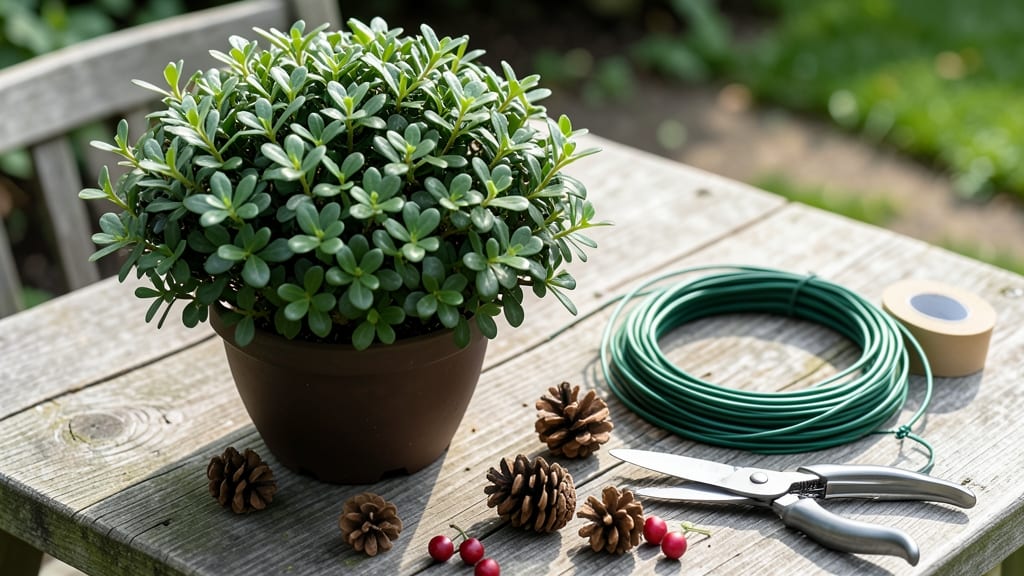
Boxwood branches transform into timeless holiday charm. ✨ I’ve crafted wreaths from pruned shrubs for years, and the secret lies in selecting fresh, pliable stems—no expensive supplies needed. The process is simpler than it looks, turning ordinary garden trimmings into a statement piece for your front door or mantel.
You’ll need just five basic tools: wire, floral tape, pruning shears, a wreath frame (or grapevine base), and a handful of boxwood branches. The key is working with freshly cut, flexible stems—they bend beautifully without snapping.
For extra durability, soak branches in water for 24 hours before arranging, especially if using them outdoors over winter.
By the end, you’ll have a full, lush wreath that smells like a forest and lasts for months. Add berries, pinecones, or ribbon for custom touches, and it’ll stay vibrant through the season. The best part? Every cut branch becomes part of your decor—zero waste, all beauty.
Works for gates, doors, or even as a centerpiece table runner. Once you master the basics, you can experiment with shapes, sizes, and seasonal accents. Let’s get started with your first wreath!
📚 In This Guide
- What you need
- Instructions
- Tips and common mistakes
- Wrapping up and next steps
What you need
- ● Boxwood branches: 12–15 medium-sized, flexible stems (about 12–18 inches long). Look for Buxus sempervirens or Buxus microphylla for the best structure.
- ● Floral wire: 22–24 gauge, 10–12 feet total (for securing stems). Green or brown blends best with boxwood.
- ● Wreath base: A 12–14-inch foam wreath frame (or a grapevine wreath for a rustic look). Ensure it’s sturdy and has a sturdy center.
- ● Floral tape or twine: 1–2 rolls (to bundle stems and hide wire). Brown or natural-colored tape works best.
- ● Scissors or pruning shears: Sharp, clean tools to trim branches evenly.
- ● Decorative elements: Pinecones, eucalyptus sprigs, or dried flowers for extra texture.
- ● Ribbon or bow: A 12–18-inch satin ribbon (green, gold, or white) to finish the wreath.
- ● Spray adhesive: For securing lightweight additions like berries or faux snow.
- ● Hot glue gun: If attaching heavier embellishments (use sparingly!).
- ● A work surface with good lighting (a table or large cutting board).
- ○ Gloves (optional, if handling thorny boxwood).
- ● Patience! Boxwood wreaths require careful layering for a full, lush look.
Step-by-Step instructions for crafting a boxwood wreath
Here's how I transform pruned boxwood branches into a timeless, evergreen wreath that brightens any season.
🪴 Step 1: Gather and Prepare Your Boxwood Branches
Start by selecting 4-6 healthy boxwood branches, each about 12-18 inches long and ½ to 1 inch in diameter. Look for flexible stems with small, dense leaves—these will shape beautifully. I always prune in late winter or early spring when the plant is dormant, making it easier to work with the wood.
Trim the ends at a 45-degree angle using sharp pruning shears to create clean cuts that won't splinter. This also encourages new growth later. If the branches are too thick, you can split them into smaller, more manageable sections. Store them in a cool, dry place until you're ready to shape them.
✂️ Step 2: Shape the Branches into a Circular Base
Lay out your branches in a circle on a flat surface, overlapping the ends slightly. The diameter of your wreath should be about 12-16 inches—large enough to hang comfortably but not so big it becomes unwieldy. Use florist wire or jute twine to loosely tie the ends together, leaving enough room to adjust as you go.
Bend each branch gently into a semi-circle, working from the center outward. You'll hear a slight crackling sound as the wood gives—this is normal and indicates flexibility. If a branch resists, don't force it; instead, trim it shorter or replace it with a more pliable one. The goal is a loose, natural circle, not a rigid one.
🌿 Step 3: Secure the Structure and Add Filler
Once your circular base is formed, use hot glue or floral wire to secure the overlapping ends firmly. Wrap the wire around the stems multiple times, tucking the ends inside the wreath for a clean finish. For extra stability, add a wire frame inside the circle—this acts as a skeleton to support any additional greenery or decorations you add later.
Fill in the gaps between the branches with smaller boxwood sprigs, eucalyptus, or pine branches to create a lush, full look. I like to weave these fillers in and out of the main branches, securing them with wire or glue as needed. The key is to create a dense, even texture—no bare spots should show through.
☀️ Step 4: Refine and Add Finishing Touches
Step back and assess your wreath from all angles. Trim any branches that stick out too far or look uneven. Use your fingers to gently adjust the leaves, fluffing them upward for a fuller appearance. If the wreath feels top-heavy, redistribute some of the smaller branches toward the bottom.
Add final touches like ribbons, berries, or dried flowers for a personalized look. I often use a satin ribbon in a complementary color, wrapping it around the center and tying it into a bow. For a rustic touch, twine or burlap works beautifully. Hang your wreath using a sturdy hook or wire—make sure it can support the weight, especially if you're adding heavy decorations.
⏰ Step 5: Maintain and Enjoy Your Wreath
To preserve your boxwood wreath, store it in a cool, dry place when not in use. If the branches start to dry out, mist them lightly with water every few weeks. Boxwood wreaths can last for years with proper care, making them a sustainable and elegant decor piece for holidays or year-round.
Rotate your wreath occasionally to ensure even exposure to light and air, which helps maintain its shape and color. If you notice any branches drying out or losing leaves, trim them back and replace them with fresh greenery. With a little attention, your wreath will stay vibrant and beautiful for seasons to come.
Tips & tricks for perfect boxwood wreath crafting
Transforming pruned branches into a stunning boxwood wreath is all about patience and precision—here's how to elevate your design effortlessly.
Branch Selection Matters: When choosing your 4-6 boxwood branches, prioritize flexibility over thickness. Younger, more pliable branches (around ½ inch in diameter) bend beautifully without snapping. Look for stems that have a slight green cast—they'll hold their shape longer than woody, brown ones. Confession: I skipped this step for years and wondered why my wreaths lost their form within weeks.
The 45-Degree Angle Hack: That 45-degree trim in Step 1 isn't just about clean cuts—it creates a natural stress point where the branch will bend most easily. Make the cut just above a leaf node (where leaves grow) to encourage new growth later. I learned this the hard way after struggling to bend branches that were cut straight across.
Wire Wrapping Technique: When securing your circular base in Step 3, wrap the florist wire in a figure-eight pattern around the stems. This creates a hidden, nearly invisible joint that's far stronger than simple loops. For extra stability, add a second layer of wire at a 90-degree angle to the first—this triangle method prevents any wobbling when you hang your finished wreath.
Filler Placement Strategy: Distribute your smaller boxwood sprigs, eucalyptus, or pine branches in a triangular pattern—thickest at the center, tapering toward the edges. This creates depth and prevents a flat, two-dimensional look. I think this works because it mimics how natural foliage grows, with denser clusters in the middle.
Pro Tips for Make A Boxwood Wreath
- Transforming pruned branches into a stunning boxwood wreath is all about patience and precision—here's how to elevate...
- Branch Selection Matters: When choosing your 4-6 boxwood branches, prioritize flexibility over thickness. Younger, mo...
- The 45-Degree Angle Hack: That 45-degree trim in Step 1 isn't just about clean cuts—it creates a natural stress point...
Frequently asked questions
Got questions about crafting your own boxwood wreath? You’re not alone! Here are answers to the most common queries—so you can create a stunning centerpiece with confidence.
How do I know when boxwood branches are ready for pruning?
Prune boxwood branches in early spring (just before new growth) or late fall for the best results. Look for healthy, flexible stems with a deep green color and no signs of disease (like yellowing or spots). Avoid pruning after a hard frost—it can stress the plant.
How long does it take to make a boxwood wreath?
For beginners, count on 2–4 hours total, depending on complexity. Breaking it down:
- 1 hour for gathering/mixing materials.
- 30–60 minutes for shaping the base (wire frame).
- 1–2 hours for weaving and securing branches.
- 30 minutes for finishing touches (florals, ribbons, etc.).
Can I use boxwood branches from my yard, or do I need to buy them?
If your boxwood shrubs are healthy and mature, their pruned branches work perfectly. Just ensure they’re disease-free and 6–12 inches long. For a uniform look, mix branches of similar thickness. Need alternatives? Try oleander, pittosporum, or eucalyptus—they’re great substitutes!
What if my wreath looks lopsided or uneven?
Don’t stress—it’s fixable! Start by rechecking your base frame for symmetry. If one side is sparse, weave in extra branches or trim longer stems on the fuller side. For a natural, rustic look, slight asymmetry can even be charming! Need help? Place the wreath on the ground and step back to spot gaps from a distance.
How do I preserve my boxwood wreath for years?
Boxwood wreaths last 1–3 years with care! Store it in a cool, dry place (like a closet) and avoid direct sunlight to prevent drying. For extra longevity:
- Mist with water every few months to keep branches pliable.
- Remove any wilted leaves or flowers and replace them.
- Use a light coat of hairspray (outdoors only) to slow moisture loss.
Wrapping up and next steps
Creating a stunning boxwood wreath from pruned branches is a rewarding way to blend creativity with sustainability! 🌿 With just a few tools, some patience, and a touch of green thumb magic, you’ve mastered turning "waste" into a timeless centerpiece.
Whether you’re gifting it, displaying it for the holidays, or simply enjoying your handiwork, your wreath will bring evergreen elegance to any space.
Now that you’re armed with the know-how, why not take it further? Experiment with mixed textures by adding pinecones, berries, or even dried flowers for extra flair. Or, share your new skill with a friend—you might just inspire the next DIY craze! Happy crafting! ✨