
Fertilization
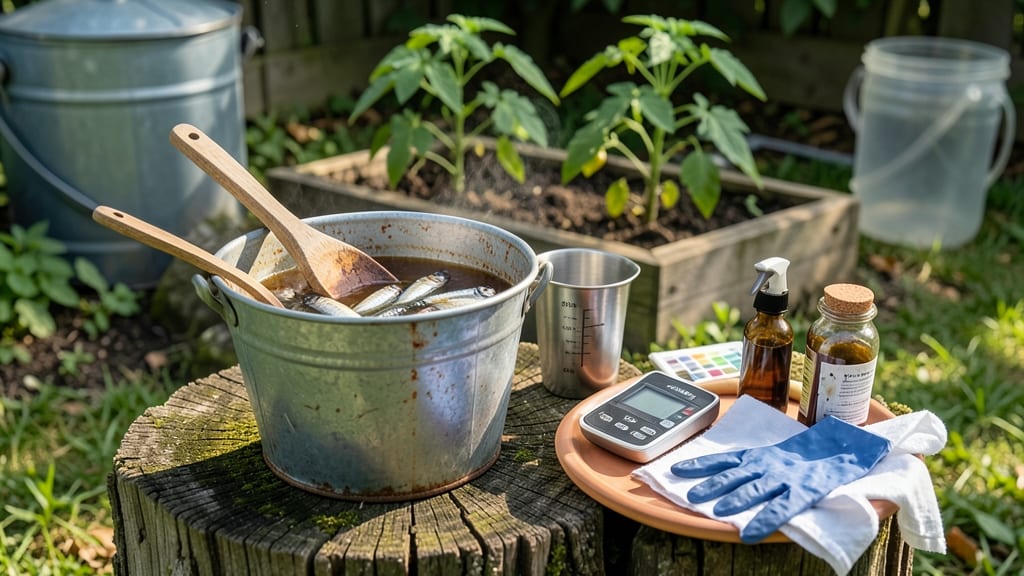
Your kitchen scraps could be turning into plant superfood. 🌱 Making fish fertilizer at home transforms what would be trash into a nutrient-packed boost for your garden—no fancy equipment needed.
The process is simpler than you’d think: combine fish scraps (heads, bones, trimmings) with water in a sealed container, let it ferment for 2-3 weeks, then strain and dilute before using. It’s like liquid gold for your soil, packed with nitrogen, phosphorus, and trace minerals that store-bought fertilizers can’t match.
You’ll see stronger stems, deeper greens, and more abundant blooms within weeks. Unlike chemical fertilizers, this feeds your plants and improves soil structure over time. Plus, it’s a zero-waste win for your garden and your trash can.
Works for vegetables, flowers, and even houseplants—just adjust the dilution strength based on what you’re growing. Let’s get started!
📚 In This Guide
- What you need
- Instructions
- Tips and common mistakes
- Wrapping up and next steps
What you need
- ● Fish scraps: Fresh or thawed fish heads, bones, tails, or trimmings (about 1–2 lbs per batch). Avoid oily fish like salmon if you’re sensitive to strong odors.
- ● Water: 5–6 gallons of non-chlorinated water (rainwater or filtered tap water works best).
- ● Container: A 5–7 gallon bucket with a lid (food-grade plastic or glass preferred). Drill a small hole in the lid for aeration if possible.
- ● Breaking tool: A hammer, mallet, or meat tenderizer to crush bones and flesh.
- ● Stirring stick or spoon: Wooden or plastic to mix contents.
- ● Mesh bag or cheesecloth: For straining the fertilizer later.
- ● Epsom salt (magnesium sulfate): 1–2 tbsp to boost plant growth.
- ● Molasses or sugar: 1 tbsp to feed beneficial microbes.
- ● Citric acid or vinegar: 1 tbsp to lower pH and prevent odor.
- ● Aeration stone or small pump: For continuous oxygen flow (speeds up fermentation).
- ● Gloves: To keep hands clean during the messy parts!
Step-by-Step instructions for Making fish fertilizer at home
Here's my foolproof method for turning fish scraps into nutrient-packed liquid fertilizer—no special equipment needed.
🌱 Step 1: Gather and Prepare Your Fish Scraps
Collect 1 pound of fish scraps—heads, bones, and trimmings work best. Rinse them thoroughly under cold water to remove any blood or guts, which can cause odor or attract pests. Chop the scraps into ½-inch pieces for faster decomposition. I use a clean knife or kitchen shears for this—just avoid plastic containers where the scraps might stick.
Place the chopped scraps in a 5-gallon bucket (or similar container). The more surface area the scraps have, the quicker they'll break down. If you're using whole fish, cut them into 2-inch chunks to speed up the process. This step is where most people rush—don't skip the rinsing or chopping, or you'll end up with a smelly mess.
💧 Step 2: Add Water and Stir for Even Distribution
Fill the bucket with 4 gallons of non-chlorinated water—rainwater or tap water that's sat out for 24 hours works best. Stir the mixture thoroughly with a wooden spoon or clean stick to ensure all scraps are submerged. You'll see bubbles form as the natural enzymes in the fish begin breaking down the tissue—this is a good sign.
Cover the bucket loosely with a lid or cloth to keep out debris while allowing airflow. Place it in a shaded spot, like under a porch or in a garage, where the temperature stays between 65-75°F. Too much heat speeds up decomposition and can create a foul odor, while cold temperatures slow the process. Check the bucket daily and stir gently to prevent mold from forming on the surface.
☀️ Step 3: Wait and Monitor for Fermentation
After 3-5 days, you'll notice the mixture start to foam and bubble vigorously—this is fermentation in action. The liquid will turn a murky brown, and you might smell a strong, fishy odor (don't worry, it's normal). Stir the mixture every 24 hours to keep it aerobic and prevent anaerobic bacteria from taking over, which can create a rotten-egg smell.
Once the scraps have fully broken down—usually after 7-10 days—they'll turn into a soft, mushy consistency. Strain the liquid through a fine mesh bag or cheesecloth into another container. The leftover solids can be composted or buried directly in the soil as a nutrient boost. Dilute the liquid fertilizer with 10 parts water before using—undiluted, it's too strong and can burn plant roots.
✂️ Step 4: Use the Fertilizer on Your Plants
Apply the diluted fish fertilizer to your plants every 2-4 weeks during the growing season. Pour it directly onto the soil around the base of the plant, avoiding the leaves to prevent chemical burns. I use a watering can with a fine rose attachment to distribute it evenly. The rich, nitrogen-heavy liquid gives plants a quick boost of energy, perfect for leafy greens, vegetables, and flowering plants.
For best results, use it in the early morning or late afternoon when the sun isn't at its strongest. You'll see a noticeable difference in plant health within 2-3 weeks—leaves will darken, stems will thicken, and growth will speed up. Store any leftover fertilizer in a sealed container in the fridge for up to 2 weeks, but always dilute before use.
Tips & tricks for perfect fish fertilizer
These practical tips will help you turn scraps into nutrient-rich plant food without the common pitfalls.
The Chopping Game-Changer: When cutting fish scraps in Step 1, aim for ¼-inch pieces instead of the recommended ½-inch if you're working with dense bones. Smaller pieces break down faster, especially in cooler temperatures. I've found that using a sharp knife or kitchen shears makes this step safer and more efficient—just be mindful of the fishy smell that lingers on your tools afterward.
Water Quality Matters: For Step 2, if you're using tap water that's heavily chlorinated, let it sit out for 48 hours instead of the standard 24 hours to ensure all chlorine evaporates. Chlorine can inhibit the fermentation process and slow down nutrient extraction. I once rushed this step and ended up with a weaker fertilizer—don't make my mistake!
Temperature Troubleshooting: If your workspace stays consistently above 75°F, you might notice faster fermentation in Step 3—but watch closely for that rotten-egg smell. When temperatures climb, stir the mixture every 12 hours instead of 24 to maintain aerobic conditions. A small fan blowing gently over the bucket can help regulate heat without creating drafts that disrupt the process.
Straining Strategy: In Step 3, when straining the liquid, use a double layer of cheesecloth for finer filtration if you want a clearer fertilizer. The extra effort removes more fish particles, which can clog irrigation systems or leave residue on leaves. I save the strained solids to make a nutrient-rich compost additive—just bury them directly in your garden beds.
Pro Tips for Make Fish Fertilizer For Plants
- These practical tips will help you turn scraps into nutrient-rich plant food without the common pitfalls.
- The Chopping Game-Changer: When cutting fish scraps in Step 1, aim for ¼-inch pieces instead of the recommended ½-inc...
- Water Quality Matters: For Step 2, if you're using tap water that's heavily chlorinated, let it sit out for 48 hours ...
Frequently asked questions
Got questions about turning fish scraps into plant superfood?
Here are answers to the most common ones—so you can fertilize like a pro!
Can I use any type of fish for fertilizer?
Stick to fresh, unpolluted fish scraps like bones, heads, or trimmings from wild-caught or farm-raised fish. Avoid oily fish (like salmon or mackerel) or fish treated with antibiotics—these can harm plants. Salmon or sardines are great, but rinse them first to remove excess salt or oil.
How long does it take to make fish fertilizer?
Fermentation takes 2–4 weeks in warm weather (70–80°F) and 4–6 weeks in cooler temps (below 60°F). Stir the mixture every 2–3 days to speed up decomposition. You’ll know it’s ready when it smells earthy, not fishy—like compost!
What if my fertilizer smells bad?
A strong, rotten fish smell means fermentation isn’t complete or the mixture is too wet. Fix it by:
- Adding dry materials (straw, leaves, or shredded newspaper) to absorb moisture.
- Stirring in garden soil or compost to balance bacteria.
- Moving the container to a warmer, shaded spot (but not direct sun).
Can I use fish fertilizer on all plants?
Yes, but use sparingly on delicate plants like tomatoes or peppers—the high nitrogen can cause leafy growth at the expense of fruit. Dilute it 1:10 with water for seedlings or young plants. Avoid using it on acid-loving plants (blueberries, azaleas) unless your soil is alkaline—test first!
Is homemade fish fertilizer cheaper than store-bought?
Absolutely!
A 5-gallon bucket of scraps costs pennies compared to $10+ for commercial fish emulsion. Plus, it’s 100% organic, packed with trace minerals (like calcium and phosphorus) that synthetic fertilizers lack. Win-win for your wallet and your garden!
What should I NOT put in my fish fertilizer?
Avoid these no-nos to keep your fertilizer safe and effective:
- Dairy or meat (attracts pests and spoils faster).
- Oily fish (like tuna or anchovies)—they can clog soil.
- Chemically treated fish (from processed or farmed sources with additives).
- Citrus peels or onions (can inhibit fermentation).
Wrapping up and next steps
Making your own fish fertilizer at home is a game-changer for gardeners! 🌱 With just a few simple ingredients—like fish scraps, water, and a little patience—you can create a nutrient-packed, eco-friendly fertilizer that boosts plant growth without breaking the bank.
Plus, you’re reducing waste and giving your plants the natural edge they deserve.
Ready to take your gardening to the next level? Start small—try a batch with just a few scraps, observe how your plants respond, and gradually scale up. Happy fertilizing! 🌿