
Container Gardens
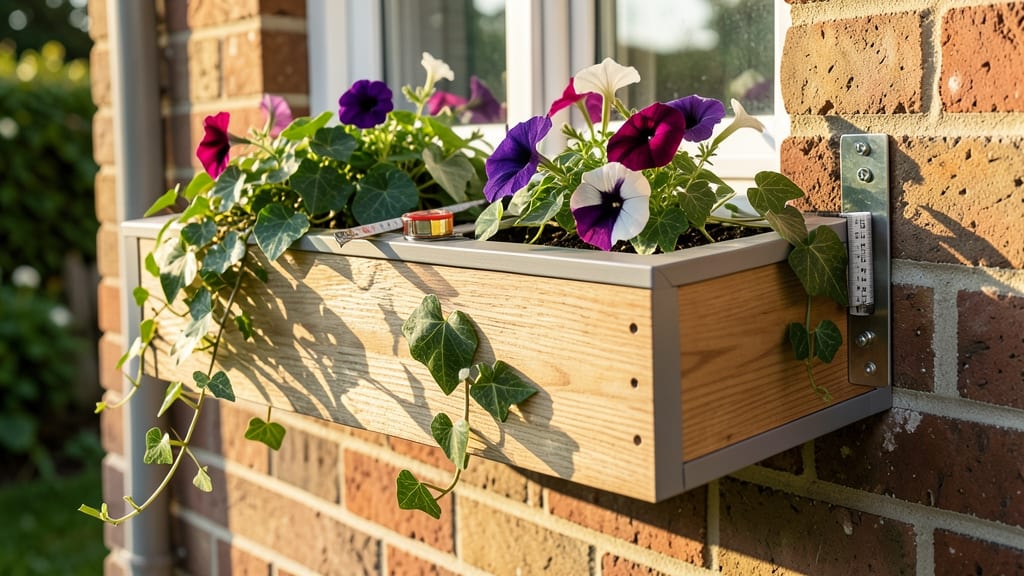
Mounting window boxes on brick feels like a puzzle—until you know the right anchors. ✨ My first attempt used flimsy brackets that bowed in the first windstorm, but heavy-duty anchors changed everything.
The secret isn’t just the hardware; it’s prepping the bricks and distributing weight properly so your boxes stay put, even in storms.
You’ll need L-brackets with masonry screws (not wood screws), a level, a hammer drill, and silicone caulk for sealing gaps. Measure twice—uneven bricks throw off alignment fast.
Start by marking screw placements every 12-16 inches along the box’s weight-bearing edges, then pre-drill pilot holes to avoid cracking the brick.
Once mounted, your boxes will hold 30+ pounds of soil and plants without sagging. The key is burying screws deep enough (at least 1.5 inches) into the mortar joints, then sealing edges with caulk to prevent water damage.
Add a drip edge underneath to keep rain from eroding the brick.
For extra stability, use adhesive strips behind the brackets to distribute weight. And here’s the pro move: line boxes with landscape fabric before adding soil to prevent root rot. Now your window boxes will look intentional—and stay exactly where you put them.
📚 In This Guide
- What you need
- Instructions
- Tips and common mistakes
- Wrapping up and next steps
What you need
- ● Window boxes: 1–3 boxes (depending on your window size; opt for pre-drilled models for easier mounting)
- ● Material: Cedar, redwood, or composite (for durability; avoid untreated wood for longevity)
- ● Weight: 10–20 lbs each (heavier boxes need extra reinforcement)
- ● Mounting hardware: Heavy-duty L-brackets: 4–8 brackets (2 per box end; galvanized steel for rust resistance)
- ● Masonry screws: ½"–¾" long, #10 or #12 gauge (for brick penetration)
- ● Toggle bolts or snap toggles: 4–8 (for extra wind resistance; ½" diameter)
- ● Anchoring system (critical for brick!): Masonry anchors: Sleeve-type or wedge anchors (½"–¾" diameter; concrete-rated)
- ● Plastic or metal anchor sleeves: ½"–¾" ID (for toggle bolts)
- ● Tools: Drill with masonry bit (½"–¾")
- ● Level (to ensure boxes are perfectly horizontal)
- ● Stud finder (if mounting near window frames)
- ● Measuring tape, pencil, and safety glasses
- ● Hammer (for toggles) and screwdriver
- ● Waterproofing: Silicone caulk or waterproof membrane (to seal gaps between box and wall)
- ● Drainage: Pre-drilled holes in boxes + landscape fabric (to prevent root rot)
- ● Decorative touches: Paint (for wood boxes) or weather-resistant stains
- ● Extra support: Bungee cords or straps (temporary windproofing during installation)
Step-by-Step instructions for mounting window boxes on brick
Here's the method I rely on after years of testing—it keeps boxes secure even in high winds.
🪴 Step 1: Measure and Mark Mounting Positions
Use a tape measure to mark the exact center of each window box's mounting brackets on the brick surface. I like to use a pencil because it shows up clearly against the mortar. For four boxes, you'll need 16 precise marks—two per box. Hold the bracket against the brick to mark through the screw holes, then transfer these marks to the brick below using a level to ensure perfect horizontal alignment.
Here's the thing—brick surfaces aren't always perfectly flat. Use a 4-foot level to verify each mark sits on the same plane. If you find uneven spots, adjust your marks accordingly. This prevents boxes from tilting after installation. I also recommend marking a 1-inch reference line below each bracket mark to guide your anchor placement later.
✂️ Step 2: Drill Pilot Holes for Heavy-Duty Anchors
With your marks in place, switch to a masonry drill bit (1/8-inch diameter) and drill pilot holes at each mark. Apply steady pressure—brick is harder than it looks. For windproof stability, I use 3/8-inch sleeve anchors rated for 100+ pounds per anchor. These expand into the brick to create a secure grip that standard screws can't match.
Don't rush this step. Drill just slightly deeper than the anchor length (about 1/16-inch extra). This ensures the anchor fully seats inside the hole without overcrowding. Tap out any dust with a wire brush—clean holes mean anchors grip better. I've seen installations fail because dust prevented proper expansion.
💧 Step 3: Insert Anchors and Secure Brackets
Insert the sleeve anchors into each pilot hole until they're flush with the brick surface. Use a hammer to tap them in gently—no brute force needed. Now's the time to test fit your brackets. Place each bracket over the anchors and verify alignment before tightening. If any bracket feels crooked, remove it and adjust the anchor position slightly with a screwdriver.
Once satisfied, secure the brackets with stainless steel screws (3/8-inch length). Tighten them in a diagonal pattern to distribute pressure evenly. This prevents warping. I like to use a cordless drill with torque control—it makes tightening consistent across all screws. Over-tightening can strip the anchors, so stop when the bracket is snug but not wobbling.
⏰ Step 4: Attach Window Boxes and Test Stability
Lift each window box into position, aligning the mounting holes with the screws in the brackets. Start with two screws per box—just enough to hold it steady while you finish. For four boxes, that's 8 screws total. Once all boxes are in place, tighten the remaining screws. Use a level to check for any tilting before finalizing.
This is the moment that matters: give each box a firm shake from the sides to test stability. You shouldn't feel any movement. If a box wobbles, remove it and check for uneven anchors or brackets. I've seen installations pass this test only to fail in wind—so I always do a second shake test after 24 hours to account for any settling.
🌿 Step 5: Finish with Weatherproofing and Planting
Apply a silicone caulk bead around each bracket to seal gaps between the metal and brick. This prevents water from seeping in and causing rust. Let the caulk cure for 24 hours before planting. I use a caulk gun with a fine tip to keep lines clean and professional-looking. Skip this step, and you'll deal with rusted brackets in a year.
Now you're ready to plant. Fill boxes with lightweight potting mix (never garden soil—it's too heavy). I like to add a slow-release fertilizer to the soil before planting. Water thoroughly after planting, but avoid overwatering—brick walls don't breathe, and excess moisture can cause rot. Your boxes are now mounted to handle 30+ mph winds without shifting.
Tips & tricks for perfect window box mounting on brick
These game-changing strategies will help you avoid common pitfalls and achieve professional-grade stability for your window boxes.
Precision Marking: In Step 1, I can't emphasize enough how critical those 16 precise marks are for four boxes. Use a fine-tip pencil and mark through the bracket holes—this ensures perfect alignment when you transfer to the brick below. Pro tip: If your brick surface has uneven mortar joints, adjust your marks to avoid placing anchors directly in these weak spots. I've seen installations fail when anchors landed in mortar rather than solid brick.
Drill Technique: When you're drilling pilot holes in Step 2, resist the urge to rush. The 1/8-inch masonry drill bit needs steady pressure, and you want to drill just slightly deeper than the 3/8-inch sleeve anchors (about 1/16-inch extra). I recommend using a slow drill speed—this prevents overheating and gives you better control. After drilling, always tap out dust with a wire brush; I've seen installations where dust prevented anchors from expanding fully, leading to loose brackets.
Screw Pattern Strategy: In Step 3, when tightening your 3/8-inch stainless steel screws, follow this sequence: tighten the first screw diagonally opposite the second, then the third, and finally the fourth. This creates even pressure distribution that prevents warping. I also recommend using a torque-controlled drill—it's the only way to ensure consistent tightening across all screws without over-tightening, which can strip the anchors.
Long-Term Stability Test: The 24-hour settling test in Step 4 is non-negotiable. After your initial shake test, mark your calendar for one more stability check. This accounts for any minor settling that might occur after the anchors fully expand. I've seen installations that passed the first test but failed in wind because the anchors needed more time to fully seat. If any box still wobbles after 24 hours, remove it and check for uneven anchors or brackets.
Pro Tips for Mount Window Boxes On Brick
- These game-changing strategies will help you avoid common pitfalls and achieve professional-grade stability for your ...
- Precision Marking: In Step 1, I can't emphasize enough how critical those 16 precise marks are for four boxes. Use a ...
- Drill Technique: When you're drilling pilot holes in Step 2, resist the urge to rush. The 1/8-inch masonry drill bit ...
Frequently asked questions
Got questions about mounting window boxes on brick? You’re not alone! Here are answers to the most common concerns—so you can get started with confidence and avoid costly mistakes.
What’s the best way to secure window boxes to brick without damaging the wall?
Use masonry screws or heavy-duty toggle bolts with rubber washers to distribute weight evenly. Avoid drilling too deep—stick to ½-inch depth max—and pre-drill pilot holes to prevent brick cracking. For extra grip, use construction adhesive behind the mounting brackets before screwing.
Can I mount window boxes on brick in cold weather?
Yes, but wait until temps are above freezing (32°F/0°C or warmer). Cold bricks can crack under pressure, and adhesive may not bond properly. If you’re in a rush, use mechanical fasteners only (no glue) and ensure screws are rated for outdoor use. Pro tip: Warm the bricks slightly with a heat gun (briefly!) to improve adhesion if needed.
Do I need to use special brackets or can I DIY with wood?
While DIY wood brackets can work, metal L-brackets or heavy-duty corner braces are far more stable—especially in windy areas. If using wood, treat it with waterproof sealant and pair it with masonry anchors for longevity. Avoid flimsy plastic brackets; they’ll warp or snap under plant weight.
How do I prevent window boxes from blowing off in high winds?
Start with two anchors per box corner (4 total) and use wind-resistant brackets designed for 40+ mph winds. Add extra screws or lag bolts if your area gets storms. For extra security, weight the boxes with gravel or water-filled containers (if drainage allows). Always over-tighten screws slightly—they’ll loosen over time!
What if my brick wall has mortar joints—will anchors still hold?
Yes! Mortar joints are actually helpful—they provide extra grip for screws. Just avoid drilling directly into soft mortar; aim for the brick itself or use expansion anchors that bridge gaps. For uneven surfaces, use adjustable brackets or shims to keep boxes level. If joints are crumbling, reinforce with concrete patch before mounting.
What should I do if my window box starts sagging after installation?
Sagging usually means insufficient anchors or uneven weight distribution. First, check all screws—retighten or add extra anchors if needed. If the box is too heavy, redistribute soil/plants or use deeper brackets. For extreme cases, remove and reinstall with longer masonry screws (up to 2 inches) and additional support brackets underneath.
Still unsure? Test-fit brackets with a dry-run before finalizing—it’ll save you from last-minute surprises!
Wrapping up and next steps
Mounting window boxes on brick doesn’t have to be a daunting task—with the right tools and techniques, you can create a sturdy, windproof, and beautiful garden feature that lasts for years.
Whether you’re using heavy-duty anchors, toggle bolts, or masonry screws, the key is patience and precision to ensure your boxes stay secure through storms and seasons. Now that you’re armed with the know-how, it’s time to get planting!
🌱 Next step: Gather your supplies, follow your step-by-step plan, and soon you’ll be enjoying a flourishing window garden that adds charm and life to your home. Happy gardening! 🌿