
Fertilization
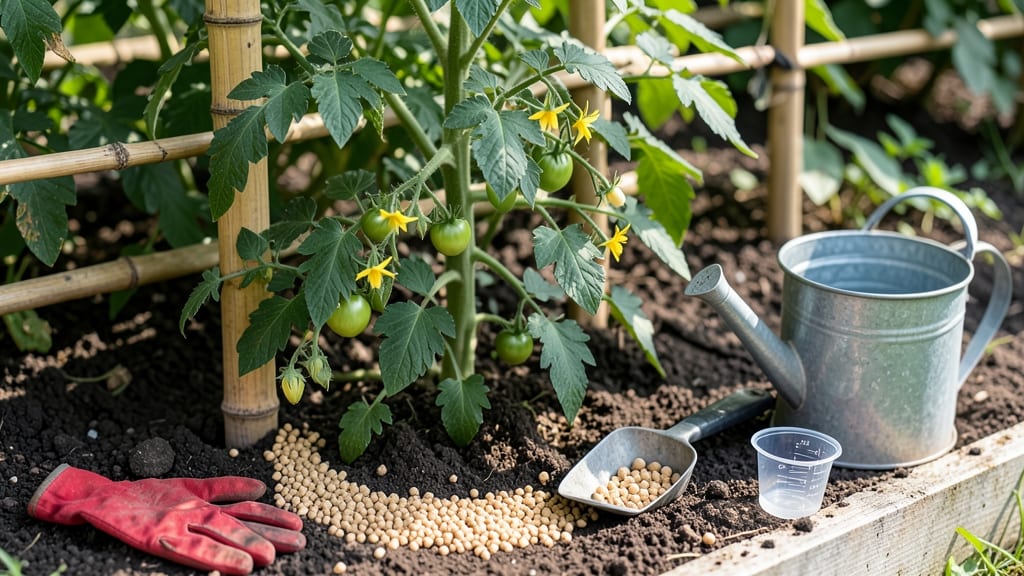
Precision timing turns fertilizer from guesswork to garden gold. 🌱 I’ve wasted years over-feeding or under-feeding plants—until I learned the science behind when and how to apply it. The difference between lush growth and limp leaves often comes down to three key moments: pre-planting, early growth, and mid-season boosts.
Most beginners grab any fertilizer and dump it on the soil, but plants absorb nutrients best when applied right before watering—never on dry ground. Organic options like compost or fish emulsion feed slowly, while synthetic granules need immediate moisture to dissolve.
Foliar sprays work fast but should be done in early morning or evening to avoid leaf burn. By the end of this, you’ll know exactly when to feed your plants—whether you’re growing tomatoes, herbs, or flowers—without shocking their roots.
The secret isn’t more fertilizer; it’s smart timing that keeps your garden thriving all season. Here’s where it gets interesting: timing varies by plant type. Leafy greens need gentle, frequent feeding, while fruiting plants (like peppers or tomatoes) respond best to heavy doses at flowering.
Let’s break it down step by step—no more wasted bags of fertilizer.
📚 In This Guide
- What you need
- Instructions
- Tips and common mistakes
- Wrapping up and next steps
What you need
- ● Fertiliser: Granular (slow-release): 10-20 lbs per 100 sq ft (adjust based on soil test results)
- ● Liquid (fast-acting): 1-2 cups per 100 sq ft (follow label instructions)
- ● Organic (compost/manure): 2-3 inches spread evenly
- ○ Soil Test Kit: To determine pH and nutrient levels (optional but recommended)
- ● Garden Gloves: Heavy-duty to protect hands from chemicals
- ● Broadcast Spreader: For even distribution of granular fertiliser
- ● Watering Can or Hose: With a gentle spray nozzle for liquid fertiliser
- ● Measuring Tools: Ruler or measuring cup for precise application
- ○ Pruning Shears: To trim dead foliage before fertilizing (optional)
- ● Soil pH adjuster (lime/sulfur) if needed
- ● Organic mulch (straw, wood chips) to retain moisture
- ● Calcium nitrate or Epsom salt for nutrient boosts (specific plant needs)
- ● Rain gauge or weather app to time fertilizing for optimal absorption
Step-by-step guide to applying fertiliser for optimal plant growth
Mastering fertiliser application transforms your garden from good to exceptional—here's how I do it.
🌱 Step 1: Test Soil and Choose the Right Fertiliser Type
Before applying any fertiliser, take a soil test to identify nutrient deficiencies. Most garden centers offer affordable testing kits, or you can send a sample to a local agricultural extension service. This tells you exactly what your plants are missing—whether it's nitrogen for leafy growth, phosphorus for root development, or potassium for disease resistance.
Select a fertiliser that matches your soil's needs. For example, a balanced 10-10-10 fertiliser works well for general garden use, while acid-loving plants like blueberries need a low-pH, high-iron formulation. If your soil test shows a deficiency in a specific nutrient, choose a targeted fertiliser like a high-phosphorus 5-10-5 for flowering plants.
💧 Step 2: Prepare the Soil and Apply Fertiliser at the Right Time
Apply fertiliser when plants are actively growing but not under stress—typically in early spring for cool-season crops and late spring for warm-season plants. Avoid fertilising during extreme heat, drought, or when plants are flowering or fruiting, as this can lead to nutrient burn or poor fruit quality.
Work the fertiliser into the top 2-3 inches of soil using a garden fork or tiller. For granular fertilisers, spread evenly over the soil surface and water lightly to help it dissolve and reach the roots. For liquid fertilisers, dilute according to package instructions and apply directly to the soil, avoiding the foliage to prevent chemical burns.
☀️ Step 3: Water Deeply After Application for Root Uptake
Water the soil thoroughly after applying fertiliser to activate the nutrients and encourage root uptake. Aim for 1-2 inches of water per application, which helps dissolve granular fertilisers and moves them into the root zone. You'll know the moisture is right when the soil feels damp 6 inches deep—use a soil probe or trowel to check.
Overwatering can leach nutrients beyond the root zone, while underwatering leaves fertiliser sitting on the surface, which can burn roots. For slow-release fertilisers, a single deep watering after application is often enough, but for quick-release types, monitor soil moisture and water lightly every 2-3 days to maintain uptake.
⏰ Step 4: Schedule Follow-Up Applications Based on Plant Needs
Most plants benefit from fertiliser applications every 4-6 weeks during the growing season. Fast-growing plants like vegetables and annuals may need more frequent feeding, while perennials and shrubs often thrive on 2-3 applications per year. Observe your plants for signs of deficiency—yellowing leaves, stunted growth, or poor flowering—these are cues to adjust your fertilising schedule.
For container plants, fertilise every 2-4 weeks during the growing season, as nutrients leach out more quickly in pots. Use a water-soluble fertiliser mixed with irrigation water for precise control. Always follow the package instructions for application rates, as over-fertilising can harm plants and harm the environment.
✂️ Step 5: Monitor and Adjust for Seasonal Changes
Adjust your fertilising routine based on seasonal changes and plant life cycles. In fall, reduce fertiliser applications for cool-season crops and focus on building soil health with organic matter. In winter
Keep a garden journal to track fertiliser applications, plant responses, and soil conditions. Note which fertilisers work best for specific plants and adjust future applications accordingly. This helps you fine-tune your approach over time, ensuring your plants get exactly what they need without waste.
Tips & tricks for precision fertiliser application
Here's what nobody tells you about getting the most out of your fertiliser—these details make all the difference between healthy plants and wasted effort.
Soil Test Accuracy: Don't rely on guesswork—send your soil sample to a lab for precise analysis. Many garden centers offer basic tests, but professional labs provide detailed breakdowns of micronutrients like zinc or manganese that home tests often miss. I've seen plants with yellow leaves that needed iron, not nitrogen—the soil test revealed the exact deficiency. This precision saves money by eliminating trial-and-error purchases.
Timing Secret: The 4-6 week schedule in Step 4 assumes ideal growing conditions, but real-world factors matter. If you're in a hot, dry climate, reduce applications to every 6-8 weeks—plants stress from heat and need less frequent feeding. For container plants, I cut the 2-4 week interval to every 3 weeks during peak summer growth, as nutrients drain faster in pots. Always check soil moisture first—dry soil means nutrients won't activate properly, no matter how often you apply.
Application Technique: When working fertiliser into the top 2-3 inches of soil (Step 2), use a garden fork rather than a trowel. The fork's tines create larger soil pores, improving aeration and root penetration. For granular fertilisers, spread in a crisscross pattern to ensure even distribution. I've found that skipping this step often leads to uneven growth—roots can't access nutrients properly if they're concentrated in one area. For liquid fertilisers, use a watering can with a fine rose to avoid splashing on leaves.
Seasonal Adjustments: The fall/winter guidance in Step 5 is critical but often misunderstood. For evergreens, I apply a light dose of slow-release fertiliser in late fall (around Thanksgiving) to support root growth during winter. The key is using half the recommended rate—just enough to sustain them without encouraging new growth that would freeze. In winter, only water-soluble fertilisers should be used, as they activate immediately when soil warms slightly.
Pro Tips for Apply Fertiliser
- Here's what nobody tells you about getting the most out of your fertiliser—these details make all the difference between healthy plants and wasted effort.
- Soil Test Accuracy: Don't rely on guesswork—send your soil sample to a lab for precise analysis.
- Timing Secret: The 4-6 week schedule in Step 4 assumes ideal growing conditions, but real-world factors matter.
Frequently asked questions
Got questions about fertiliser application? You're not alone! Here are answers to the most common queries to help you fertilise like a pro.
How often should I apply fertiliser to my plants?
Frequency depends on your plant type and fertiliser type. For organic fertilisers, apply every 4–6 weeks during the growing season. Slow-release granules last 2–3 months, while liquid fertilisers may need weekly applications. Always follow the product label for best results!
Is it better to fertilise in the morning or evening?
Morning is ideal! Applying fertiliser in the early hours (before 10 AM) gives plants time to absorb nutrients before the heat of the day. Avoid late evening to prevent fungal risks from damp foliage overnight. Pro tip: Water plants first to help nutrient uptake.
Do I need to water after applying fertiliser?
Watering before and after application helps dissolve granules and washes nutrients into the soil. For granular fertilisers, water lightly first, then apply the fertiliser, and water again. Liquid fertilisers should be mixed with water and applied directly to avoid leaf burn.
What should I do if my plants look burnt after fertilising?
Fertiliser burn happens when too much salt or nutrient concentration damages roots. Flush the soil with water immediately, then reduce fertiliser strength by half for the next application. Use a mild, organic fertiliser like compost tea to recover damaged roots.
Are there eco-friendly alternatives to chemical fertilisers?
Yes! Consider compost, worm castings, manure, or plant-based fertilisers like seaweed extract. These improve soil health naturally and reduce chemical runoff. For container plants, use fish emulsion or banana peel tea for a potassium boost!
Wrapping up and next steps
Mastering the art of fertiliser application is all about precision, patience, and observation—your plants will thank you with lush growth and vibrant blooms! 🌱 By choosing the right type, timing it perfectly, and following best practices, you’re giving your garden the exact nutrients it craves when it needs them most.
Now that you’re armed with the know-how, grab those gloves and get ready to see your green space thrive!
🚀 Next step: Start small—test one plant or section first, track its progress, and adjust as needed. Happy fertilizing!