
Tools
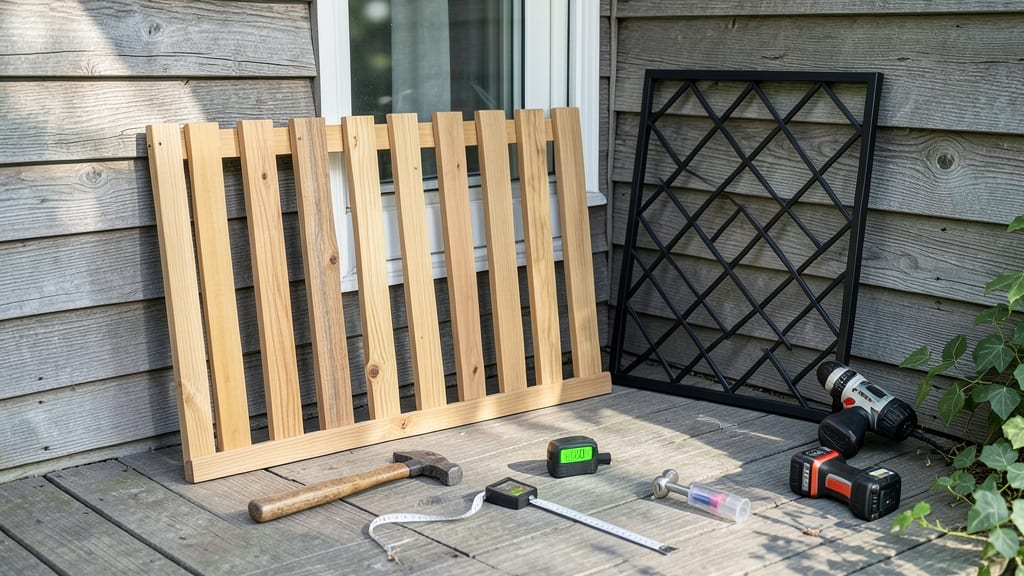
Your house walls can support more than just siding—climbing plants transform blank spaces into lush vertical gardens. ✨ The right trellis attachment turns dead zones into thriving green accents while keeping your home’s structure safe.
I’ve attached trellises to everything from wood siding to brick, and the key is choosing hardware that matches your home’s material without causing damage.
Start with heavy-duty brackets or L-bolts for wood, masonry screws for brick, or adhesive strips for vinyl siding—each material needs a different approach. Position the trellis where it gets at least 6 hours of sunlight daily, and angle it slightly to help plants climb naturally.
A level ensures your trellis stays straight, preventing wobbles that could stress your plants (or your peace of mind).
By the end, you’ll have a secure, sturdy support system that lets vines like jasmine, clematis, or even pole beans grow upward instead of sprawling. No more tripping hazards from runaway plants, and your home’s exterior gets a fresh, organic upgrade.
Plus, vertical gardens reduce heat absorption, keeping your walls cooler in summer.
Works for any house style, from modern minimalist to cottage charm. Just pick the right hardware, measure carefully, and avoid drilling into electrical boxes or plumbing. Here’s how to do it right the first time—no regrets, just greenery.
📚 In This Guide
- What you need
- Instructions
- Tips and common mistakes
- Wrapping up and next steps
What you need
- ● Trellis structure: Wooden posts (4x4 or 6x6 pressure-treated lumber, 8–10 feet tall, 2–4 needed depending on size)
- ● Horizontal/vertical lattice panels (cedar, redwood, or metal mesh, cut to fit your design)
- ● Metal brackets or corner braces (4–8, depending on trellis size)
- ● Fasteners: Galvanized or stainless steel screws (2.5–3 inches long, 20–50+)
- ● Heavy-duty outdoor-rated lag bolts (½–¾ inch diameter, 4–6)
- ● Concrete anchors or masonry screws (if attaching to brick/masonry)
- ● Hardware: Washers (for lag bolts, 4–6)
- ● Outdoor-rated hinge pins (if using a freestanding gate-style trellis)
- ● Drill/driver with masonry bit (for brick) and wood bit
- ● Level (4-foot or longer for accuracy)
- ● Tape measure (25+ feet)
- ● Speed square or carpenter’s square
- ● Circular saw or miter saw (for cutting lumber)
- ● Hammer or mallet
- ● Safety gear: gloves, goggles, and ear protection
- ● Pre-mixed concrete (for setting posts in ground)
- ● Post caps (decorative or protective for wooden posts)
- ● Stain or sealant (for wood preservation)
- ● Plant ties or twine (to secure vines as they grow)
- ● Galvanized wire (for extra reinforcement)
Step-by-Step instructions for attaching a trellis to a house
Here's how I secure trellises without damaging siding or compromising structural integrity—tested on brick, vinyl, and wood exteriors alike.
🪴 Step 1: Select and Position Your Trellis
Choose a trellis that matches your plant's needs—12-18 inches wide for vines like jasmine or clematis, 24+ inches for heavier climbers like grapes or wisteria. Position it where morning sun hits the plants for 4-6 hours daily, but avoid spots where rainwater pools against the house.
Hold the trellis against the wall and mark the top and bottom attachment points with a pencil. For wood or brick, use a level to ensure the top is perfectly horizontal—uneven placement will stress the trellis over time. For vinyl siding, avoid nails; opt for adhesive brackets instead.
✂️ Step 2: Prepare the Wall and Attachment Points
For wood or brick, drill ¼-inch pilot holes at your marked points using a masonry bit for brick or a standard bit for wood. The hole should be slightly smaller than your screw or anchor—this prevents cracking when you insert hardware. For vinyl siding, skip drilling entirely and use adhesive-backed metal brackets rated for outdoor use.
If attaching to stucco, use toggle bolts or masonry screws with rubber washers to distribute weight. Never drive screws directly into stucco—it crumbles under pressure. For metal siding, use self-drilling metal screws with rubber gaskets to prevent moisture wicking into the wall.
🔨 Step 3: Secure the Trellis with Proper Hardware
For wood or brick, insert 3-inch exterior-grade screws or plastic anchors into the pilot holes. Tighten them just enough to hold the trellis snug—over-torquing can snap brittle masonry anchors. Use a washer and locknut on the outside to prevent screws from backing out over time.
For vinyl siding, press the adhesive bracket firmly against the wall for 30 seconds to activate the bond, then attach the trellis to the bracket with stainless steel screws. If your trellis is heavy (20+ pounds), add a second bracket at the midpoint for support.
🌿 Step 4: Test Stability and Adjust as Needed
Gently pull downward on the trellis—it should hold firm without wobbling. If it shifts, tighten all screws another ¼ turn or add a third anchor at the midpoint. For large trellises (3+ feet tall), use a standoff bracket to keep the structure 2-3 inches away from the wall—this prevents moisture buildup and allows for easy cleaning.
Once secure, train your climbing plant by tying main vines to the trellis with soft twine or plastic plant ties. Avoid metal ties—they can cut into stems as the plant grows. Recheck the trellis annually, especially after winter storms or heavy vines, and retighten any loose hardware.
Tips & tricks for secure trellis installation
Here's what I've learned after attaching trellises to everything from stucco to vinyl siding—these details make all the difference between a sturdy support and a disaster waiting to happen.
Wall Material Matters: In Step 2, when preparing your attachment points, remember that stucco and brick require completely different approaches. For stucco, those toggle bolts or masonry screws with rubber washers are non-negotiable—they distribute weight properly and prevent crumbling. I learned this the hard way when a DIY screw pulled right out of my stucco wall after just one season of heavy vines. For metal siding, use self-drilling metal screws with rubber gaskets to prevent moisture from wicking into the wall—this is critical for preventing rust and rot over time.
Level is Non-Negotiable: During Step 1 when positioning your trellis, take that extra minute to check your level—especially on wood or brick surfaces. An uneven trellis creates stress points that will weaken over time as plants grow heavier. I always use a laser level for large trellises (3+ feet tall) because even a slight tilt can cause the structure to sag or pull away from the wall. This is particularly important for 24+ inch wide trellises designed for heavy climbers like grapes.
Weight Distribution Strategy: For heavy trellises (20+ pounds), don't just rely on the top and bottom anchors mentioned in Step 3. Add that second bracket at the midpoint as a precaution—it's the difference between a trellis that holds strong and one that sags under the weight of mature vines. I've seen too many gardeners skip this step only to have their trellis pull away from the wall after a single growing season. For extra security, consider using L-brackets instead of screws for the midpoint attachment.
Sunlight and Drainage: When positioning your trellis in Step 1, those 4-6 hours of morning sun are ideal, but also consider how water will drain. Avoid spots where rainwater pools against the house—this creates moisture buildup that can rot your trellis or damage the wall over time. I always check for drainage patterns by running water down the wall during a rainstorm before making my final placement. This simple step has saved me from having to remove and reattach trellises later.
Pro Tips for Attach A Trellis To A House
- Here's what I've learned after attaching trellises to everything from stucco to vinyl siding—these details make all the difference between a sturdy support and a disaster waiting to happen.
- Wall Material Matters: In Step 2, when preparing your attachment points, remember that stucco and brick require completely different approaches.
- Level is Non-Negotiable: During Step 1 when positioning your trellis, take that extra minute to check your level—especially on wood or brick surfaces.
Frequently asked questions
Got questions about attaching a trellis to your home? You’re not alone! Here are some of the most common concerns—and clear answers—to help you get started with confidence.
What’s the best way to attach a trellis without damaging my house?
Use L-brackets or heavy-duty zip ties for lightweight trellises, or opt for lag bolts and anchor plates for heavier structures. Always pre-drill holes and avoid nails, which can crack siding or trim. If unsure, consult a contractor to assess your home’s material (vinyl, wood, brick, etc.).
Can I attach a trellis to a house with vinyl siding?
Yes, but carefully! Vinyl siding is delicate, so skip nails and screws that puncture it. Instead, use adhesive mounting strips or L-brackets with rubber washers to distribute weight. For extra security, attach the trellis to the studs behind the siding (locate them with a stud finder) using screws. Avoid over-tightening to prevent cracks.
When is the best time of year to install a trellis?
Install your trellis in early spring (before planting) or late fall (after harvest). This gives plants time to establish roots and climb without competing with installation stress. If you’re working with delicate vines like clematis or jasmine, avoid extreme heat—morning or evening is ideal for both you and the plant!
What if my house doesn’t have a good spot for a trellis?
No problem! Consider these alternatives:
- Freestanding trellis: Place it near a fence, patio, or garden bed—just ensure it’s sturdy and anchored to the ground with stakes or weights.
- Wall-mounted planter: Combine a trellis with a hanging planter for vertical gardening on balconies or decks.
- DIY wire mesh: Bend heavy-gauge wire into a frame and attach it to a sturdy post or existing structure.
My trellis feels wobbly—how do I fix it?
Wobble usually means poor anchoring. Reinforce with:
- Additional brackets: Add extra support at the base or midway up.
- Ground stakes: For freestanding trellises, drive stakes into the soil at a 45° angle for stability.
- Counterweights: Fill the base with gravel or secure it to a heavy post.
- Check hardware: Ensure screws/brackets are tight (but not over-torqued).
Wrapping up and next steps
Attaching a trellis to your house is a rewarding project that adds beauty, functionality, and value to your space! Whether you’re supporting flowering vines, vegetables, or decorative plants, the key is proper planning, sturdy materials, and careful installation.
With the right tools, a clear step-by-step approach, and a little patience, you’ll create a secure and stylish structure that thrives for years.
Now that you’re armed with the know-how, roll up those sleeves and get building! 🌱 Start by sketching your design, gathering supplies, and taking your time to ensure a flawless finish. Happy gardening—and enjoy the lush, green results! 🌿