
Planting
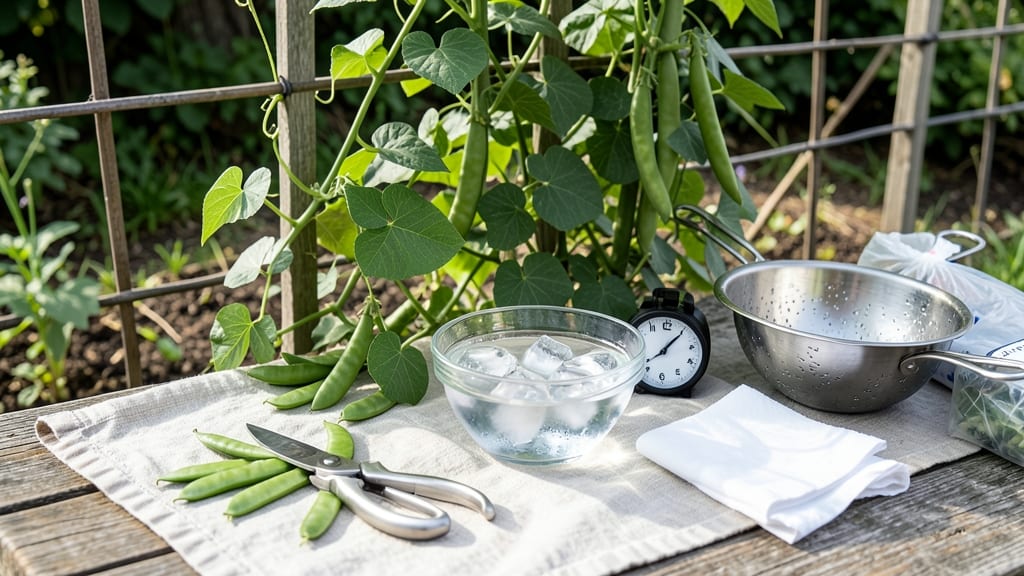
Blanching peas before freezing saves you from mushy freezer meals later. 🌱 The secret lies in stopping their enzymes at the perfect moment—when they're bright green and tender-crisp, not overcooked. This is how you preserve that garden-fresh snap for months.
You'll need a large pot, ice water, tongs, and a colander. The process takes just 10 minutes, but timing is everything. Too short, and peas stay tough; too long, and they turn to mush. We're aiming for that crisp-tender texture that makes frozen peas taste like summer.
After blanching, you'll pack them into freezer bags, squeezing out excess air. When you're ready to use them, they'll thaw in minutes and cook perfectly—no soggy surprises. The key is working fast once they hit the ice bath to lock in that vibrant color and texture.
This method fits right into your garden's seasonal rhythm. Harvest peas when pods are plump but before seeds get too big, then blanch them immediately. You'll have a pantry stocked with peas ready for stir-fries, soups, or spring meals all winter long.
📚 In This Guide
- What you need
- Instructions
- Tips and common mistakes
- Wrapping up and next steps
What you need
- ● Fresh peas: 2–3 lbs (about 4–6 cups, shelled). Choose peas that are firm, bright green, and free of blemishes.
- ● Large pot: A deep, heavy-bottomed pot (6–8 quarts) with a lid. A Dutch oven works great!
- ● Ice water bath: A large bowl or sink filled with 2–3 gallons of ice water (use 1 part ice to 1 part water).
- ● Slotted spoon or spider strainer: For easy draining and transferring peas.
- ● Timer: A kitchen timer (or your phone) to monitor blanching time precisely.
- ● Towel or clean kitchen towel: For patting peas dry before freezing.
- ● Freezer-safe bags or containers: Option 1: Heavy-duty quart-sized freezer bags (Glad or Ziploc brands work well).
- ● Option 2: Airtight freezer-safe containers (like Rubbermaid or glass jars with lids).
- ● Permanent marker or labels: To date and label your frozen peas.
- ○ Salt: 1–2 tablespoons (adds to the blanching water for flavor—optional but recommended for taste).
- ● Colander: For rinsing peas before blanching (if they’re dirty or dusty).
- ● Vacuum sealer: For extra-long shelf life (up to 18 months!).
- ● Paper towels: For a quicker dry if you’re in a hurry.
- ● Measuring cup: To ensure consistent ice water ratios.
Step-by-step instructions for preserving peas through freezing
Here’s the method I’ve used for years to keep peas crisp-tender for months—no soggy texture in sight.
💧 Step 1: Prepare the Peas for Quick Cooking
Start by rinsing your peas under cold water to remove any dirt or debris. I like to spread them on a clean kitchen towel and pat them dry—this ensures even cooking later. If your peas are still attached to vines, snap them off cleanly at the stem. The goal is to work quickly so the peas don’t start cooking in their own juices before blanching.
For best results, sort the peas by size—smaller peas need slightly less time in the boiling water. If you’re working with a large batch, divide them into groups. This prevents uneven cooking, which can lead to some peas being mushy while others stay crunchy.
☀️ Step 2: Blanch the Peas for Perfect Texture
Fill a large pot with enough water to cover the peas by about 2 inches. Bring the water to a rolling boil—this ensures the peas cook evenly and quickly. Once boiling, add 1 teaspoon of salt per gallon of water to help preserve color and flavor. I’ve found that skipping the salt can make the peas taste bland after freezing.
Add the peas to the boiling water and stir gently. For fresh peas, blanch for 2-3 minutes—this is the sweet spot for crisp-tender texture. If you’re using frozen peas, reduce the time to 1-2 minutes. Watch closely: the peas are done when they’re bright green but still slightly firm to the bite. Overcooking turns them mushy, and that’s a texture no one wants after freezing.
⏰ Step 3: Shock the Peas to Halt Cooking
Prepare an ice bath by filling a large bowl with cold water and adding ice cubes. The water should be cold enough to chill the peas immediately—think 35-40°F. Once the peas reach 2-3 minutes of blanching, use a slotted spoon to transfer them directly into the ice water. This stops the cooking process instantly and locks in that crisp-tender texture.
Let the peas sit in the ice bath for 3-5 minutes, stirring occasionally. You’ll see them turn a vibrant green—this is your sign they’ve cooled properly. Drain the peas thoroughly in a colander, shaking off any excess water. The less moisture they carry into the freezer, the better they’ll keep.
🪴 Step 4: Package and Freeze for Long-Term Storage
Spread the drained peas on a clean kitchen towel or paper towels to air-dry for 5-10 minutes. This extra step prevents ice crystals from forming, which can make the peas mushy later. Once dry, transfer the peas to airtight containers or heavy-duty freezer bags. I like to use 1-cup portions so I can pull out just what I need without thawing the whole batch.
Label each container with the date and variety of peas. For best quality, freeze the peas within 24 hours of blanching. Store them in the coldest part of your freezer, ideally at 0°F or below. When stored properly, your peas will stay crisp-tender for up to a year—though I always use them up sooner because they taste so fresh!
Tips & tricks for perfectly preserved peas
These small details make all the difference when freezing peas—trust me, I’ve learned them the hard way!
Timing is Everything: That 2-3 minute blanching window for fresh peas is tighter than it seems. Set a timer and test one pea early—it should sink to the bottom but still feel firm when you bite into it. For frozen peas, cut that time to 1-2 minutes since they’ve already been partially cooked. Overcooking by even 30 seconds can ruin that crisp-tender texture we’re working for.
Salt Does More Than Season: The 1 teaspoon of salt per gallon isn’t just about flavor—it helps preserve color and firmness during freezing. I’ve found that skipping it makes peas taste bland and lose their vibrant green after thawing. Pro tip: Use kosher salt for better control over the amount.
Shocking Secrets: Your ice bath needs to be 35-40°F cold—don’t just throw in ice cubes! I keep a thermometer handy to verify. The peas should turn bright green within 3-5 minutes in the ice water. If they’re still dull after that, your ice bath isn’t cold enough and the peas will continue cooking slightly.
Freezing Strategy: Spread those dried peas on a towel for 5-10 minutes before packaging—this prevents ice crystals that cause mushiness. I like to portion them into 1-cup servings right away so I can grab exactly what I need without thawing everything. Label with dates because even with perfect technique, peas start losing texture after 6 months in the freezer.
Pro Tips for Blanch Peas Before Freezing
- These small details make all the difference when freezing peas—trust me, I’ve learned them the hard way!
- Timing is Everything: That 2-3 minute blanching window for fresh peas is tighter than it seems. Set a timer and test ...
- Salt Does More Than Season: The 1 teaspoon of salt per gallon isn’t just about flavor—it helps preserve color and fir...
Frequently asked questions
Got questions about blanching peas for freezing?
You’re not alone—here are the most common ones, answered clearly so you can freeze peas like a pro!
Can I freeze peas without blanching first?
Technically, yes—but why risk it? Unblanched peas develop off-flavors and mushy textures when frozen. Blanching stops enzyme activity and preserves color, crispness, and nutrients for up to 9–12 months. Skip it, and you’ll regret it later!
How long should I blanch peas for perfect texture?
For crisp-tender peas, blanch for 2–3 minutes in boiling water, then plunge into ice water for 3–4 minutes. Over-blanching (beyond 4 minutes) turns them mushy. Use a timer—your freezer (and taste buds) will thank you!
What if I don’t have a blanch basket? Can I use a slotted spoon?
A slotted spoon or fine-mesh strainer works in a pinch—just avoid crushing the peas. For large batches, a colander with big holes also does the trick. Pro tip: Work in batches to avoid crowding, which slows heat transfer.
How do I know if my frozen peas are still good?
Frozen peas stay best for 9–12 months, but check for ice crystals or slimy textures after thawing. If they smell off or taste bland, it’s time to toss them. When in doubt, taste test a small batch—safety first!
Can I blanch and freeze peas from my garden?
Yes! Fresh garden peas blanch and freeze even better than store-bought because they’re picked at peak ripeness. Just trim stems first and blanch immediately after harvesting. Bonus: Homegrown peas taste sweeter after freezing!
Wrapping up and next steps
Blanching peas before freezing is your secret weapon for preserving their vibrant color, crisp-tender texture, and fresh flavor—month after month! With just a few simple steps, you’ll unlock a pantry staple that’s as easy to use as it is delicious.
Now that you’re armed with the know-how, go ahead and stock up—your future meals (and taste buds) will thank you!
Ready to take the next step? Try freezing your blanched peas in small portions for easy snacking or meal prep. Or, experiment with creative recipes like creamy pea soups or crispy pea fritters—the possibilities are endless! 🌱✨