
Tools
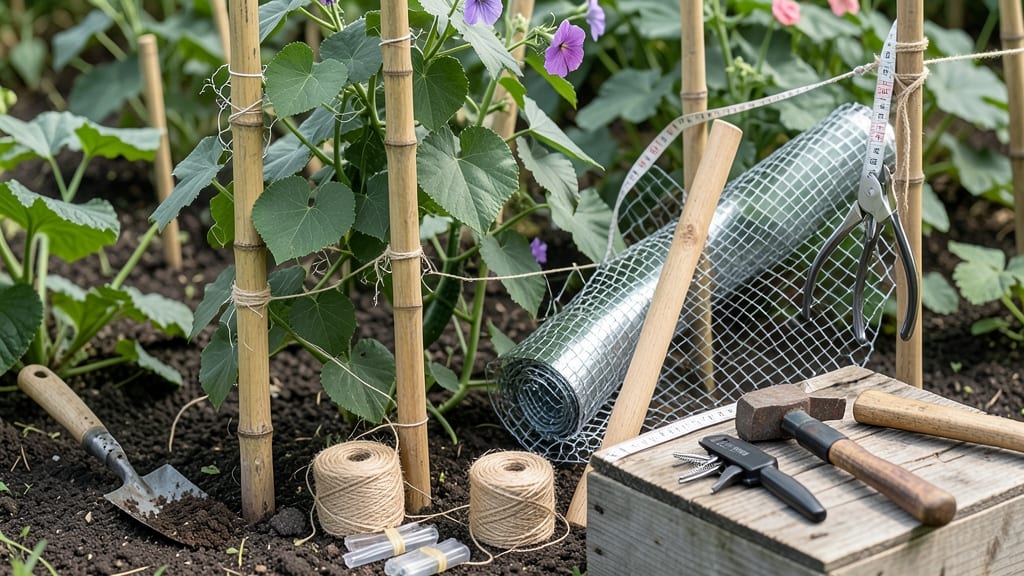
Building a cheap trellis for under $20 transformed my chaotic garden into a productive vertical paradise. 🌱 Last summer, I spent hours wrestling with sprawling cucumbers and flopping tomatoes—until I realized a simple frame could save space and my sanity.
The right trellis turns vines into neat, harvest-ready plants while keeping pests and diseases at bay.
You don’t need fancy materials—bamboo stakes, scrap lumber, or even rebar work perfectly. My go-to design uses 2x4 posts and chicken wire, costing less than $15 total. The key?
Sturdy anchoring and spacing that matches your plants’ growth habits. Tomato cages? Overrated. A DIY trellis gives you control over height, width, and even shape (A-frame, teepee, or grid—your call).
By the end of the season, you’ll watch pounds of produce climb instead of sprawl, saving space for other crops. The best part? No more digging through tangled vines at harvest time.
I’ll show you how to build one in under an hour—no power tools required—plus how to adapt it for everything from peas to passionflowers.
Works in any garden size, from balcony pots to backyard plots. Here’s how to get started without breaking the bank—or your back.
📚 In This Guide
- What you need
- Instructions
- Tips and common mistakes
- Wrapping up and next steps
What you need
- ● Wood (2x4s or 4x4s): 4–6 pieces (8–10 feet long each, depending on trellis height). Tip: Pressure-treated wood lasts longer!
- ● Wood screws or deck screws: 1–2 lbs (2.5–3 inches long). Galvanized screws resist rust.
- ● Lattice panels or chicken wire: 1–2 panels (4x8 feet). For extra support, opt for 1/2-inch hardware cloth.
- ● Post anchors or concrete: 4–6 bags (for securing vertical posts). Pro tip: Use T-posts if you want a no-dig option!
- ○ Wood glue (optional): For extra reinforcement at joints.
- ● Drill/driver with screw bits
- ● Measuring tape
- ● Level (to keep your trellis straight!)
- ● Hacksaw or circular saw (if cutting wood on-site)
- ● Staple gun (for attaching lattice/chicken wire)
- ● Stain or paint (to protect wood and match your garden aesthetic)
- ● Galvanized washers (for extra screw grip)
- ● Pre-cut lattice strips (if you prefer a DIY lattice look)
- ● Cinder blocks (for lightweight post support)
Step-by-Step instructions for building a budget-friendly trellis
Here’s how I create sturdy, low-cost trellises that last—no fancy tools or expensive materials needed.
🪴 Step 1: Gather Basic Materials and Tools
For a 4-foot tall trellis supporting climbing plants like beans, cucumbers, or morning glories, you’ll need two 4-foot wooden stakes (or sturdy bamboo poles), 4-foot long wooden lattice strips (or even chicken wire), and twine or zip ties. I use 2x4s for stakes—they’re cheap, straight, and strong enough to handle vining plants. Skip the fancy hardware store finds; check your local reuse center for free or low-cost wood scraps.
Grab a hacksaw or handsaw (or borrow one), a hammer or mallet, and a measuring tape. If you’re using lattice, cut it to 3-foot lengths—this gives you room for plants to climb while keeping the structure lightweight. For chicken wire, just bend it into a diamond pattern and secure it between the stakes. The key here is simplicity: the fewer pieces, the easier (and cheaper) it is to assemble.
✂️ Step 2: Assemble the Frame
Drive the two 4-foot stakes into the ground 12-18 inches deep, spacing them 3 feet apart. The deeper they go, the more stable your trellis will be—especially in windy conditions. Use a hammer or mallet to tap them in firmly, then check for plumb (vertical) by holding a level against them or using a string with a weight. If one leans, dig it out slightly and adjust.
Now, attach your lattice or wire between the stakes. If using lattice, place it 6 inches from the top of the stakes and secure it with zip ties or twine every 12 inches down the length. For chicken wire, bend it into a diamond shape (like a window screen) and twist the ends tightly around the stakes. The goal is to create a grid-like structure—this gives plants something to grip and climb. Real talk: if your lattice feels wobbly, add a third stake in the middle for extra support.
🌿 Step 3: Reinforce and Customize for Your Plants
For heavy climbers like cucumbers or squash, add horizontal supports every 12 inches—this prevents the lattice from sagging under weight. Use more twine or zip ties to secure additional lattice strips or even old garden stakes as crossbars. If you’re growing lightweight vines like morning glories or beans, a single lattice strip or wire diamond is plenty. The rule here: the more your plant weighs, the more support it needs.
Pro tip: If you’re building multiple trellises, connect them with twine or wire at the top to create a tunnel trellis—this works great for cucumbers or pole beans in long garden beds. Just tie the tops of adjacent trellises together and let the plants grow over the top. You’ll save space and create a lush, shaded canopy in no time.
💧 Step 4: Plant and Train Your Climbers
Once your trellis is up, plant your climbing plants 6-12 inches away from the base—this gives them room to spread before they start climbing. For beans or peas, gently weave the vines through the lattice as they grow. For cucumbers or squash, use soft plant ties (old fabric strips or even old T-shirts cut into strips) to guide the main stems upward. Never tie vines too tightly; you want to encourage growth, not strangle it.
Water deeply after planting, and watch for new growth toward the trellis—that’s your cue to start training. I check my trellises every 3-4 days and gently adjust vines as needed. The first few weeks are critical: if a vine misses the lattice, it’ll flop and struggle to recover. A little daily attention now means stronger plants and bigger yields later.
☀️ Step 5: Maintain and Repurpose
Throughout the growing season, check your trellis weekly for loose ties or sagging lattice. If you notice vines slipping, secure them with new twine or ties—this keeps everything stable and prevents breakage. At the end of the season, remove spent plants but leave the trellis in place. I reuse mine year after year; the wood just gets stronger with age. If a stake starts to lean, dig it up, trim off the bottom 6 inches, and drive it back in—it’ll last even longer.
Here’s the thing—this trellis isn’t just for one season. Next year, try training tomatoes or even growing flowers like clematis or sweet peas. The same structure works for almost any climbing plant, and the cost? Under $10 if you repurpose materials. That’s the magic of a good trellis: it’s versatile, durable, and stupidly cheap to build.
Tips & tricks for building a sturdy, budget-friendly trellis
A few strategic choices can turn your basic trellis into a garden workhorse that lasts for years. Here's what I've learned after building dozens of these over the seasons.
Stake Placement Matters: When driving your 4-foot stakes 12-18 inches deep in Step 2, focus on creating a stable base rather than just depth. I've found that adding a third stake in the middle for taller trellises (over 5 feet) creates a triangular support system that prevents leaning—especially important if you're growing heavy vines like cucumbers or squash. The 3-foot spacing between stakes is perfect for most garden beds, but if you're working with a narrow row, reduce this to 2 feet for extra stability. Check for plumb using a string with a weight—this simple trick ensures your trellis won't lean over time.
Material Selection Savings: Don't overlook bamboo poles as an alternative to wooden stakes—they're naturally straight, lightweight, and often free if you harvest them from your own yard or local parks. For lattice, check construction sites for discarded wooden pallets; the slats make excellent trellis material when cut to 3-foot lengths. I've also used old window screens or plastic mesh fencing in place of chicken wire—they're just as effective and often cost nothing. The key is to match your material to the plant: heavier climbers need sturdier supports, while lightweight vines like morning glories can handle almost anything.
Training Technique: In Step 4, when training your vines, remember that gentle guidance is better than force. I use old T-shirt strips instead of plastic ties because they stretch as the plant grows, preventing damage to tender stems. For cucumbers and squash, I weave the main vine through the lattice every 6-12 inches to encourage multiple side shoots. The first 3-4 days after planting are critical—this is when vines decide whether to climb or sprawl. A quick daily check prevents wasted effort later when vines flop over.
Long-Term Maintenance: The weekly check mentioned in Step 5 is non-negotiable for heavy producers. I've seen trellises collapse under the weight of cucumbers when ties loosen over time. Store your zip ties or twine in a small container near your garden so you can make quick adjustments. At season's end, don't discard your trellis—simply remove spent plants and store it vertically against a fence or wall. This preserves the structure and makes next year's assembly a breeze. The wood actually becomes stronger with age as it seasons naturally.
Pro Tips for Build A Cheap Trellis
- A few strategic choices can turn your basic trellis into a garden workhorse that lasts for years.
- Stake Placement Matters: When driving your 4-foot stakes 12-18 inches deep in Step 2, focus on creating a stable base rather than just depth.
- Material Selection Savings: Don't overlook bamboo poles as an alternative to wooden stakes—they're naturally straight, lightweight, and often free if you harvest them from your own yard or local parks.
Frequently asked questions
Got questions about building a budget-friendly trellis? You’re not alone! Here are answers to the most common concerns—so you can get growing without the guesswork.
What’s the cheapest material I can use for a trellis?
Stick to bamboo stakes, wooden pallets, or scrap lumber—all cost-effective and sturdy. For extra savings, repurpose old fences, wire mesh, or even PVC pipes. Just ensure materials are treated (if wood) to prevent rot. Pro tip: Check local hardware stores for "scrap" bins or "giveaway" sections!
How long does it take to build a simple trellis?
A basic 4x4-foot trellis takes 30–60 minutes if you’ve pre-cut materials. More complex designs (like A-frames or spiral trellises) may take 1–2 hours. Plan ahead: measuring twice and cutting once saves time (and frustration!). Pro tip: Assemble on a sunny day—tools work better when your hands aren’t stiff!
Can I build a trellis without power tools?
Use a hand saw, drill (battery-powered), or even a sturdy hammer and nails. For wire trellises, twist-tie or zip ties work great. Just pre-drill holes to avoid splitting wood. Pro tip: A ratchet strap helps hold pieces in place while you work.
Will a cheap trellis hold up in wind or rain?
Yes, if built right! Use galvanized hardware, sturdy stakes (at least 12" deep), and a wide base. For extra stability, tie plants loosely (tight ties snap in storms). Avoid flimsy materials like untreated wood or thin wire—they’ll warp or rust. Pro tip: Angle supports slightly inward for wind resistance!
What plants need a trellis, and when should I install it?
Great for vining plants like cucumbers, beans, peas, or morning glories. Install trellises early—as soon as seedlings sprout (or 2–3 weeks before planting). For perennials (e.g., clematis or grapes), build in late winter or early spring so roots establish before climbing. Pro tip: Train plants upward gently to avoid breaking stems!
What if my trellis leans or collapses?
Check for loose stakes, weak joints, or uneven weight distribution. Reinforce with extra ties or diagonal braces. If wood warps, replace affected pieces—don’t prop it up with duct tape! Pro tip: Bury stakes deeper in windy areas for better grip.
Wrapping up and next steps
Building a cheap trellis doesn’t have to be complicated—with a little creativity and repurposed materials, you’ve got a sturdy, budget-friendly frame to elevate your climbing plants! 🌱 Whether you used bamboo, PVC pipes, or scrap wood, your new trellis will give vines the support they need while keeping costs low. Now that you’ve got the basics down, it’s time to get growing!
Ready to take the next step? Try experimenting with different plant varieties—like cucumbers, beans, or morning glories—to see what thrives best on your DIY trellis. Happy gardening! 🌿