
Planting
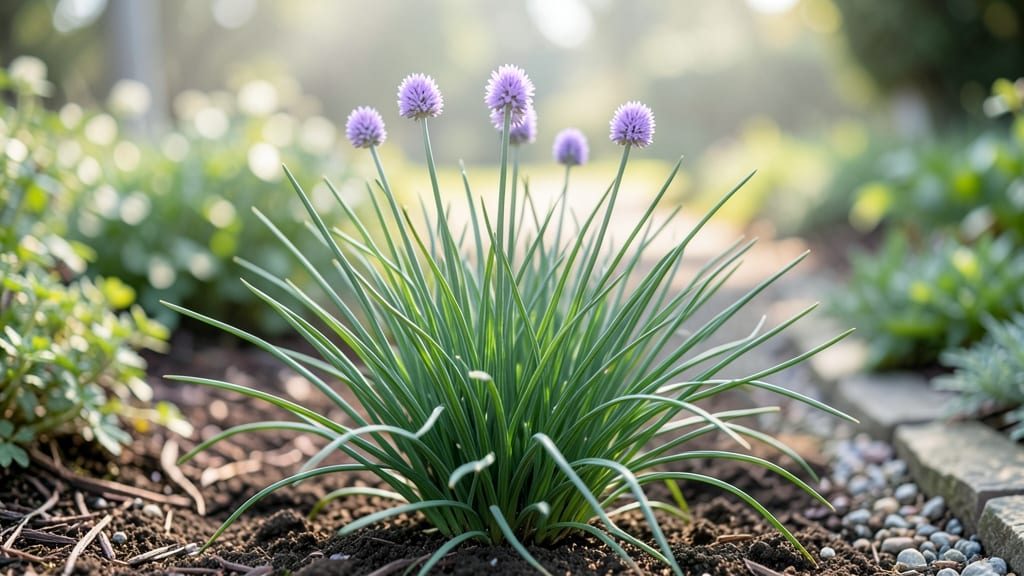
How to care for the chives plant outdoors is easier than you think—these hardy perennials thrive with almost no fuss. 🌱 I’ve grown them for years, and they’ve never failed me, even through harsh winters or forgetful watering. The secret lies in their simple needs: good soil, sunlight, and occasional trimming. You’ll need well-draining soil, a spot with full sun to partial shade, and consistent moisture—though they tolerate drought better than most herbs. Chives spread slowly, so give them about 6 inches of space between plants. Once established, they’ll return every spring, producing fresh green shoots you can snip all season. The payoff? Fresh chives for cooking, pest-repelling blooms, and a plant that keeps growing with minimal effort. Harvest leaves as needed, and they’ll keep coming back stronger. Even in winter, a little mulch keeps them alive for next year’s harvest. Mistakes to avoid: overwatering, letting them go dormant in summer heat, or crowding them too closely. With just a little attention, your chives will reward you with years of easy, flavorful growth.
📚 In This Guide
- What you need
- Instructions
- Tips and common mistakes
- Wrapping up and next steps
What you need
- ● Chive plants or seeds: Start with Allium schoenoprasum (either nursery-grown plants or organic seeds). For seeds, plant 6-8 per spot (they’re slow to germinate). For plants, 3-4 per pot or garden bed works well.
- ● Well-draining soil: Mix 1 part compost with 2 parts garden soil (or potting mix for containers). Chives hate soggy roots!
- ● Sunny spot: Choose a location with at least 4-6 hours of direct sunlight daily (partial shade tolerates but may reduce yield).
- ○ Containers (optional but handy): Pot size: 6–8 inches deep (for 1-2 plants) or larger for multiple clumps.
- ● Material: Terracotta or fabric pots (prevents root rot; ensure drainage holes!)
- ● Watering can or hose with a gentle spray nozzle: Chives need 1 inch of water per week (more in extreme heat).
- ○ Mulch (optional but recommended): Use 2–3 inches of straw, shredded leaves, or pine needles to retain moisture and suppress weeds.
- ● Pruning shears or clean scissors: For harvesting and trimming (sterilize with rubbing alcohol between cuts!).
- ● Balanced fertilizer (5-10-5 or 10-10-10): Apply once in early spring (follow package rates). Organic options like fish emulsion or compost tea work too!
- ● Epsom salt: A tablespoon per gallon of water (monthly in spring/summer) boosts magnesium for lush growth.
- ● Row covers or netting: Protects from pests like aphids or deer (especially useful in early spring or fall).
- ● Garden journal: Track planting dates, watering schedules, and harvests to refine your routine!
Tips & tricks for perfect chive plant care outdoors
Once you’ve planted your chives, these simple tricks will help them thrive with minimal effort—and keep them producing those delicious green stems for years.
Sunlight Strategy: If your chives aren’t getting the full 6 hours of sunlight they need, don’t panic. They’ll tolerate partial shade, but their stems will be thinner and less flavorful. I’ve seen chives grow beautifully in morning sun with afternoon shade—just avoid deep shade where they’ll stretch and weaken. A south-facing window or balcony works great for container chives too.
Soil Test Hack: That 10-15 minute drainage test in Step 1 is crucial—poor drainage is the #1 reason chives fail. If your soil drains too slowly, mix in perlite or coarse sand instead of just compost. I’ve even used crushed gravel at the bottom of pots for better drainage. The goal is to mimic their natural habitat where water flows away easily.
Watering Wisdom: The "1 inch per week" rule is perfect for most climates, but adjust based on your soil type. Sandy soil dries faster—check moisture every 4-5 days. Clay soil holds moisture longer—wait until the top 2 inches are dry. And remember: watering at the base prevents those pesky fungal issues that make leaves turn yellow and mushy.
Harvesting Secret: When you snip those stems just above a set of leaves, you’re not just getting fresh chives—you’re encouraging bushier growth. I always harvest in the morning when stems are most flavorful. And if you see purple flowers starting to form, snip them off immediately—they’ll make your chives go to seed instead of producing more leaves.
Pro Tips for Care For Chives Plant Outdoors
- Once you’ve planted your chives, these simple tricks will help them thrive with minimal effort—and keep them producin...
- Sunlight Strategy: If your chives aren’t getting the full 6 hours of sunlight they need, don’t panic. They’ll tolerat...
- Soil Test Hack: That 10-15 minute drainage test in Step 1 is crucial—poor drainage is the #1 reason chives fail. If y...
Frequently asked questions
about growing chives outdoors—because even the easiest plants have their quirks! Here are answers to the most common questions to keep your chives thriving.Can chives survive winter outdoors?
Yes! Chives are perennial hardy in USDA zones 3–9. They’ll die back in cold snaps but regrow in spring. For extra protection, mulch with straw or leaves in late fall to shield roots from freezing. No fuss—just resilience!
How often should I harvest chives?
Harvest chives every 2–3 weeks by snipping stems just above the base with clean scissors. This encourages bushier growth. Avoid cutting more than one-third of the plant at once—think "less is more" for long-term harvests!
Why are my chives turning yellow or wilted?
Yellow leaves often signal overwatering or poor drainage. Let soil dry slightly between waterings, and ensure pots/containers have drainage holes. Wilting can also mean underwatering—chives prefer consistently moist (not soggy) soil.
Can I grow chives in containers or just in the ground?
Chives thrive in containers (6+ inches deep) with well-draining potting mix. Just ensure they get 6+ hours of sunlight daily. Containers also make it easy to move them indoors if frost threatens.
Are chives easy to regrow from scraps?
Yes! Toss leftover chive roots (with green shoots) into a glass of water—change the water every 2–3 days. Once roots grow (~1 inch), transplant to soil. It’s a zero-waste way to keep your kitchen garden stocked!
Do chives attract pests like aphids?
Chives are pest-resistant, but aphids might visit. Spray off with water or introduce ladybugs (natural predators). Avoid chemical sprays—they can harm beneficial insects. A quick rinse usually does the trick!
Wrapping up and next steps
Caring for chives outdoors is simpler than you think—just give them sunlight, well-draining soil, and a little patience, and they’ll reward you with flavorful, year-round greens!
Whether you’re a beginner or a seasoned gardener, these hardy plants thrive with minimal fuss, making them a perfect addition to any herb garden. 🌱
Now that you’re armed with the right tips and tricks, why not start your chive adventure today? Snip some fresh herbs for your next meal, share your progress with fellow gardeners, or even experiment with growing them in containers.
Happy planting—your kitchen (and taste buds) will thank you! 😊