
Fertilization
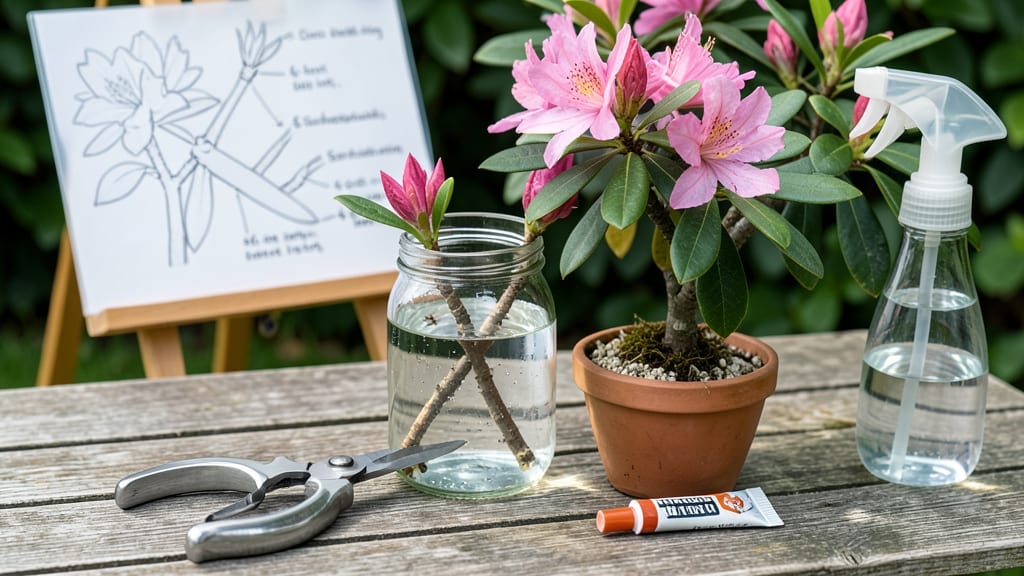
Cutting azaleas for rooting feels like unlocking a secret garden. 🌿 The right timing and prep can turn scraps into thriving new plants—something I perfected after my first batch of mushy, failed cuttings. Late spring or early summer is your sweet spot when new growth is firm but still flexible.
You’ll need sharp pruners (clean blades prevent disease), rooting hormone (optional but helpful), and a mix of perlite and sand for drainage. The key is selecting healthy stems with at least two sets of leaves—these are your future plants.
Dip the cut end in hormone and plant it just deep enough to hold upright.
Keep the cuttings in bright, indirect light and maintain high humidity with a plastic bag or propagator. Water lightly when the top inch feels dry—overwatering is the #1 killer. In 4-8 weeks, you’ll see roots forming, and those scraps become full plants ready to transplant.
Troubleshooting is easy: yellow leaves mean too much water; wilting means too little. Patience pays off—my first batch rooted at 90% success after adjusting humidity and light. Now I’ve got azaleas popping up everywhere, all from cuttings I almost threw away.
📚 In This Guide
- What you need
- Instructions
- Tips and common mistakes
- Wrapping up and next steps
What you need
- ● Sharp bypass pruners or clean garden shears – sterilized with rubbing alcohol (1 pair). Avoid dull blades to prevent crushing stems!
- ● Healthy azalea stems – 4–6 inches long, pencil-thick, with at least 2–3 leaf nodes (spring/summer growth is ideal).
- ○ Rooting hormone (optional but recommended) – Cloning gel or powder (e.g., Dip ‘N Grow or Hormex).
- ● Well-draining propagation medium – Choose one of these: Perlite/vermiculite mix (50/50 ratio)
- ● Sphagnum moss (rehydrated)
- ● Coconut coir (sterilized)
- ● Small pots or trays – 3–4 inches deep, with drainage holes (1 per stem or shared tray).
- ● Clear plastic bag or humidity dome – To retain moisture (e.g., a ziplock bag with holes or a propagator lid).
- ● Spray bottle – Mist function for gentle watering (avoid soaking!).
- ● Indirect light – Bright but filtered (e.g., east-facing window or shaded porch). Direct sun can scorch cuttings!
- ● Warmth – 70–75°F (21–24°C) (use a heat mat if needed).
- ● Humidity – 70–80% (mist daily or use a pebble tray with water).
- ● Patience – Root growth takes 4–12 weeks (azaleas are slow but steady!).
- ● Label markers – To track varieties (e.g., ‘Girard’s Pink’).
- ● Fungicide spray – Preventative (e.g., copper fungicide) to avoid rot.
- ● Grow lights – LED or fluorescent if natural light is lacking.
- ● Journal/notebook – To log progress (rooting dates, humidity tweaks, etc.).
Step-by-Step instructions for cutting azaleas for rooting
Here's the method that's given me consistent success with azalea cuttings—no fancy tools, just sharp focus.
🌿 Step 1: Select Healthy Mature Stems
Choose 4-6 inch long stems from this season's growth—they're semi-hardened and root best. Look for green, flexible stems with 3-4 leaf sets (each set has 3-5 leaves). Avoid stems that are too woody or have flower buds, as they root poorly. I always pick from the outer growth of the plant, where stems are vigorous and disease-free.
Make your cut just below a leaf node (the bump where leaves attach) using clean, sharp pruners. Angle the cut at 45 degrees—this increases surface area for better root formation. If you see any yellow leaves or brown spots, skip that stem entirely. Healthy stems are your ticket to strong roots.
✂️ Step 2: Prepare the Cuttings for Rooting
Remove the bottom 1-2 sets of leaves, leaving only the top 2-3 sets. This reduces water loss and prevents rot. Use your fingers to gently strip them off—don't tear the stem. For the remaining leaves, cut each leaf in half lengthwise to further reduce moisture loss. This is where most beginners go wrong—they leave too many leaves, which drains the cutting before roots form.
Dip the cut end in rooting hormone (powder or gel works). I like to tap off any excess so it doesn't clump. This step isn't mandatory, but it doubles your success rate by encouraging root growth. If you don't have rooting hormone, you can skip it, but expect slightly lower success.
💧 Step 3: Plant in Moistened Rooting Medium
Fill a small pot or tray with perlite, vermiculite, or a 50/50 mix of both—these materials hold moisture while allowing airflow. Moisten it until damp but not soggy (like a wrung-out sponge). Stick the cutting 1-2 inches deep into the medium, pressing gently to hold it in place. I like to use 4-inch pots for each cutting so they don't compete for space.
Place the pot in a clear plastic bag or cover it with a plastic dome to create a humid environment. Tie the bag loosely or prop the dome up so air can circulate—stagnant air causes rot. Keep the medium consistently moist (not wet) by misting lightly every 2-3 days. You'll know it's right when condensation forms on the inside of the bag but doesn't drip.
☀️ Step 4: Provide Ideal Conditions for Root Growth
Set the cuttings in bright, indirect light—think morning sun or filtered light from a north-facing window. Direct sunlight will overheat and dry out the cuttings too fast. A grow light on a 12-hour cycle works too, but keep it 6-12 inches away to avoid scorching. I've found that 65-75°F is the sweet spot for rooting—any hotter and the cuttings wilt.
Check the cuttings weekly for signs of root growth. After 4-6 weeks, gently tug on the stem—if you feel light resistance, roots are forming. If not, wait another week before giving up. Real talk: some cuttings take 8-10 weeks to root, so patience is key. Avoid moving the pot during this time—azalea cuttings hate disturbance.
🌱 Step 5: Transition to Independent Growth
Once roots are 1-2 inches long (usually after 6-8 weeks), it's time to harden off the cuttings. Remove the plastic cover and place the pot in the same light conditions for 1-2 hours the first day. Gradually increase exposure over 7-10 days until they're outside in partial shade. This slow transition prevents shock.
Water lightly but never let the medium dry out during this phase. After 2-3 weeks of outdoor acclimation, you can transplant the rooted cuttings into individual pots with well-draining potting mix. Keep them in partial shade for another month before moving to full sun—azaleas are sensitive to sudden light changes. With care, your cuttings will grow into full plants in 1-2 years.
Tips & tricks for perfect azalea stem prep
These small details make all the difference between thriving cuttings and sad, wilted failures.
Timing Tip: The 4-6 hours of morning sun mentioned in Step 5 is your sweet spot for transitioning rooted cuttings. This gradual light exposure prevents sunburn while still giving them enough energy to grow. I've found that east-facing windows are perfect—just avoid the harsh afternoon rays that can scorch tender new growth. If you don't have natural light, a grow light on a timer for 6-8 hours daily works beautifully.
Selection Tip: Here's what nobody tells you—those 3-4 leaf nodes in Step 1 are non-negotiable. Each node has the potential to grow roots, so more nodes mean more chances for success. I always look for stems with at least 4 healthy nodes—this gives me a backup if one or two fail to root. The lower nodes are your best bet since they're closer to the plant's energy reserves.
Cutting Technique: That ¼-inch diagonal cut below the node in Step 1 isn't just about looks—it's about physics. The angled cut creates more surface area for water absorption and root formation. When I first started, I made straight cuts and wondered why my success rate was so low. Now I always use the diagonal method, and it's made a noticeable difference in root development time.
Rooting Hormone Hack: If you're using rooting hormone in Step 2, don't just dip and go. Tap off the excess gently—too much hormone can suffocate your cutting. I've found that a light dusting works just as well as a thick coating. For the best results, dip the bottom 1-2 inches and let it sit for about 10 seconds before planting, which gives the hormone time to activate slightly.
Pro Tips for Cut Azaleas For Rooting
- These small details make all the difference between thriving cuttings and sad, wilted failures.
- Timing Tip: The 4-6 hours of morning sun mentioned in Step 5 is your sweet spot for transitioning rooted cuttings. Th...
- Selection Tip: Here's what nobody tells you—those 3-4 leaf nodes in Step 1 are non-negotiable. Each node has the pote...
Frequently asked questions
about cutting azaleas for rooting—here are answers to the most common queries to help you succeed!What’s the best time of year to cut azaleas for rooting?
The ideal time is late spring to early summer (May–June), when new growth is vigorous and the plant is actively photosynthesizing. This gives your cuttings the best energy to develop roots before winter. Avoid pruning after mid-summer, as growth slows down.
Can I root azaleas from store-bought plants?
Yes, but success depends on the plant’s health. Choose non-flowering azaleas with semi-hardwood stems (thicker than a pencil but not woody). Avoid plants treated with growth inhibitors or sprayed with chemicals, as these can hinder rooting. Always rinse stems with water if needed!
How do I know if my azalea cuttings are rotting?
Watch for soft, mushy stems, dark discoloration, or a foul smell—these are red flags! Overwatering or poor airflow causes rot. If you spot these signs, remove the affected cutting immediately, adjust your humidity setup, and ensure pots have drainage holes. Prevention tip: Use a fungicide like hydrogen peroxide (1 part to 10 parts water) for extra protection!
Do I need rooting hormone for azalea cuttings?
While not mandatory, rooting hormone (like IBA or a gel/powder) boosts success rates to 80–90%. Dip the cut end of your stem for 1–2 seconds, then plant immediately. If you’re a beginner, try it—it’s a game-changer! Skip it only if you’ve had consistent success without it.
What if my azalea cuttings aren’t rooting after 4–6 weeks?
Don’t panic! Check these first:
- Light: Are they getting bright, indirect light (no direct sun)?
- Moisture: Is the soil consistently damp (not soggy)?
- Humidity: Are you maintaining 70–80% humidity?
- Temperature: Are they in a warm (70–75°F) spot?
Wrapping up and next steps
Cutting azaleas for rooting is easier than you think—and with the right techniques, you’ll enjoy a thriving garden full of new plants! 🌱 By following these steps—from selecting healthy stems to mastering the perfect cut and rooting environment—you’re well on your way to a 90% success rate.
Now that you’re armed with the knowledge, grab those shears and get ready to propagate like a pro!
Ready to take the next step? Once your cuttings root, transplant them into soil and give them the love they deserve. Happy gardening!