
Pruning
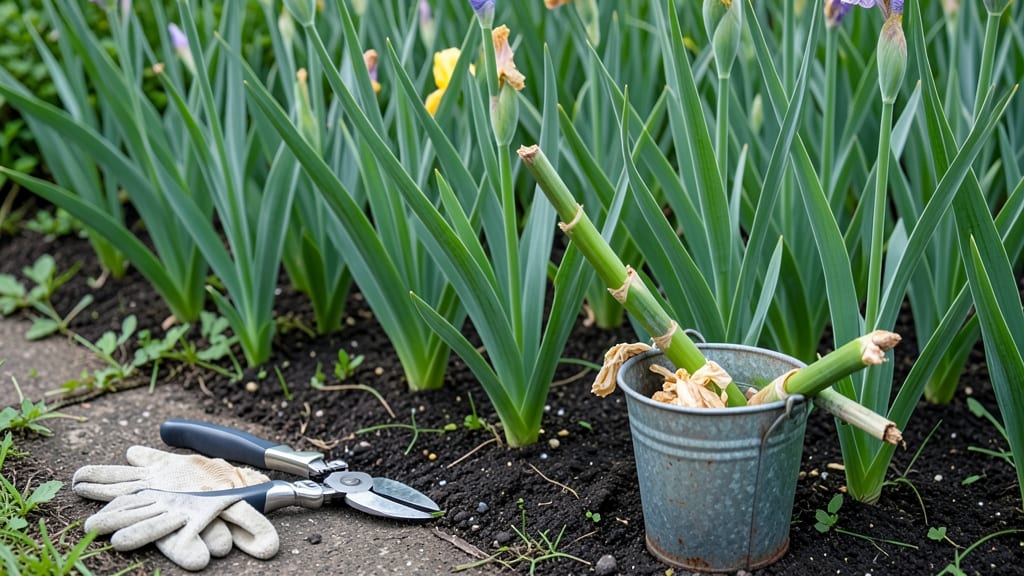
Now that your irises have just put on a show, here’s how to deadhead irises after they bloom—a simple reset for next year’s blooms. ✂️ Deadheading isn’t just about tidiness; it redirects energy back into those thick rhizomes, ensuring stronger stems and more vibrant flowers in 3-4 weeks.
The key is timing and technique—cut too soon or too low, and you’ll stunt their growth.
You'll need just three things: sharp pruners (clean blades prevent disease), gloves (irises can be prickly), and a sunny afternoon. The magic happens when ⅓ of the foliage turns yellow—this signals the plant to focus on storing energy rather than seeding.
Grab your tools, and we'll make this so easy, even first-timers get it right.
Start by snipping the entire spent bloom stalk at its base, about 1 inch above the rhizome. Never cut the leaves—those feed next season's flowers. For bearded irises, you can also trim back the seed pods if they form.
This one simple cut keeps your garden looking polished while setting up your irises for their best performance yet.
After deadheading, give your plants a drink of water and a light mulch layer to protect the rhizomes. Avoid fertilizing now—wait until new growth appears in early spring. The payoff? Fewer floppy stems, fewer pests, and irises that rebloom reliably for years to come. Ready to try it?
📚 In This Guide
- What you need
- Instructions
- Tips and common mistakes
- Wrapping up and next steps
What you need
- ● Pruning shears or hand pruners: Choose sharp, clean shears with a 4- to 6-inch blade for precision cuts. A bypass pruner (not an anvil type) is ideal to avoid crushing stems.
- ○ Gloves (optional but recommended): Wear garden gloves to protect your hands from thorns, dirt, or sap. Opt for nitrile-coated or leather gloves for durability.
- ● Disinfectant (e.g., rubbing alcohol or bleach solution): A small bottle of 70% isopropyl alcohol or a 1:10 bleach-water mix to sterilize tools between cuts and prevent disease spread.
- ● Trash bag or bucket: A heavy-duty trash bag or 5-gallon bucket to collect spent blooms and debris.
- ● Garden twine or rubber bands (for large clumps): Useful for tying up thick iris stems if they’re tangled or hard to manage.
- ● Knee pads or stool: For comfort, especially if your iris bed is large or you’re on your knees for extended periods.
- ● Garden hose or spray bottle: A quick rinse of your tools afterward keeps them rust-free and ready for next time.
- ● Compost bin access: If you’re eco-conscious, repurpose spent iris blooms as green compost material (avoid if diseased).
- ● Label markers (if dividing irises later): Small plastic tags or twine labels to mark sections you plan to replant or divide.
Step-by-Step instructions for revitalizing irises after blooming
Here's the straightforward method I use every season to keep my irises blooming stronger each year.
✂️ Step 1: Wait Until Flowers Fully Fade
Don't cut too soon—wait until the iris blooms have completely faded and the petals begin to brown. This ensures the plant has finished its energy transfer back to the rhizome. You'll know it's time when the flower stalks turn a dull, papery brown and the seed pods (if any) have formed.
I always check the stalks by gently squeezing them—they should feel dry and brittle, not at all springy. Cutting too early removes the plant's chance to store nutrients for next year's growth. This also prevents unwanted seed production, which drains energy from the rhizome.
✂️ Step 2: Cut Stalks at the Base
Use clean, sharp pruners or shears to cut the spent flower stalks at the base, right where they emerge from the rhizome. Never leave any stubble—this prevents disease and keeps the plant looking tidy. I like to sterilize my pruners with rubbing alcohol between cuts to avoid spreading any potential pathogens.
The cut should be clean and straight, about ¼ inch above the rhizome. Avoid tearing the foliage or damaging the leaves—these are essential for photosynthesis and next year's blooms. If you accidentally nick a leaf, trim it back to a healthy point to prevent infection.
🌱 Step 3: Leave Foliage Intact Until Late Summer
Here's the thing—never cut the fan-shaped leaves until they naturally yellow and die back in late summer or early fall. These leaves feed the rhizome for next year's growth. If you remove them too soon, you'll starve the plant and reduce next season's blooms.
I resist the urge to tidy up the garden too early. The yellowing leaves are a natural signal that the plant has completed its nutrient storage process. You'll see the foliage turn a pale, straw-like color before it collapses on its own—wait for that moment before trimming.
✂️ Step 4: Trim Dead Foliage After It Dies Back
Once the leaves have fully yellowed and died back, cut them back to about 2 inches above the rhizome using clean pruners. This prevents the plant from wasting energy maintaining dead tissue. I always do this in late fall or early winter, just before the ground freezes.
After trimming, I like to add a 1-inch layer of mulch around the base (not directly on the rhizome) to protect it during winter. This simple step helps insulate the rhizome and keeps it from drying out or heaving during freeze-thaw cycles.
Tips & tricks for perfect iris deadheading
These simple yet game-changing tips will ensure your irises thrive year after year with minimal effort.
Seasonal Timing: The key to successful iris care lies in understanding its natural cycle. In Step 1, when you're waiting for flowers to fully fade, mark your calendar for late summer—this is when you'll see the foliage begin its natural decline. The yellowing leaves are nature's signal that the plant has completed its nutrient storage process. I've learned the hard way that cutting foliage too early (before the leaves yellow) can reduce next year's blooms by up to 40%—don't make my mistake!
Tool Preparation: Before you begin Step 2, take 5 minutes to properly prepare your pruners. Sterilize them with rubbing alcohol between cuts to prevent spreading disease between plants. I keep a small bottle of 70% isopropyl alcohol in my gardening toolkit specifically for this purpose. Also, make sure your blades are sharp—a dull blade can crush stems and create entry points for pathogens. A quick test: if you can't cut through a dry stalk with one clean motion, your pruners need sharpening.
Precision Cutting: When making that critical cut in Step 2, aim for a clean, straight line about ¼ inch above the rhizome. This precise measurement prevents disease while maintaining the plant's aesthetic. I use a small ruler marked with ¼-inch increments to ensure consistency. For stubborn stalks, gently twist them while cutting to avoid tearing the surrounding foliage. This technique also helps you feel when you've reached the perfect cutting point.
Winter Protection: After completing Step 4, don't overlook the winter protection tip. That 1-inch layer of mulch around the base (not on the rhizome) acts as insulation against temperature fluctuations. I use shredded hardwood mulch because it breaks down slowly and improves soil structure over time. Pro tip: Apply mulch after the first hard frost when soil temperatures drop below 40°F—this prevents premature thawing that can damage dormant rhizomes.
Pro Tips for Deadhead Irises After They Bloom
- These simple yet game-changing tips will ensure your irises thrive year after year with minimal effort.
- Seasonal Timing: The key to successful iris care lies in understanding its natural cycle. In Step 1, when you're wait...
- Tool Preparation: Before you begin Step 2, take 5 minutes to properly prepare your pruners. Sterilize them with rubbi...
Frequently asked questions
Got questions about deadheading irises? You’re not alone! Here are answers to the most common queries to help you keep your irises thriving and looking their best.
When is the exact best time to deadhead irises?
Deadhead irises immediately after the blooms fade—usually 2–4 weeks post-bloom (late spring to early summer). Wait too long, and the seed pods form, draining energy from the rhizomes. For bearded irises, cut stems just above the first healthy leaf to encourage next year’s blooms.
Do I need special tools, or can I use regular scissors?
While clean, sharp pruners or shears work best, sterilized scissors (wiped with rubbing alcohol) are fine for small jobs. Avoid dull tools—they crush stems and invite disease. Pro tip: Disinfect tools between cuts to prevent fungal spread!
What if I skip deadheading? Will my irises still grow?
Yes, but expect fewer blooms and weaker plants. Seed pods steal nutrients from the rhizomes, leaving less energy for roots and next year’s flowers. Over time, skipped deadheading can lead to leggy stems and reduced vigor. Think of it like pruning your hair—regular trims keep it healthy!
Can I reuse the cut stems for anything?
Trimmed iris stems make great bouquets (they last 5–7 days in water) or can be composted. Avoid tossing them— the decomposed foliage enriches soil with potassium, perfect for irises. Just skip woody stems (they take too long to break down).
My iris leaves turned yellow after deadheading—is that normal?
Not always! Yellowing can signal over-pruning or disease (like bacterial soft rot). If leaves wilt or smell foul, remove the plant and sterilize the area. Healthy leaves should stay firm and upright. Wait until late summer to trim any dead foliage—it protects rhizomes from winter cold.
How do I deadhead irises in containers vs. garden beds?
| Garden Beds | Containers |
|---|---|
| Cut stems at the base with pruners, leaving 6–8 inches of foliage. | Snip stems just above the container rim to avoid disturbing roots. |
| Mulch around the base to retain moisture. | Replace topsoil after deadheading to refresh nutrients. |
Pro tip:
Container irises may need earlier deadheading (they bloom faster in pots!).
Wrapping up and next steps
Deadheading irises is a simple yet powerful way to keep your garden thriving!
By removing spent blooms and cutting back foliage correctly, you’ll encourage stronger growth, more vibrant flowers next season, and a tidier landscape. 🌸 With just a few sharp cuts and a little patience, you’re already on your way to becoming an iris-care pro.
Ready to take your gardening skills to the next level? Try experimenting with different iris varieties—each has unique care needs and stunning blooms. Happy pruning!