
How To
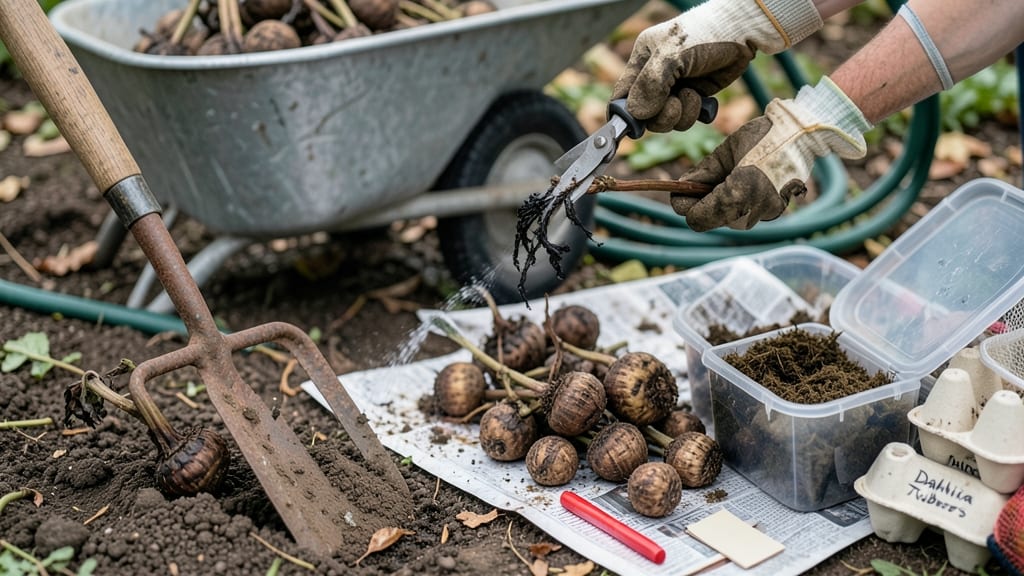
Frost is coming—don’t let your dahlias become winter casualties. 🌿 Digging up and storing tubers properly means vibrant blooms next spring instead of sad, shriveled remnants. I’ve saved my dahlias through three winters this way, and the secret isn’t complicated: timing, gentle handling, and the right storage conditions.
The key is acting before hard frost, usually in late fall when foliage yellows but before temperatures drop below 25°F. You’ll need a fork, gloves, and a dry, dark spot (like a basement or garage).
Cut back stems to 6 inches, then lift tubers carefully—don’t slice them, or they’ll rot. Shake off soil and let them dry for 24 hours before storing in a breathable container.
Stored correctly, your tubers will stay firm and ready to replant in spring. The trick is keeping them cool (35-40°F), dry, and not touching—moisture is the enemy.
Check them monthly for soft spots or mold, and you’ll wake up to thriving plants next season, not a sad pile of mush.
Regional tweaks matter: In Zone 5, dig by mid-October; in Zone 8, wait until November. And never store damp tubers—this is the #1 mistake that kills them. With this method, your dahlias will bounce back bigger and better every year.
📚 In This Guide
- What you need
- Instructions
- Tips and common mistakes
- Wrapping up and next steps
What you need
- ● Garden fork or trowel – A sturdy, heavy-duty fork (18-24") works best to avoid damaging tubers.
- ● Garden gloves – Thick, cut-resistant gloves (e.g., Fingerless Mechanix or Workrite) to protect hands from thorns and dirt.
- ● Buckets or containers – At least 2-3 large, breathable containers (5-gallon buckets with drainage holes work well) to hold tubers during curing.
- ● Newspaper or cardboard – Enough to layer (~10-15 sheets) for cushioning tubers during storage.
- ● Chopsticks or wooden skewers – 6-12 pieces (6-8" long) to prop tubers apart and prevent rot.
- ● Spray bottle with water – For lightly misting tubers before storage (avoid soaking!).
- ● Sharp knife or pruners – Sterilized tools to trim stems and remove foliage.
- ○ Disinfectant (optional but recommended) – A 1:10 bleach-water solution (1 part bleach to 9 parts water) to sanitize tools and containers.
- ● Dahlia tuber treatment – Fungicide (like Neem oil or copper fungicide) to prevent mold during storage.
- ● Humidity tray – A shallow tray with pebbles and water to maintain moisture levels in a storage bin.
- ● Storage box with lid – A plastic bin with ventilation holes (e.g., Sterns & Foster storage boxes) for long-term keeping.
- ● Thermometer/hygrometer – To monitor storage conditions (ideal: 35–45°F (2–7°C) and 50–70% humidity).
- ● Labels & markers – To tag tubers by variety (e.g., ‘Galaxy’ or ‘Café au Lait’) for next season.
Step-by-step instructions for digging up and storing dahlia tubers
Here's the foolproof method I use every fall to wake up vibrant dahlias year after year.
🌿 Step 1: Time the Digging Perfectly for Cold Climates
Wait until after your first hard frost when the foliage has blackened completely—this signals the plant has completed its energy transfer to the tubers. I dig mine in late October or early November, depending on your zone's first frost date. The key is to get them before the ground freezes solid.
Use a garden fork or trowel to gently loosen the soil around the base of the plant. Work slowly to avoid cutting the tubers—dahlias are delicate at this stage. You'll see clusters of swollen tubers connected to the stem; these are your winter storage pieces.
🌱 Step 2: Clean and Separate the Tubers
Once unearthed, brush off excess soil with your fingers or a soft brush—don't wash them yet. I like to leave a tiny bit of soil on the tubers as it helps prevent drying. Use clean shears to cut the stems back to about 1 inch above the largest tuber in each cluster.
Separate the tubers carefully, making sure each piece has at least one eye (the small bump where new growth will emerge). Discard any tubers that look shriveled or mushy—these won't survive storage. I place them on a clean towel to air-dry for 24 hours in a shaded, well-ventilated spot.
💧 Step 3: Cure and Prepare for Storage
After drying, I treat the tubers to a curing process that hardens their skin. Place them in a single layer on a wire rack or mesh tray and store in a dark, dry space at 55-60°F for 1-2 weeks. This mimics the natural drying period and prevents rot during storage.
During this time, check occasionally for any tubers that start to soften—these should be set aside for immediate planting or composting. Once fully cured, the tubers will feel firm and leathery to the touch, ready for long-term storage.
⏰ Step 4: Store with Proper Moisture and Temperature Control
After curing, I store the tubers in a cool, dark place with 40-50°F temperatures and 50-60% humidity. A basement, unheated garage, or root cellar works perfectly. I use paper bags or cardboard boxes filled with slightly damp (not wet) peat moss or vermiculite to maintain moisture levels.
Check the tubers monthly throughout winter—remove any that show signs of mold or rot immediately. If stored properly, they'll stay dormant until spring. I mark each bag with the variety name to avoid confusion when replanting.
☀️ Step 5: Prepare for Spring Planting
In early spring, about 4-6 weeks before your last frost date, remove the tubers from storage and inspect for any signs of sprouting. Soak them in lukewarm water for 1 hour to rehydrate before planting. This jumpstarts growth and ensures a head start on the season.
Plant the tubers in well-draining soil, about 4-6 inches deep, with the eyes facing upward. Water lightly and watch for new shoots to emerge within 2-3 weeks. With proper storage, you'll see the same vibrant blooms return year after year.
Tips & tricks for perfect dahlia tuber storage
Between us, the difference between tubers that thrive next season and ones that rot in storage often comes down to these simple but critical details.
Timing is Everything: Don't rush the 24-hour drying period after separation—this is when the tubers develop their natural protective skin. I've learned the hard way that skipping this step leads to soft spots that invite rot. Place them in a spot with good airflow but no direct sunlight, like a covered porch or garage. The key is gentle drying, not baking in the sun.
Curing Creates Resilience: That 1-2 week curing period at 55-60°F isn't just a suggestion—it's what transforms delicate tubers into storage survivors. Think of it like tanning your skin before winter. I use an old wire cooling rack in my basement where the temperature stays steady. If your space runs warmer, aim for the lower end of the range (closer to 55°F) to prevent premature softening.
Storage Environment Matters: The 40-50°F range isn't arbitrary—it's the sweet spot where tubers stay dormant without developing mold. I've had success using old shoeboxes lined with damp (not wet) paper towels instead of peat moss. The trick is to check the moisture weekly by squeezing a handful—it should feel like a wrung-out sponge, not a swamp. Too dry? Add a few drops of water. Too damp? Add more paper towels.
Spring Prep Shortcut: For tubers that show early sprouting in storage, you can give them a head start by soaking them in lukewarm water for just 30 minutes (instead of the full hour) about 2 weeks before your target planting date. This jumpstarts growth while still giving you time to harden off the plants before the final frost. Just be ready to plant them immediately after soaking.
Pro Tips for Dig Up And Store Dahlia Tubers
- Between us, the difference between tubers that thrive next season and ones that rot in storage often comes down to th...
- Timing is Everything: Don't rush the 24-hour drying period after separation—this is when the tubers develop their nat...
- Curing Creates Resilience: That 1-2 week curing period at 55-60°F isn't just a suggestion—it's what transforms delica...
Frequently asked questions
Got questions about digging up and storing dahlia tubers? You’re not alone! Here are some of the most common concerns—and their answers—to help you keep your dahlias thriving until spring.
When is the best time to dig up dahlia tubers?
Wait until after the first hard frost (when foliage turns black and dies back). Most gardeners dig in late fall or early winter, once nighttime temps drop below 20°F (-6°C). This timing prevents rot while ensuring tubers have hardened off for storage.
Can I store dahlia tubers in the ground over winter?
No—unless you live in Zone 8 or warmer with mild winters. In colder climates, tubers need protection from freezing temps. Dig them up and store indoors (or in a root cellar) to prevent rot or damage. Pro tip: Mulch heavily if you must leave them in the ground, but expect lower survival rates.
How do I clean and prepare tubers before storing?
After digging, gently rinse off soil with water (don’t soak). Trim stems to 2–3 inches and remove any damaged or soft tubers. Let them dry in a shady, well-ventilated spot for 1–2 days. Warning: Avoid direct sunlight or heat, which can cause them to dry out or rot.
What’s the best storage method for dahlia tubers?
Use a cool (32–40°F / 0–4°C), dark, and humid (60–70%) environment like a basement, garage, or paper bag with peat moss. Avoid plastic bags (they trap moisture). Check tubers monthly for mold or soft spots—discard any that look off.
My tubers are sprouting early—what went wrong?
This usually means too much light or warmth during storage. Move them to a darker, cooler spot immediately. If sprouts are tiny, they’ll likely survive; but if they’re long and leggy, trim them back to 2–3 inches before replanting in spring.
Can I store tubers in the fridge?
Not ideal! Fridge temps (below 40°F / 4°C) can cause chilling injury, while humidity levels fluctuate too much. A dedicated storage box with peat moss or vermiculite works far better. If you must use the fridge, opt for the crisp drawer (set to the warmest setting) as a last resort.
Wrapping up and next steps
Digging up and storing dahlia tubers might seem like a chore, but with the right steps, you’re setting the stage for a bigger, more vibrant garden next spring! 🌸 By following this guide, you’ll protect your tubers from winter’s chill and ensure they’re ready to burst back to life when the weather warms.
Now that you’re equipped with the knowledge, grab those gloves and get digging—your future blooms will thank you!
Ready to take it further? Plan your spring planting schedule or explore dahlia varieties to grow in your garden. Happy gardening! 🌱