
Pests and Diseases
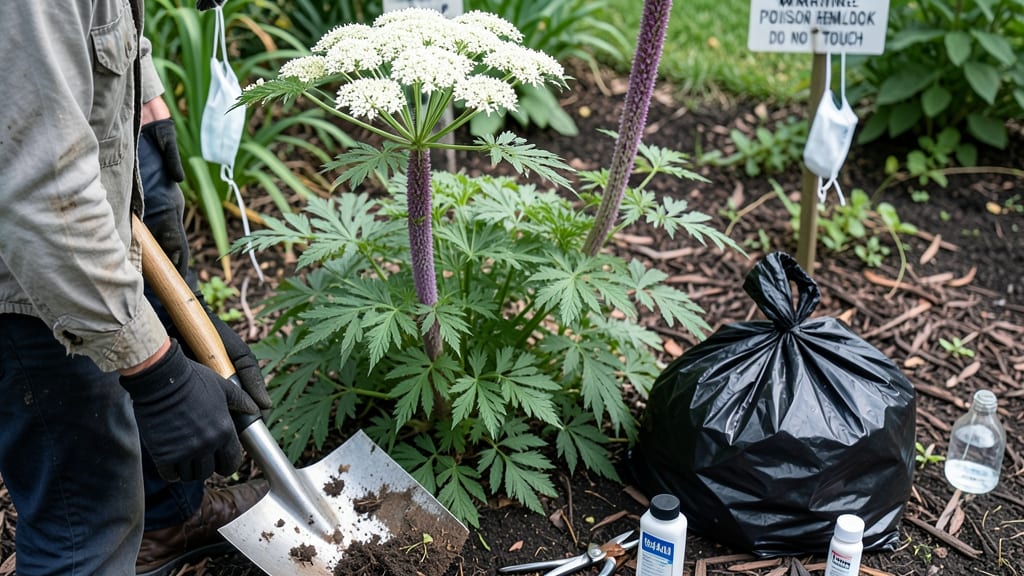
How to dispose of poison hemlock safely is critical—this plant looks like a giant carrot until it poisons you. 🌿 That's why removing it safely isn't just about pulling weeds; it's about protecting your family, pets, and the environment from one of nature's most dangerous plants.
First, confirm it's hemlock (purple-spotted stems, fern-like leaves, and a musty odor) before you touch it. Grab thick gloves, long sleeves, and a heavy-duty trash bag—this isn't a plant you compost or leave behind. Local laws may require special disposal, so check with your waste management before you start digging.
You'll cut the plant at ground level, then dig up the roots (even small pieces regrow). The goal is complete removal—no fragments left to sprout again. Double-bag everything and label it clearly, because even dead hemlock is toxic if handled improperly.
Afterward, wash your tools and clothing thoroughly with soap and water. The last thing you want is to accidentally spread seeds or sap to other parts of your yard. A little caution now prevents a much bigger problem later.
📚 In This Guide
- What you need
- Instructions
- Tips and common mistakes
- Wrapping up and next steps
What you need
- ● Heavy-duty gloves (nitrile or latex, waterproof, minimum 12-mil thickness)
- ● Long-sleeved shirt and pants (preferably thick fabric like denim or canvas)
- ● Safety goggles (ANSI-rated for debris protection)
- ● Face mask/respirator (N95 or higher, especially if burning or cutting)
- ● Sharp shovel or spade (for deep root extraction, 12-inch blade recommended)
- ● Pruning shears or loppers (for cutting stems, disinfect with rubbing alcohol after use)
- ● Heavy-duty trash bags (20–30-gallon capacity, double-bagged for extra security)
- ● Garden tarp or plastic sheeting (4’x6’ minimum, to contain debris)
- ● Vinegar or herbicide (for spot treatment; glyphosate-based if chemical control is chosen)
- ● Wheelbarrow or bucket (for transporting cuttings and soil)
- ● Root barrier cloth (to prevent regrowth if replanting nearby)
- ● Soil solarization kit (clear plastic sheeting + stakes for sun baking)
- ● Disposable coveralls (for full-body protection during heavy exposure)
- ● Hand sanitizer or disinfectant wipes (for cleanup)
- ● Labeling tape (to mark treated areas and warn others)
Step-by-Step instructions for safe poison hemlock removal
Here’s how to eliminate this toxic plant completely—without leaving roots behind to sprout again.
✂️ Step 1: Identify and Prepare the Work Area
Poison hemlock (Conium maculatum) looks like giant Queen Anne’s lace but has purple-spotted stems and a foul odor when crushed. Before you begin, wear long sleeves, gloves, and a mask—all parts of the plant are toxic, including the sap. Clear a 3-foot radius around the plant to avoid accidentally damaging nearby roots during removal.
Water the soil around the base thoroughly 24 hours before pulling. This loosens the roots and makes them easier to extract. If the ground is dry, the roots will snap when pulled, leaving fragments behind that can regrow. Test the soil’s moisture by pressing your finger 1 inch deep**—it should feel damp but not soggy.
🪴 Step 2: Dig Out the Entire Root System
Use a sharp shovel or garden fork to cut a 12-inch deep trench around the plant in a circle, about 6 inches from the stem. This severs lateral roots before you pull. Grip the base of the plant firmly and wiggle it side to side while pulling upward—resist the urge to yank straight up, which can break roots off underground.
Check the pulled root for any remaining fragments. If you spot even a 1-inch piece still in the soil, dig deeper or use a root saw to remove it completely. Poison hemlock roots can regenerate from tiny pieces, so thoroughness here prevents future regrowth. Place the entire plant in a sealed plastic bag immediately—never compost it.
💧 Step 3: Treat the Soil to Prevent Regrowth
After removal, apply a 2-inch layer of cardboard or newspaper over the exposed soil, followed by 3-4 inches of mulch (like wood chips or straw). This smothers any missed root fragments and blocks sunlight, which poison hemlock needs to resprout. Water the area lightly to settle the mulch in place.
For stubborn patches, spot-treat the soil with a vinegar-based herbicide (5% acetic acid or higher) or a commercial non-selective herbicide like glyphosate. Follow label instructions precisely—overapplying can harm nearby plants. Reapply mulch after treatment to maintain suppression.
☀️ Step 4: Monitor and Retreat if Needed
Inspect the removal site weekly for 3 months. Watch for new shoots with the plant’s distinctive fern-like leaves or purple-streaked stems. If you spot any regrowth, repeat the digging process immediately—these young plants are easier to remove before their roots establish.
If the area was heavily infested, consider planting competitive ground covers like clover or dense ornamental grasses. These crowd out weeds and poison hemlock by blocking sunlight and depleting soil resources. Avoid planting anything edible in the treated area for at least 6 months to ensure no residual toxins remain.
Tips & tricks for safe poison hemlock removal
These practical tips will help you eliminate this toxic plant completely while avoiding common pitfalls that lead to regrowth.
Identification Double-Check: In Step 1, when confirming poison hemlock, focus on the purple blotches on stems and the yellowish-green compound umbels—these are the most reliable markers. I’ve seen people mistake it for wild carrot because of the similar leaf shape, so take photos and compare with trusted sources. The foul odor when crushed is another key clue, but don’t rely on smell alone since some plants can have similar scents.
Cutting Technique: During Step 2, when cutting at the base, use a sharp shovel to make clean cuts 1-2 inches below ground level. This prevents root fragments from breaking off and sprouting later. I’ve learned the hard way that pulling instead of cutting leaves behind pieces that can regrow—always sever the root cleanly. After cutting, inspect the soil for any remaining root pieces and remove them immediately.
Smothering Success: For Step 3, when smothering the soil with plastic, ensure the edges are completely sealed to block all light and oxygen. I recommend using 12 sheets of thick black plastic for larger areas to guarantee full coverage. If you notice any gaps, secure them with rocks or soil edges. The 4-6 week timeline is critical—this gives the heat enough time to kill any dormant seeds or root fragments in the soil.
Monitoring Strategy: In Step 4, when monitoring for regrowth, keep a close eye on the area for 3-4 growing seasons. I’ve seen hemlock seeds remain dormant for years, so patience is key. Mark the area with stakes or flags to track any new sprouts. If you notice even a single shoot, repeat the cutting and smothering process immediately—don’t wait for it to grow larger.
Pro Tips for Dispose Of Poison Hemlock
- These practical tips will help you eliminate this toxic plant completely while avoiding common pitfalls that lead to regrowth.
- Identification Double-Check: In Step 1, when confirming poison hemlock, focus on the purple blotches on stems and the yellowish-green compound umbels—these are the most reliable markers.
- Cutting Technique: During Step 2, when cutting at the base, use a sharp shovel to make clean cuts 1-2 inches below ground level.
Frequently asked questions
about disposing of poison hemlock safely and effectively:Can I just pull poison hemlock out by hand?
While small plants can be hand-pulled, roots must be fully removed—even tiny fragments can regrow. Use gloves (poison hemlock sap can irritate skin) and dig deep to avoid leaving root pieces. For large patches, tools like a shovel or dandelion digger are better. Never compost—it can spread seeds or roots.
How long does it take for poison hemlock to die after cutting?
Cutting at the base (or using herbicide) kills the plant in 2–4 weeks, but regrowth may occur if roots aren’t fully destroyed. For faster results, repeat herbicide applications every 7–10 days until foliage yellows and dies. Monitor the area for new shoots for at least 6 months.
What if poison hemlock keeps coming back?
Regrowth usually means roots or seeds remain. Dig up the entire area (6+ inches deep) to remove hidden roots, or apply glyphosate directly to stumps. For stubborn cases, smother with cardboard + mulch for 3–6 months to block light. Test soil for seeds before replanting.
Are there natural alternatives to chemicals?
Yes! Try these non-toxic methods:
- Vinegar + dish soap: Mix 1 gallon vinegar, 1 cup dish soap, and spray on leaves (repeat weekly). Works best on small plants.
- Solarization: Cover the area with clear plastic for 4–6 weeks in hot sun to kill roots/seeds.
- Goats/sheep: Livestock will graze it down (but avoid ingesting other plants).
Note: Natural methods take longer and may require multiple treatments.
Is poison hemlock dangerous to pets or kids if I’m disposing of it?
Yes—extreme caution is critical! Wear gloves, long sleeves, and a mask to avoid skin/lung irritation. Store herbicides out of reach of children/pets, and wash hands thoroughly after handling. If ingestion occurs, call Poison Control (1-800-222-1222) immediately—this plant is deadly in all parts.
When is the best time of year to remove poison hemlock?
The ideal window is late spring to early summer (May–June) when plants are actively growing but before seeding. Fall (September–October) is also effective, as cooler temps reduce regrowth risks. Avoid dormant seasons (winter), as roots may not absorb treatments as effectively.
Wrapping up and next steps
Disposing of poison hemlock safely is all about preparation, caution, and persistence—every step matters!
By following the right methods, you protect your garden, pets, and family while preventing regrowth. You’ve got this! Now that you’re armed with the knowledge, take action today—start with a thorough inspection of your property and tackle those invasive plants before they spread further.
🌱 Next step: Gather your tools, put on protective gear, and begin removal with confidence. And remember—if the patch is large or you’re unsure, don’t hesitate to call a professional. Your safety (and your garden’s!) comes first.