
How To
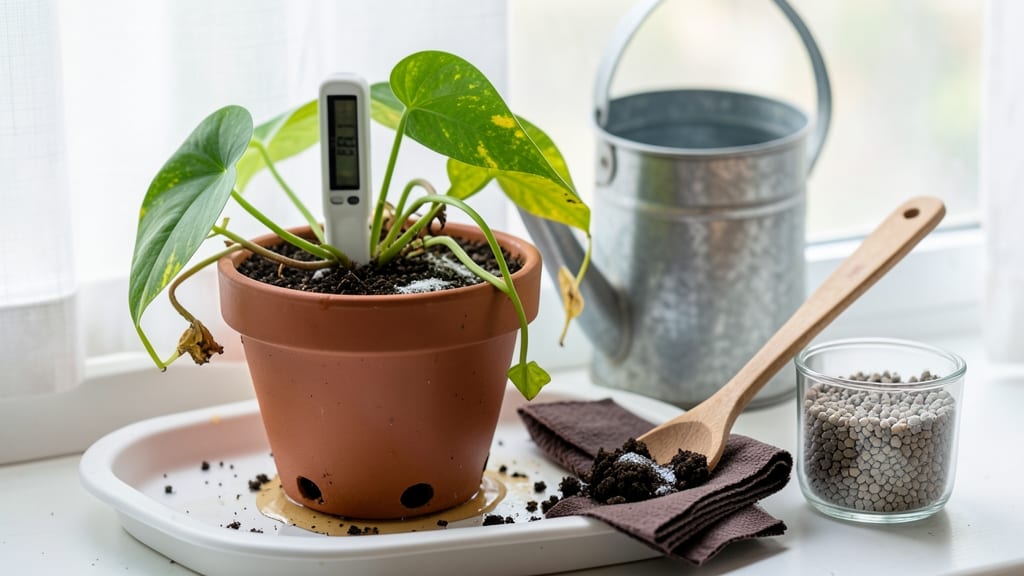
How to dry an overwatered plant—yellowing leaves and mushy stems don’t mean your plant is doomed. 🌱 Overwatering happens to every gardener—even the experienced ones—and this science-backed method brings plants back from the brink. The key isn't guesswork but understanding when roots suffocate and how to restore balance.
Start by removing the plant from its pot and gently inspecting the roots. Healthy roots are firm and white, while overwatered roots turn brown, mushy, and smell foul. Trim away the damaged parts, then repot in fresh, well-draining soil to give roots room to recover.
After repotting, withhold water completely for 3-5 days to let roots dry out. Then, water only when the top inch of soil feels dry—this prevents recurrence. Most plants show signs of recovery within 1-2 weeks of proper care.
This method works for houseplants, herbs, and even struggling garden beds. The secret is patience and consistency—your plant will bounce back if you give it the right conditions. Let's get those roots breathing again.
📚 In This Guide
- What you need
- Instructions
- Tips and common mistakes
- Wrapping up and next steps
What you need
- ● Well-draining potting mix: Replace the current mix with a fresh blend (e.g., cactus/succulent mix for drought-tolerant plants or a light, airy peat/perlite combo for others). Quantity: Enough to refill the pot (check package for ratios).
- ● Clean, breathable pot: If roots are rotting, upgrade to a pot with drainage holes (terracotta or plastic with holes). Size: Same or slightly larger diameter than the original.
- ● Pruning shears or sharp scissors: Sterilize with rubbing alcohol to trim dead/wilted leaves and roots. Tip: Avoid tearing—clean cuts heal faster!
- ● Rubbing alcohol (70% isopropyl) or hydrogen peroxide (3%): For sterilizing tools and cleaning roots.
- ○ Spray bottle with water: For gentle rehydration (once roots recover). Optional: Add a rooting hormone if propagating cuttings.
- ● New fertilizer (balanced or low-nitrogen): Wait 4–6 weeks before using—overwatered plants need time to recover first!
- ● Rooting hormone gel/powder: Speeds up recovery for severely damaged roots.
- ● Grow lights or sunny windowsill: If your plant needs extra light during recovery.
- ● Moisture meter: To avoid future overwatering—stickiness = soggy soil!
- ● Peat moss or coconut coir: For extra aeration when repotting.
Step-by-Step instructions for reviving overwatered plants
Here's the science-backed approach I use to rescue plants that have been drowned in water.
💧 Step 1: Stop Watering and Assess the Damage
First, halt all watering immediately—even if the soil feels dry at the surface. Overwatered plants can't tell you they've had enough, and continuing will suffocate their roots. Check the soil 2-3 inches down; if it smells sour or feels cold and clammy, you're dealing with root rot. Yellowing leaves and wilting despite moist soil are classic signs.
Gently tug on the plant at the base. If it slides out easily, the roots are mushy and rotting. If resistance remains, there's still hope—proceed to the next steps. Real talk: the sooner you act, the better the recovery odds. I've revived plants with 50% root loss using this method, but those with 75%+ rot usually don't make it.
🪴 Step 2: Trim Damaged Roots and Repot
Remove the plant from its pot and rinse away 20% of the soil from the root ball using lukewarm water. This exposes the roots without shocking the plant. With sterilized scissors, cut away any black, mushy, or slimy roots—healthy roots are firm and white. I like to work over a bucket to catch the debris and assess the damage.
Repot into a clean container with fresh, sterile potting mix (never reuse old soil—it's likely contaminated). Choose a pot 1-2 inches smaller than the original to reduce soil volume and prevent future overwatering. The new mix should be well-draining; I add 20% perlite or orchid bark to improve aeration. Tap the pot gently to settle the soil without compacting it.
☀️ Step 3: Adjust Light and Humidity Conditions
Place the revived plant in bright, indirect light for the first 7-10 days. Direct sunlight now will stress the plant further by increasing transpiration while its roots recover. If your space is dim, supplement with a grow light kept 6-12 inches away to avoid heat stress. Watch for crispy leaf edges—that's a sign the light is too intense.
Increase humidity around the plant by grouping it with other plants or placing the pot on a tray filled with 1 inch of pebbles and water. The evaporating moisture creates a microclimate that mimics the plant's natural environment. Avoid misting leaves directly—this can promote fungal growth on weakened foliage. I've seen dramatic recovery in 2-3 weeks under these conditions.
💧 Step 4: Implement a Strict Watering Schedule
Wait until the top 2-3 inches of soil feel completely dry to the touch before watering again. Stick your finger in—if it comes out clean, it's time. Water deeply but slowly, allowing the soil to absorb moisture evenly. Stop when water begins to drain from the bottom holes; soggy soil is the enemy. I use a watering can with a narrow spout to direct the flow to the soil surface, avoiding the leaves.
After watering, let the plant drain for 15-20 minutes to ensure excess water escapes. Empty the saucer immediately—root rot thrives in standing water. Over the next 4-6 weeks, reduce watering frequency by 30-50% compared to pre-overwatering levels. You'll notice new growth within 3-4 weeks if the roots have recovered.
✂️ Step 5: Prune and Fertilize for Recovery
Once the plant shows signs of new growth (tiny leaves at the stem tips), trim any remaining yellow or brown leaves with sterilized scissors. Pruning may seem counterintuitive, but it redirects the plant's energy toward root and new leaf production. Cut just above a leaf node or bud to encourage branching. I avoid pruning more than 30% of the foliage at once to prevent shock.
Wait 4-6 weeks before fertilizing—recovering roots can't handle nutrients yet. When you do fertilize, use a diluted, balanced liquid fertilizer (half-strength) to avoid burning the plant. I've found that a seaweed-based fertilizer with micronutrients speeds up recovery by strengthening cell walls. Monitor the plant closely for the first 8 weeks; any new wilting or yellowing means you're pushing it too hard.
Tips & tricks for perfect plant revival
Between us, saving an overwatered plant isn't just about following steps—it's about understanding what's really happening underground. Here's what nobody tells you about bringing your wilting friend back to life.
Root Assessment is Everything: When you're checking for root rot in Step 1, focus on the texture more than the color. Healthy roots should feel like firm, crisp celery stalks when you squeeze them gently. If they squish between your fingers like overcooked pasta, you're dealing with severe rot. I've seen plants with only 20% healthy roots still make a full recovery—it's not about how much you've lost, but how much you've got left to work with.
Sterilization Can't Be Overstated: In Step 2, when you're repotting with fresh soil, take an extra 5 minutes to sterilize your tools and container. A quick wipe-down with rubbing alcohol (70% or higher) prevents introducing new pathogens to your already-stressed plant. I learned this the hard way after repotting a rescued fern with contaminated scissors—it led to another round of rot. Trust me on this: clean tools mean the difference between recovery and relapse.
Light Balance is Critical: During those first 7-10 days in Step 3, if your space only has bright direct light options, create a makeshift shade screen using sheer white fabric or even a white bedsheet draped over a frame. This diffuses the intensity while still providing the bright light your plant needs. I've watched plants crisp up in just hours under harsh midday sun when they should have been thriving.
Watering Technique Matters: The 15-20 minute draining period in Step 4 isn't just about preventing root rot—it's about teaching your plant new water habits. After you've watered, gently lift the pot to check the weight. A properly drained pot should feel noticeably lighter. This weight check becomes your new watering guide, helping you develop an instinct for when your plant truly needs moisture versus when it's just being fussy.
Pro Tips for Dry An Overwatered Plant
- Between us, saving an overwatered plant isn't just about following steps—it's about understanding what's really happe...
- Root Assessment is Everything: When you're checking for root rot in Step 1, focus on the texture more than the color....
- Sterilization Can't Be Overstated: In Step 2, when you're repotting with fresh soil, take an extra 5 minutes to steri...
Frequently asked questions
Got questions about drying out an overwatered plant? You’re not alone—even experienced gardeners sometimes need a quick fix! Here are some of the most common concerns and straightforward answers to get your plant back on track.
How long does it take for an overwatered plant to dry out?
Most plants show improvement within 3–7 days of proper drying, but recovery depends on the plant type and damage severity. Monitor soil moisture daily—if it’s still soggy after 24 hours, let it dry longer. Patience is key!
Can I speed up the drying process?
Yes! Place the plant in a bright, indirect light spot (no direct sun) and use a fan on low to improve airflow. Remove any yellow or mushy leaves immediately—they trap moisture. Avoid repotting until the soil is fully dry.
What if my plant’s leaves are already mushy or black?
Don’t panic! Prune the damaged leaves with clean scissors to prevent rot. If the roots are mushy (gently squeeze a few—healthy roots spring back), trim them and replant in dry soil. Severe cases may need a root hormone to encourage regrowth.
Should I use paper towels or a hairdryer to dry the soil?
Avoid hairdryers!
They can overheat roots. Instead, wrap the pot in a paper towel and gently squeeze out excess water, or place it on a tray with dry, absorbent material (like coconut coir). Let it air-dry naturally.
How do I know when to stop drying and start watering again?
Stick your finger 1–2 inches into the soil. If it feels dry (like crumbled cookie dough), it’s time to water—lightly. Overwatering is a habit, so adjust your watering schedule based on your plant’s needs (e.g., succulents need less than ferns!).
Wrapping up and next steps
Overwatering can feel like a setback, but with the right steps, your plant can bounce back stronger than ever! 🌱 Remember, patience and proper care are key—trim damaged leaves, adjust your watering routine, and monitor progress.
Once your plant recovers, take this as a learning moment to refine your green thumb.
Ready to master plant care? Next, explore our guide on identifying plant stress signals to keep your garden thriving long-term! 🌿