
Planting
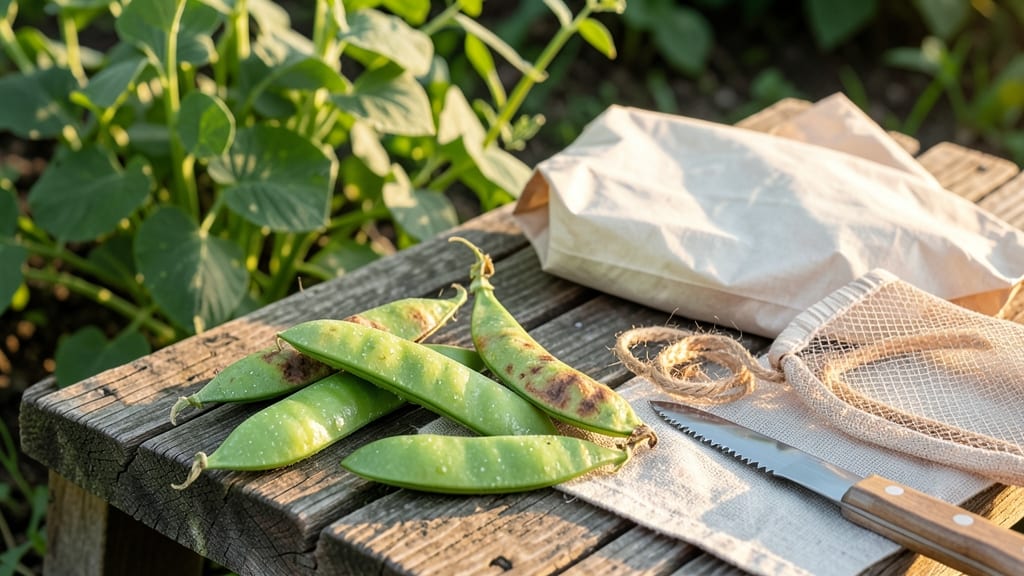
Your garden peas taste best when dried fresh from the vine. ✨ The moment you pick them at peak ripeness—when pods snap easily but seeds are plump—you’re one step closer to a pantry full of flavor.
Proper drying locks in that fresh-picked sweetness for months, but rush it and you’ll end up with moldy, shriveled peas that lose all their goodness.
Start by shelling pods immediately after harvest—don’t let them sit, even for a day. Spread peas in a single layer on clean, dry mesh screens or parchment-lined trays in a warm, well-ventilated spot (like a covered porch or sunny windowsill).
Avoid direct sunlight, which can cook them too fast and turn them bitter. If humidity’s high, switch to a food dehydrator at 125°F for 3-4 hours—this guarantees even drying without risking spoilage.
Once completely dry, peas should rattle when shaken and feel lightweight to the touch. Store them in airtight glass jars or vacuum-sealed bags in a cool, dark place—they’ll keep for up to a year if moisture stays out.
The reward? Peas that rehydrate perfectly for soups, stews, or side dishes, tasting like summer even in winter.
Pro tip: Label jars with the harvest date—older peas lose their snap over time. And if you’re drying large batches, split them into smaller containers to prevent condensation buildup.
The key is patience: dried peas need 2-3 weeks of slow drying for best results, but it’s worth it for that farm-fresh taste all year long.
📚 In This Guide
- What you need
- Instructions
- Tips and common mistakes
- Wrapping up and next steps
What you need
- ● Freshly harvested peas: 1–2 lbs (or more, depending on your needs). Choose dry, mature pods with firm peas inside—avoid any that are soft, moldy, or discolored! 🌿
- ● Clean, breathable containers: Paper bags (brown lunch bags or coffee filters work great!)
- ● Mesh bags or breathable fabric sacks (for better airflow)
- ● Cardboard boxes with holes punched in the sides (DIY-friendly!)
- ● Drying rack or screen: A sturdy, elevated surface (like a wire rack, clean wooden frame, or even a mesh screen) to allow airflow underneath.
- ● Sharp knife or pruning shears: For trimming pea pods cleanly before drying.
- ○ Tongs or gloves: Optional but helpful for handling pods without bruising them.
- ● Food-safe storage containers: Airtight jars, Mylar bags, or vacuum-sealed bags for long-term storage (once fully dried).
- ○ Humidity indicator (optional but helpful): A small device or even a home humidity monitor to check moisture levels (ideal range: <30% humidity).
- ● Dry, warm, and well-ventilated space: A sunny porch, garage with open windows, or a dehydrator set to 120–140°F (49–60°C).
- ● Consistent weather (if drying outdoors): Aim for 3–5 days of dry, sunny weather with temps between <70–90°F (21–32°C)
- ● Low-humidity area: Avoid damp basements or closed spaces—moisture is the enemy of proper drying! 💧
- ● Dehydrator with temperature control (for faster, more consistent drying).
- ● Food-grade silica gel packets (to absorb excess moisture in storage).
- ● Labeling tags (to track harvest dates and varieties).
- ● Fan or small ventilation system (to speed up airflow in humid climates).
Step-by-step instructions for drying fresh peas
Here’s how to preserve your garden’s bounty with minimal effort and maximum shelf life.
🌱 Step 1: Harvest Peas at Peak Ripeness
Pick peas when pods are fully swollen but still bright green—just before they start yellowing or wrinkling. Snap them off the vine with a sharp tug to avoid damaging the plant. I always harvest on a dry morning after the dew has evaporated; this prevents excess moisture from clinging to the pods.
Work quickly to avoid bruising. Spread the pods on a clean towel or paper towel to catch any stray peas that might pop free during handling. If you’re processing a large harvest, sort them immediately—discard any damaged or discolored pods, as they won’t dry evenly and may spoil the batch.
☀️ Step 2: Prepare for Drying
Choose a drying method based on your climate. For sun drying, select a spot with direct sunlight and low humidity (below 60%)—a covered porch, screened-in patio, or even a clean tarp strung between trees works. For indoor drying, use a dehydrator set to 125-135°F or an oven on its lowest setting with the door slightly ajar for airflow.
If sun drying, lay pods in a single layer on a clean, breathable surface like a wire rack or mesh screen. Avoid plastic or glass, which traps moisture. For dehydrator or oven drying, spread pods in a single layer on trays, ensuring they don’t touch. Stir or rotate them every 1-2 hours to promote even drying.
⏰ Step 3: Dry Until Completely Dry
Peas are fully dried when pods crisp to the touch and rattle when shaken. Sun drying typically takes 3-5 days, depending on weather. Check daily—overcast days or high humidity can extend drying time. If rain is forecast, move pods indoors to finish drying.
For dehydrator or oven drying, 2-4 hours is usually enough. Test for doneness by squeezing a pod—it should feel dry and papery, with no give. If any pods remain pliable, return them to the dryer for another 30-60 minutes. Once dry, let pods cool completely before storing to prevent condensation.
🪴 Step 4: Store Properly for Long-Term Use
Transfer dried peas to airtight containers like glass jars or food-grade plastic bags. Label with the date and variety—properly stored peas keep for up to 1 year in a cool, dark place (like a pantry) or 2+ years in the freezer for even longer shelf life.
Before storing, I like to crush the dried peas slightly with a rolling pin to release any trapped moisture. This extra step prevents clumping and extends freshness. Store in a dark, cool spot—light and heat accelerate spoilage. Check containers monthly for signs of moisture or pests, and re-seal if needed.
Tips & tricks for perfectly preserved peas
Preserving your garden's fresh peas doesn't have to be a gamble—these insider tips ensure your dried harvest stays vibrant and flavorful for months.
Harvest Timing: The morning after a dry night is ideal for harvesting—peas picked then have minimal surface moisture, which prevents mold during drying. If you must harvest later, work quickly and spread pods on a clean towel to absorb any dew. I’ve learned the hard way that even slight dampness can turn a good batch into a moldy mess.
Surface Selection: For sun drying, prioritize surfaces that allow airflow on all sides—wire racks or mesh screens are perfect. If using a tarp, choose one with holes for ventilation. In Step 2, I’ve seen plastic sheets trap moisture and create soggy pods, so avoid them at all costs. Even a slight breeze helps evaporate moisture faster.
Equipment Watch: When using an oven for drying, prop the door slightly open with a wooden spoon to allow moisture to escape. The 125-135°F dehydrator setting is perfect, but if you’re oven-drying, the lowest setting with airflow is key. I’ve ruined batches by forgetting to crack the door—condensation builds up and turns your dried peas into a mushy disappointment.
Storage Secret: Before sealing your dried peas in containers, give them a gentle crush with a rolling pin. This releases any hidden moisture trapped inside the pods, preventing clumping. I store mine in glass jars with a small packet of silica gel to absorb any lingering dampness—this keeps them crisp for up to a year.
Pro Tips for Dry Peas
- Preserving your garden's fresh peas doesn't have to be a gamble—these insider tips ensure your dried harvest stays vi...
- Harvest Timing: The morning after a dry night is ideal for harvesting—peas picked then have minimal surface moisture,...
- Surface Selection: For sun drying, prioritize surfaces that allow airflow on all sides—wire racks or mesh screens are...
Frequently asked questions
Got questions about drying peas? You’re not alone—here are some of the most common ones, answered for your peace of mind!
How long do peas take to dry completely?
Peas typically need 10–14 days to dry fully in ideal conditions (warm, dry, and well-ventilated). Check for readiness by squeezing a pod—if it’s hard and crunchy inside, it’s done! Humid weather may extend drying time, so adjust your method (e.g., switch to a dehydrator).
Can I speed up the drying process?
Use a food dehydrator (set to 125–135°F) for 4–6 hours, or spread peas on a baking sheet in a low oven (140–160°F) for 2–3 hours. For large batches, a well-ventilated attic or garage with fans can also help. Just avoid high heat—it can scorch the peas!
What if my peas start molding or getting bugs?
Mold or pests mean your drying environment is too damp or humid. Act fast: Remove affected peas immediately, increase airflow (open windows, use fans), and consider moving them to a dryer, oven, or sealed container with silica gel. For pests, freeze peas for 24 hours to kill insects before redrying.
How should I store dried peas long-term?
Once fully dry, store peas in airtight containers (glass jars or Mylar bags) with oxygen absorbers in a cool, dark place (like a pantry or root cellar). Properly stored, they’ll last 1–5 years! Label containers with the date to track freshness.
Can I dry peas straight from the pod, or do I need to shell them first?
You can dry peas in the pod (like snap peas) or shelled (like garden peas). For whole peas, shelling first speeds up drying and makes storage easier. If drying in pods, ensure they’re fully mature and dry—immature peas won’t store well. Hang pods in bundles or lay them flat to dry.
Wrapping up and next steps
Drying peas at home is a rewarding way to preserve nature’s bounty and enjoy their nutritious benefits year-round! 🌱 By following these simple steps—harvesting at peak ripeness, prepping thoroughly, and drying evenly—you’ll unlock a pantry staple that’s both cost-effective and delicious.
Whether you’re a seasoned gardener or a beginner, your dried peas are just a few sunny days (or a dehydrator cycle) away.
Ready to take the next step? Start small—try drying a batch of peas from your garden or a local farm, then experiment with recipes like soups, stews, or homemade hummus. Happy drying, and may your harvest bring warmth to your table for seasons to come! 🌞