
Tools
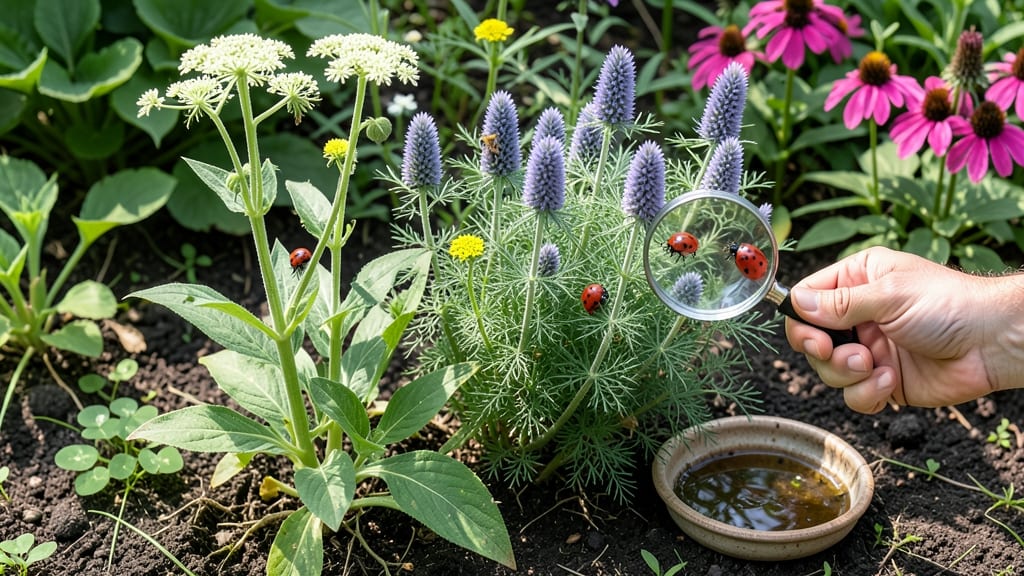
How to encourage ladybugs in your garden is the secret to turning your plot into a thriving, pest-free haven—each one devours hundreds of aphids in a season. 🌱 I’ve watched my garden transform since I learned how to attract them: fewer pests, more flowers, and a balanced ecosystem that works without chemicals. The secret isn’t complicated—it’s about creating the right habitat and inviting them to stay. Start by planting ladybug-friendly flowers like marigolds, dill, or yarrow—their bright blooms signal safe feeding grounds. Add a shallow dish of water with pebbles (so they don’t drown) and avoid pesticides entirely—even "organic" sprays can harm these beneficial bugs. Within weeks, you’ll spot their bright red-orange backs patrolling your plants, keeping pests in check naturally. The payoff is immediate: fewer chewed leaves, more vibrant blooms, and a garden that thrives without constant intervention. Ladybugs also pollinate flowers and control other garden pests like mites and whiteflies, making them one of nature’s best garden helpers. Once you set up their home, they’ll keep coming back year after year. This works for any garden size, from small containers to sprawling yards. The key is consistency—once you provide food, water, and shelter, they’ll stick around and do the hard work for you. Let’s get your garden buzzing with these tiny allies!
📚 In This Guide
- What you need
- Instructions
- Tips and common mistakes
- Wrapping up and next steps
What you need
- ● Native flowering plants: At least 3-5 varieties (e.g., marigolds, dill, fennel, yarrow, or cosmos). Aim for continuous blooms from spring to fall.
- ● Ladybug habitat: Small wooden or bamboo ladybug house (available online or DIY with a hollow log and mesh).
- ● Pinecone ladybug hotel (fill pinecones with cotton balls or straw for overwintering).
- ● Water source: Shallow birdbath or saucer (fill with pebbles and water to prevent drowning).
- ● Misting bottle (for light hydration during dry spells).
- ● Pest-free zone: Organic pesticide-free zone (avoid chemical sprays; ladybugs are sensitive!).
- ● Neem oil or insecticidal soap (for targeted pest control, if needed).
- ● Ladybug larvae food: Aphid-infested plants (e.g., roses or fruit trees) to attract adult ladybugs naturally.
- ● Diverse mulch: Straw or leaf litter to provide shelter and moisture retention.
- ● Purchased ladybugs: 100-500 adults/larvae (buy from reputable suppliers in early morning/evening to reduce stress).
- ● Sunlight monitor: Ensure 6+ hours of sun for most ladybug-friendly plants.
Step-by-Step instructions for creating a ladybug-friendly garden
Here’s how to turn your garden into a ladybug paradise—no traps or chemicals required.
🌱 Step 1: Plant Ladybug Attractants
Ladybugs thrive where their favorite plants grow. Focus on nepeta (catmint), dill, fennel, and yarrow—these are their top food and shelter sources. I always plant catmint in clusters of three plants spaced 18 inches apart—it blooms repeatedly and provides continuous nectar. Avoid pesticides entirely in these areas, as even "organic" sprays can harm ladybugs.
Add a few native wildflowers like milkweed or goldenrod for extra appeal. These plants attract aphids, which ladybugs eat voraciously. Place them near your veggie beds so ladybugs can patrol for pests. If your garden is new, start with one to two plants and expand yearly—ladybugs will find you faster.
☀️ Step 2: Provide Shelter and Water
Ladybugs need safe daytime retreats. Install small wooden shelters (like 4-inch cubes with holes drilled in the sides) near their favorite plants. I like to place these under dappled shade—they’ll hide during the day and emerge at dawn/dusk to hunt. Avoid dense mulch piles; ladybugs prefer open, airy spots where they can spot aphids easily.
Shallow dishes of water with pebbles (so they can climb out) placed near their plants work wonders. Change the water every 2-3 days to prevent mosquito breeding. I’ve seen ladybugs drink from dew-covered leaves too, so don’t worry if they don’t use the dishes immediately—they’ll find them when thirsty.
💧 Step 3: Create a Pest Buffet
Ladybugs eat aphids, mites, and soft-bodied insects, so encourage these pests in controlled areas. Let a few aphid colonies thrive on dandelions or stinging nettle—these act as natural ladybug feeders. Plant these 10-12 feet away from your prized veggies so ladybugs have a "training ground" before patrolling your garden.
If aphids are scarce, introduce a small potted plant with aphids (available at garden centers) near your ladybug shelters. Watch as they multiply and spread—within a week, you’ll see ladybugs migrating to your main garden. Avoid overdoing this; a few plants with aphids are enough to sustain a healthy population.
⏰ Step 4: Time Your Planting for Ladybug Arrivals
Ladybugs emerge in late spring to early summer when temperatures hit 60-75°F. Plan to plant their favorite flowers 4-6 weeks before this window—catmint and dill germinate quickly, so they’ll be established by the time ladybugs arrive. If you’re in a cooler climate, start with potted plants instead of seeds for faster results.
In fall, leave some plants standing (like yarrow or fennel) to provide overwintering sites. Ladybugs lay eggs in sheltered spots, and these plants offer protection from winter winds. Come spring, you’ll see new generations emerge ready to patrol your garden. Patience is key—it takes 2-3 seasons to build a thriving ladybug colony.
🌿 Step 5: Monitor and Adjust
Check your garden weekly for ladybug activity. Look for tiny orange eggs on the undersides of leaves—this means they’re breeding successfully. If you see fewer ladybugs than expected, add more nectar plants or reduce watering slightly (drier conditions can attract more aphids, which draw ladybugs).
If pests like spider mites appear, ladybugs will handle them—but if the infestation is severe, introduce more aphid-rich plants temporarily. Avoid the urge to intervene; ladybugs are slow but effective. Within 4-6 weeks, you’ll notice fewer pests and more ladybugs patrolling your garden naturally.
Tips & tricks for creating a ladybug haven
Building a thriving ladybug population takes strategy—here’s how to maximize your garden’s appeal without the guesswork.
Plant Placement Matters: In Step 1, when planting catmint clusters, position them near the edges of your garden rather than the center. Ladybugs prefer to patrol borders where they can easily spot aphids on neighboring plants. I’ve noticed they’re more active in areas with partial sun exposure—morning sunlight followed by afternoon shade creates the perfect microclimate for them.
Shelter Design Tips: For Step 2’s wooden shelters, I recommend using untreated cedar or pine—these woods resist rot naturally and won’t harm ladybugs if they chew on them (which they occasionally do). Drill holes at varying heights (2-4 inches off the ground) to accommodate different ladybug species and their egg-laying preferences. Place shelters on the north or east side of plants to shield them from harsh afternoon sun.
Pest Management Balance: When creating your aphid buffet in Step 3, focus on just 2-3 plants with aphids rather than letting them spread uncontrollably. Too many aphids can attract predatory wasps that compete with ladybugs. I’ve found that a single heavily infested dandelion plant is often enough to sustain a healthy ladybug population—just monitor it weekly and prune back if aphids become excessive.
Seasonal Timing Secret: In Step 4, if you’re in a region with unpredictable springs, consider planting catmint in pots that you can move to warmer microclimates during cool spells. Ladybugs are sensitive to temperature swings—maintaining that 60-75°F range is crucial for their activity. I’ve seen ladybugs become lethargic when temperatures dip below 55°F, so providing this buffer zone can make all the difference during transitional seasons.
Pro Tips for Encourage Ladybugs In Your Garden
- Building a thriving ladybug population takes strategy—here’s how to maximize your garden’s appeal without the guesswork.
- Plant Placement Matters: In Step 1, when planting catmint clusters, position them near the edges of your garden rathe...
- Shelter Design Tips: For Step 2’s wooden shelters, I recommend using untreated cedar or pine—these woods resist rot n...
Frequently asked questions
Got questions about inviting these tiny, beneficial allies to your garden? Here are answers to the most common ones—so you can roll out the welcome mat with confidence!
How long does it take to see ladybugs in my garden after making changes?
Patience is key! With the right habitat, you might spot ladybugs within a few weeks to a couple of months. If you’re releasing purchased larvae or adults, they’ll start hunting pests almost immediately. Native species may take longer, so keep planting nectar-rich flowers and water sources to speed things up.
What if ladybugs don’t stick around? Are there alternatives?
If ladybugs vanish, don’t worry—there are backup plans! Try introducing lacewings, parasitic wasps, or ground beetles (all natural pest controllers). You can also use beneficial nematodes or neem oil as temporary solutions while you troubleshoot. Check for pesticides (even organic ones) that might repel them!
Can I attract ladybugs without planting flowers? What else works?
Ladybugs love diverse textures in your garden. Add:
- Leaf litter (they hide in it over winter)
- Small water sources (shallow dishes with pebbles)
- Dill, fennel, or marigolds (even in pots!)
- Avoid over-tidying—messy edges welcome them!
Will ladybugs help with specific pests, like squash bugs or spider mites?
Ladybugs are aphid specialists, but some species tackle other soft-bodied pests too! For squash bugs or spider mites, consider:
- Convergent lady beetles (they eat squash bugs)
- Green lacewings (devour spider mites)
- Hand-picking severe infestations while waiting for reinforcements.
Are store-bought ladybugs better than waiting for natural ones?
Store-bought ladybugs work fast, but native species are often smarter for long-term control. Here’s the breakdown:
Option
Pros
Cons
Purchased ladybugs
Instant pest control; good for outbreaks
May not stay long; some are non-native
Natural attraction
Sustainable; builds a local ecosystem
Takes time (weeks to months)
Wrapping up and next steps
Encouraging ladybugs in your garden is a simple, rewarding way to boost natural pest control and create a thriving ecosystem! By planting their favorite flowers, providing water sources, and avoiding pesticides, you’re not just helping these tiny allies—you’re nurturing a healthier, more balanced garden. 🌿✨
Ready to take the next step? Start small—pick one ladybug-friendly plant or habitat tip this week and watch your garden transform! Share your progress or ask questions in the comments—we’d love to see (and help) your garden flourish.