
How To
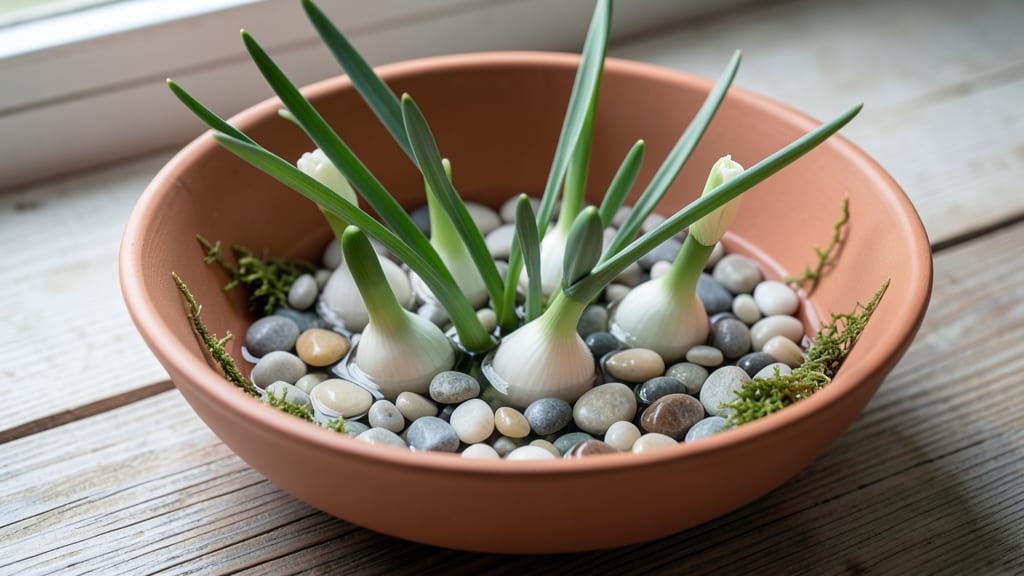
How to force paperwhite bulbs in cold water gives you fragrant blooms by Christmas—no greenhouse needed. ✨ I’ve tried soil and pebble methods, but this trick cuts the wait time in half while keeping it effortless. The secret? A simple soak that mimics winter’s chill, tricking bulbs into blooming indoors. You’ll need just 3 supplies: paperwhite bulbs, a clear glass container, and cold water. No soil, no fuss—just place bulbs base-down in water and watch roots sprout within days. The key is keeping the water cold (60-65°F) and bulbs partially submerged. Bright light (but no direct sun) speeds up blooming, and you’ll see buds in 3-4 weeks. The payoff? Clusters of snow-white, star-shaped flowers that perfume your home for weeks. Even my black thumb can’t kill these—just avoid overcrowding and change the water every few days. Perfect for holiday tables or winter cheer. Works year-round but best timed for Thanksgiving to Christmas. Here’s how to do it without a single failed bulb!
📚 In This Guide
- What you need
- Instructions
- Tips and common mistakes
- Wrapping up and next steps
What you need
- ● Paperwhite bulbs: 3–5 bulbs (choose firm, plump ones with no soft spots or sprouts).
- ● Shallow container: A wide, low dish (e.g., ceramic bowl, baking tray, or even a repurposed cake pan) that can hold the bulbs with ~½ inch of water covering their bases.
- ● Room-temperature water: Tap water is fine, but avoid distilled or softened water (it lacks minerals).
- ● Pebbles or marbles: 3–5 small stones (½ inch diameter) to elevate the bulbs slightly above the waterline and prevent rot.
- ○ Optional lighting: A bright windowsill (south-facing is ideal) or a grow light (12+ hours of light/day).
- ● Decorative elements: Moss, pebbles, or a shallow tray liner for a polished look.
- ● Hydrogen peroxide (3%): 1 tsp per quart of water to keep the water fresh and prevent bacterial growth.
- ● Thermometer: To monitor water temperature (ideal range: 60–70°F).
- ● Spray bottle: For misting bulbs lightly if your home is very dry.
Step-by-step instructions for forcing paperwhite bulbs
Here's the foolproof method I've used for years to get fragrant paperwhite blooms indoors by the holidays.
🌱 Step 1: Select and Prepare Healthy Bulbs
Choose firm, plump paperwhite bulbs with no soft spots or mold. I always pick bulbs that are about 3-4 inches in diameter—they force best. Remove any dried outer skins with your fingers, but don't cut into the bulb itself. This ensures clean, healthy growth without introducing moisture that could cause rot.
Paperwhites don't need soil to force—just a stable container. I use a clear glass bowl because it lets you watch the roots develop, which is satisfying. Arrange 4 bulbs base-down in the bowl, pressing them gently into place so they stay upright. The bulbs should touch each other slightly for stability, but don't crowd them—they need room to grow.
💧 Step 2: Cold Water Soak for Rapid Growth
Here's the trick that makes all the difference: fill the bowl with cold water until it reaches halfway up the bulbs, about 1-2 inches. The cold water shock triggers faster root growth than warm water. Leave the bulbs soaking overnight—12-16 hours—so the roots can start developing before you move them to a brighter spot.
After soaking, drain the water completely. You'll see tiny white roots beginning to emerge from the base. This is your signal that the forcing process has started. Don't let the bulbs sit in standing water after this point—just a quick soak when the roots look dry or every 3-4 days thereafter. Too much moisture causes bulbs to rot before they bloom.
☀️ Step 3: Position for Bright, Indirect Light
Place the bowl in a spot with bright, indirect light—like a sunny windowsill with sheer curtains. Paperwhites need 8-10 hours of light daily but will scorch if exposed to direct midday sun. You'll know the light is right when the green shoots are upright and 1-2 inches tall in about 10-14 days. If they lean toward the light, rotate the bowl daily to keep them growing straight.
Watch for the first true leaves to unfurl—these are the long, thin leaves that will support the flower stalk. This is when you can reduce watering slightly, letting the soil surface dry out between soakings. Overwatering now will drown the delicate roots and stunt growth. A good rule is to water when the roots look dry or the leaves start to droop slightly.
⏰ Step 4: Encourage Flower Stalk Development
Once the leaves reach 4-6 inches tall, you'll notice a small bump forming in the center—the future flower stalk. This is when to increase watering slightly, keeping the roots consistently moist but not soggy. I like to use room-temperature water now to avoid shocking the developing stems. You'll see the stalk emerge in another 2-3 weeks, growing rapidly toward the light.
The real magic happens when the first buds appear. At this stage, move the bowl to a cooler spot (around 60-65°F) if possible—this slows growth slightly and helps the plant focus energy on blooming rather than leafy growth. You'll have 4-6 fragrant white blooms per bulb in 6-8 weeks total, depending on your starting conditions.
✂️ Step 5: Maintain and Enjoy the Blooms
Once the flowers open, they'll last 7-10 days indoors if you keep them in a cool spot away from drafts. Cut the stems at an angle with clean scissors to arrange them in a vase—this gives you another 3-5 days of enjoyment from each bloom. After flowering, the bulbs will shrivel and die, but you'll have beautiful memories (and maybe a few extra bulbs to plant outdoors in spring).
Here's the thing—paperwhites are annuals for indoor forcing, but you can plant the leftover bulbs in your garden after they finish blooming. They'll naturalize and return year after year, spreading through offsets. Just dig them up in fall and store them dry until next season's forcing adventure.
Tips & tricks for perfect paperwhite forcing
Here's what nobody tells you about getting those fragrant blooms without the guesswork.
Bulb Selection Matters: The 3-4 inch diameter bulbs specified aren't arbitrary—they're the sweet spot for forcing. Smaller bulbs often produce fewer blooms, while larger ones may take longer to flower. Look for bulbs that feel heavy for their size, which indicates they're packed with energy for growth. I've found that bulbs with a slight papery texture on the outside tend to force more reliably than those with a waxy coating.
Container Choice Makes a Difference: While any stable container works, clear glass bowls reveal the magic of root development. The roots will grow dramatically during the 12-16 hour soak, and watching this process is oddly satisfying. For a more decorative presentation, use a shallow vase or even a repurposed glass jar. Just ensure the container is wide enough to accommodate your 4 bulbs without crowding—they should touch slightly but not be packed tightly.
Light Positioning is Critical: The 8-10 hours of bright, indirect light is non-negotiable for proper growth. If your windowsill gets direct midday sun, place the bowl 1-2 feet back from the window. You'll notice the bulbs will lean toward the light source—this is their way of telling you they need to be rotated daily. A simple trick is to place a sticky note on the outside of the bowl to mark which direction they're facing each morning, so you remember to rotate them.
Water Temperature Secrets: The instructions specify cold water for the initial 12-16 hour soak, but room temperature works better after the roots emerge. Cold water creates a mild shock that stimulates faster root growth, while room temperature prevents shocking the developing stems later. I keep a separate pitcher of room temperature water for the later stages to make this transition seamless. Never use warm water—it can cause the bulbs to rot before they even begin to grow.
Pro Tips for Force Paperwhite Bulbs
- Here's what nobody tells you about getting those fragrant blooms without the guesswork.
- Bulb Selection Matters: The 3-4 inch diameter bulbs specified aren't arbitrary—they're the sweet spot for forcing.
- Container Choice Makes a Difference: While any stable container works, clear glass bowls reveal the magic of root development.
Frequently asked questions
Got questions about forcing Paperwhite bulbs? You’re not alone! Here are some of the most common concerns—and straightforward answers—to help you grow stunning blooms without the guesswork.
How long should I soak the bulbs in cold water?
Soak your bulbs for 6–8 hours in cold water to kickstart growth. Longer soaks (up to 24 hours) won’t hurt, but avoid letting them dry out afterward. Think of it like waking up a sleepy plant—just enough to get things moving!
Can I force Paperwhite bulbs in warm water instead?
Cold water is best for slow, steady growth, but lukewarm water (60–70°F) works in a pinch. Avoid hot water—it can shock the bulbs or cause uneven sprouting. If you’re in a hurry, a warm soak speeds things up slightly, but cold is still the gold standard.
What if my bulbs don’t sprout after soaking?
Don’t panic! Try these fixes:
- Check for rot: Soggy or mushy bulbs? They’re done—toss them.
- Re-soak: Place them back in fresh water for another 4–6 hours.
- Warmth trick: Set the jar near a sunny window or under a grow light.
Do I need to use a special vase or container?
Nope! Any clear container (glass jars, vases, or even a mason jar) works as long as it’s at least 3 inches tall to submerge the bulb’s base. Just ensure the opening is wide enough for blooms to peek through later. Recycle that pasta sauce jar—it’s perfect!
Will forcing bulbs work in winter?
Forcing Paperwhites is a winter tradition—their sweet scent brightens cold months. Just keep them in a spot with indirect light (50–70°F). Avoid drafts or freezing temps, and you’ll have fragrant blooms just in time for the holidays.
Can I reuse forced bulbs?
Unfortunately, no. Once forced, Paperwhite bulbs exhaust their energy blooming. But save the flowering stems for bouquets! Plant the spent bulbs in soil after blooming—they might produce smaller flowers next season.
Wrapping up and next steps
Forcing Paperwhite bulbs is a rewarding way to bring early spring blooms indoors—and you’ve got all the tricks to make it happen! 🌱 Whether you’re using cold water, pebbles, or a cozy paper towel setup, patience and consistency are your best friends. Now that you’re armed with these techniques, why not treat yourself (or a loved one) to a burst of fragrant beauty before the season arrives?
Ready to take the next step? Grab your bulbs, pick your method, and start soaking! 💡 If you’re feeling adventurous, experiment with different bulb varieties or even DIY planters for a creative twist. Happy forcing—and enjoy your stunning, homegrown blooms! 🌸