
Propagation
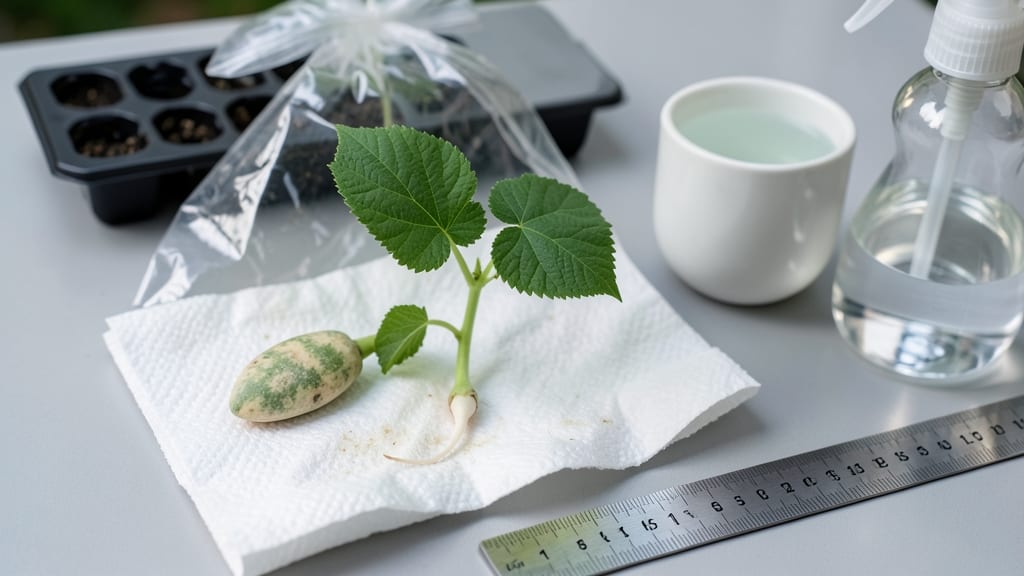
Germinating beans in paper towels feels like cheating—48-hour sprouts instead of waiting weeks for soil germination. ✨ I tried this method after watching my seed packets gather dust, and now I never buy pre-sprouted seeds again.
The secret? Keeping them cozy, not soggy, and patient for just a couple of days.
You only need 3 supplies: paper towels, a spray bottle, and a ziplock bag. No fancy equipment—just what’s lying around. The trick is folding the towel damp (not dripping) and checking daily for mold or uneven sprouts.
Most beans crack open within 24-48 hours, ready to pop into soil.
By the time you transplant those little roots into pots, they’ll be stronger and faster-growing than store-bought seedlings. No more weak starts struggling to catch up—just bold, hungry sprouts eager to climb. The best part? You can do this on a kitchen counter, no greenhouse needed.
This method works for any bean variety—bush, pole, or heirloom—and saves space until you’re ready to plant. Just be ready to move them to soil within 3-5 days or they’ll get root-bound. Here’s how to do it without a single failed sprout.
📚 In This Guide
- What you need
- Instructions
- Tips and common mistakes
- Wrapping up and next steps
What you need
- ● Dry bean seeds – Choose heirloom, organic, or non-GMO beans like pinto, kidney, black, or mung beans (about 10-20 seeds for a small batch).
- ● Paper towels – Use 2-3 unbleached, seed-free paper towels (avoid scented or recycled towels).
- ● Spray bottle – A 16 oz misting bottle with a fine spray nozzle (or a clean spray bottle with water).
- ● Plastic zip-top bag – A quart-sized (32 oz) resealable bag (or a gallon bag for larger batches).
- ● Small plate or shallow container – A 6-inch diameter dish (like a paper plate or ceramic saucer).
- ● Grow light or sunny windowsill – If your space is dark, a LED grow light (or a south-facing window) speeds up germination.
- ● Label & marker – To track seed types and germination dates.
- ● Hair dryer (low heat) – For quick-drying seeds if they get too damp (use sparingly!).
- ● Seedling tray or egg cartons – For transplanting sprouts later (if you’re not direct-sowing).
Step-by-step instructions for germinating beans in paper towel
Here's the quick method I swear by—no fancy equipment, just a little patience for speedy sprouts.
🌱 Step 1: Soak the Seeds Overnight
Place 4-5 bean seeds (dry or fresh) in a shallow bowl. Cover them completely with lukewarm water—just enough to submerge them. Let them soak for 8-12 hours (overnight works perfectly). You'll see the seeds swell noticeably as they absorb moisture, which kickstarts the germination process.
I like to use a clear bowl so I can watch the seeds plump up—it's oddly satisfying. Drain the water completely before moving to the next step. Any leftover moisture can lead to mold if left sitting too long.
🧻 Step 2: Sandwich Between Damp Paper Towels
Lay out 2 large paper towels on a flat surface, like a plate or tray. Spritz them lightly with water until they feel damp but not soaked—think of a wrung-out sponge. Place the soaked seeds 1 inch apart in a single row down the center of the towels.
Fold the top towel over the seeds to create a cozy, moist sandwich. Gently press down to ensure good contact between the towels and seeds. This setup mimics the humid environment seeds need to break dormancy and sprout quickly.
💧 Step 3: Store in a Warm, Dark Spot
Place the paper towel "sandwich" inside a ziplock bag or cover it loosely with plastic wrap. This traps moisture while allowing airflow—critical for preventing mold. Store it in a warm spot, ideally between 70-80°F. A seedling heat mat or the top of your fridge works well.
Check the setup after 24 hours. The seeds should show tiny white roots breaking through the seed coat—that's your signal everything is working. If the towels dry out, spritz them lightly with water and reseal. Avoid overwatering; soggy towels suffocate seeds.
☀️ Step 4: Monitor and Transplant When Ready
After 48 hours, you'll see 1-2 inch sprouts with visible roots. This is the moment to act! Carefully unfold the paper towels and transfer each sprout to its own small biodegradable pot filled with moist seed-starting mix. Plant them ½ inch deep, roots-down, and firm the soil gently around them.
Place the pots in bright, indirect light for 3-5 days to acclimate. Avoid direct sun at this stage—young sprouts are delicate. Water lightly when the top inch of soil feels dry, and you'll have sturdy seedlings ready for transplanting in 10-14 days.
⏰ Step 5: Speed Up Germination with These Pro Tips
For even faster results, try pre-soaking seeds in lukewarm water with a pinch of seaweed fertilizer—it adds trace minerals that boost early growth. If your kitchen runs cooler, place the sealed bag near a sunny window during the day and move it to a warmer spot at night.
Watch for leggy sprouts (long, pale stems). This happens when seeds get too much light too soon—keep them in darkness until roots are ½ inch long before exposing them to light. Once you see true leaves (the first pair after the seed leaves), your sprouts are ready for the garden or larger pots.
Tips & tricks for perfect bean germination
Here's what I learned after watching hundreds of seeds sprout—these little tricks make all the difference between thriving sprouts and disappointing failures.
Soak Like a Pro: The 8-12 hour soak time is perfect, but here's the secret: use filtered or rainwater if possible. Tap water often contains chlorine or fluoride that can inhibit germination. I also recommend changing the water halfway through soaking if you notice any cloudiness—this keeps the water fresh and oxygenated for your seeds.
Paper Towel Prep: Don't just dampen the towels—give them a good wring first. You want them damp like a wrung-out sponge, not dripping wet. I use two layers of paper towels for better moisture retention, especially if your kitchen tends to be dry. Pro tip: Place the seeds on the bottom towel first, then fold the top towel over them to create that perfect sandwich effect.
Temperature Control: While 70-80°F is ideal, most kitchens don't maintain this consistently. I've found that placing the sealed bag on top of my refrigerator during the day (when it's cooler) and moving it to a warm spot at night works perfectly. If you don't have a warm spot, try placing the bag near your oven (with it off) or on top of a lamp—just avoid direct heat sources that could dry out the towels.
Light Timing: The 48-hour mark is when most seeds will show visible sprouts, but don't rush to expose them to light just yet. Wait until you see roots at least ½ inch long before moving them to light. This prevents leggy sprouts that stretch toward the light source. Once you do move them, use grow lights or place them near an east-facing window for gentle morning light.
Pro Tips for Germinate Beans In Paper Towel
- Here's what I learned after watching hundreds of seeds sprout—these little tricks make all the difference between thriving sprouts and disappointing failures.
- Soak Like a Pro: The 8-12 hour soak time is perfect, but here's the secret: use filtered or rainwater if possible.
- Paper Towel Prep: Don't just dampen the towels—give them a good wring first.
Frequently asked questions
Got questions about germinating beans in a paper towel? You’re not alone! Here are answers to the most common queries to help you grow those sprouts like a pro.
How long does it take for beans to sprout in a paper towel?
Most beans will sprout within 24–48 hours if kept in a warm, moist environment. Keep the paper towel damp (not soggy) and check daily—you’ll see tiny roots and a curled sprout breaking through the seed coat!
What if my beans aren’t sprouting after 48 hours?
Don’t worry—some seeds need extra time! Try these fixes:
- Check moisture: The paper towel should feel damp like a wrung-out sponge.
- Adjust warmth: Place them near a sunny window or use a seedling heat mat (70–85°F is ideal).
- Test viability: Soak a few beans in water overnight—if they swell, they’re still good!
Can I use any type of paper towel for germination?
Yes! Any unbleached, white paper towel works best (avoid colored or textured towels, as dyes or chemicals might inhibit growth). Fold it into a thick pad (about 4–5 layers) to hold moisture without becoming a swamp.
What’s the best way to transfer sprouted beans to soil?
Once your beans sprout ½–1 inch, gently unfold the paper towel and plant them 1 inch deep in moist soil. Cover with a plastic dome or wrap the pot in plastic to retain humidity for a few days. Avoid disturbing the roots—just tuck them in like little seedlings!
Can I reuse the paper towel method for multiple batches?
Not really. Paper towels lose their absorbency after one use and can harbor bacteria. For efficiency, keep a fresh stack handy or switch to a seedling tray with damp paper towels for back-to-back batches.
Wrapping up and next steps
Germinating beans in a paper towel is a simple, cost-effective, and rewarding way to jumpstart your gardening journey—no soil or sunlight required! 🌱 With just a few supplies and patience, you’ll have tiny sprouts ready for transplanting in under two days.
Whether you’re a beginner or a seasoned gardener, this method proves that big results start with small steps.
Now that you’ve mastered the technique, it’s time to put those sprouts to work. Try transferring them to soil, or experiment with growing them in water for a fun indoor project. Happy growing—your future plants (and taste buds!) will thank you! 🌿✨