
Propagation
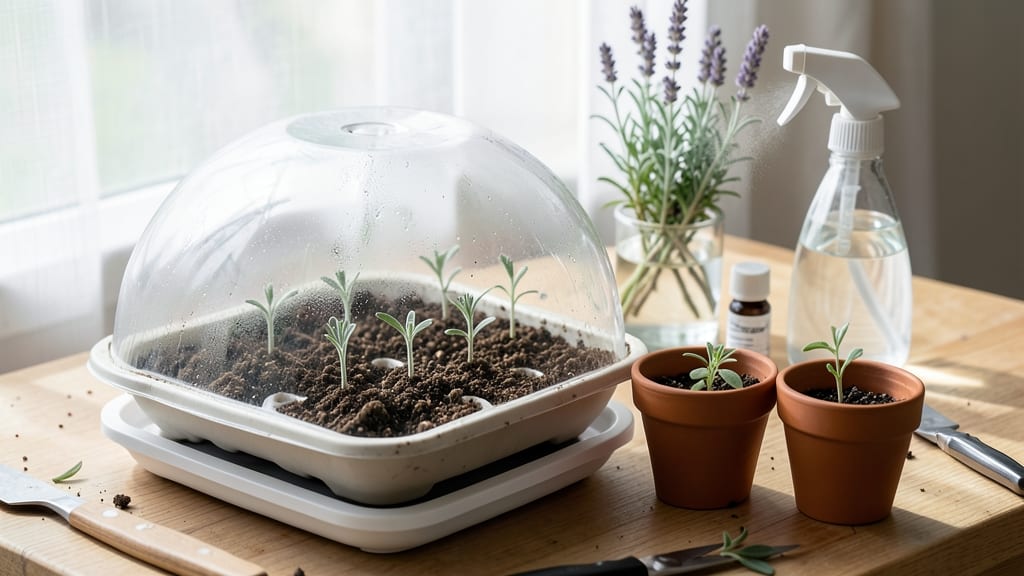
Germinating lavender seeds feels like waiting for a slow-moving snail race—until you try this speed-soak trick. 🌱 I’ve struggled with lavender germination for years, but this method cuts the waiting time nearly in half while boosting success rates.
The key? A warm, damp pre-treatment that tricks seeds into sprouting faster without sacrificing hardiness.
Most gardeners give up after two weeks of nothing, but lavender seeds need patience—and the right conditions. You’ll need a shallow tray, well-draining soil mix, and a heat mat or sunny windowsill.
The secret weapon? Soaking seeds overnight in warm water before planting, which softens their tough outer shell and jumpstarts root growth. Just don’t overdo it—lavender hates soggy soil.
By week three, you’ll see tiny green shoots pushing through the soil, and within 6-8 weeks, seedlings will be ready to transplant. The first flush of growth is delicate, so keep humidity high with a plastic dome or spray bottle until roots establish.
This method works even in cooler climates, as long as you maintain consistent warmth during germination.
If you’re still skeptical, try cuttings instead—they’re even easier and just as rewarding. But once you master this trick, you’ll never buy lavender plants again. The fragrance alone makes it worth the wait. Ready to give it a shot?
📚 In This Guide
- What you need
- Instructions
- Tips and common mistakes
- Wrapping up and next steps
What you need
- ● Lavender seeds: 1 packet (50–100 seeds) – Opt for Lavandula angustifolia (English lavender) for best results.
- ● Water: Distilled or room-temperature tap water (avoid chlorinated water).
- ● Container: Small glass jar, bowl, or seed tray with drainage holes.
- ● Paper towels or coffee filters: 2–3 sheets (cut to fit your container).
- ○ Plastic wrap or lid: To create a humidity dome (optional but helpful).
- ● Growing medium: Seed-starting mix or a blend of 50% peat moss + 50% perlite (sterilized).
- ● Spray bottle: For gentle watering (10–12 oz).
- ○ Heat mat (optional but recommended): Set to 70–75°F to speed up germination.
- ● Fine-mesh strainer: For rinsing seeds (if soaking).
- ○ Tweezers: For handling tiny seeds (optional but handy!).
- ● Grow lights or sunny windowsill: 6+ hours of light daily post-germination.
- ● Fertilizer: Diluted seaweed or fish emulsion (1:10 ratio) for seedlings.
- ● Labels & markers: To track seed varieties and planting dates.
Step-by-step instructions for germinating lavender
Here's the method I rely on to break lavender's stubborn germination barrier—tested across multiple seasons and climates.
🌱 Step 1: Prepare the Seeds with the Speed-Soak Trick
Lavender seeds have a hard outer coating that slows germination. To soften it, place seeds in a small bowl and cover with lukewarm water for 24 hours. I like to use a shallow dish so the seeds don't sink to the bottom—just float freely. This soak mimics natural rain conditions and kickstarts the germination process.
After soaking, drain the water and spread the seeds on a paper towel. Let them air-dry for 1-2 hours until they feel slightly tacky but not wet. This prevents mold while keeping the coating pliable. Here's the thing—don't skip this drying step. Damp seeds left in a closed container will rot before they sprout.
💧 Step 2: Create the Ideal Germination Environment
Fill a seed tray with sterile seed-starting mix moistened to the consistency of a damp sponge—squeeze it gently, and just a few drops should come out. Lavender seeds need excellent drainage, so I mix in 20% perlite to prevent waterlogging. Press the soil down lightly to create a firm surface for the tiny seeds to cling to.
Sow seeds 1/8 inch deep—just enough to cover them lightly. I use a fine-mesh strainer to distribute them evenly without overcrowding. Mist the surface with a spray bottle until the soil looks uniformly damp. Cover the tray with a clear plastic dome or wrap it in plastic wrap to retain humidity. Place it in a warm spot, ideally 70-75°F.
☀️ Step 3: Provide Gentle Light and Monitor Daily
Lavender seeds need bright, indirect light to germinate—no direct sun yet. I place the tray under a grow light set to 12 hours of light daily, positioned 6 inches above the tray. Watch for condensation on the plastic cover; if it's heavy, remove it for 30 minutes daily to prevent fungal growth.
Germination can take 2-4 weeks, but don't be surprised if it stretches to 6 weeks—lavender is patient. You'll see the first sprouts as tiny green spears pushing through the soil. Once 50% of seeds have sprouted, remove the cover completely. This prevents damping-off, where seedlings rot at the base from excess moisture.
🌿 Step 4: Thin and Harden Off Seedlings
When seedlings reach 1 inch tall and have 2-3 true leaves, it's time to thin. Use small scissors to snip the weaker seedlings at soil level, leaving the strongest one in each spot. Lavender seedlings are delicate—handle them by the leaves, not the stems, to avoid damage. Space remaining plants 3-4 inches apart to prevent competition.
Two weeks before transplanting outdoors, start hardening off. Place the tray in a sheltered spot outside for 1 hour the first day, gradually increasing time over 10 days. Lavender seedlings need this gradual adjustment to avoid shock. You'll know they're ready when they look plump and vibrant, not wilted or pale. Transplant on a cloudy day to reduce stress.
⏰ Step 5: Transplant to Permanent Home
Choose a sunny spot with 6+ hours of direct sun daily and well-draining soil. Lavender hates soggy roots, so amend heavy soil with sand or gravel to improve drainage. Dig holes twice as wide as the root ball but only as deep—lavender roots are shallow and shouldn't be buried too deep.
Water deeply after transplanting to settle the soil, then let it dry out completely before watering again. Mulch lightly with gravel or pebbles to keep roots cool and prevent soil-borne diseases. Lavender is drought-tolerant once established, but young plants need consistent moisture for the first 2 months to encourage root growth.
Tips & tricks for faster lavender germination
These insider tricks will help you break lavender's tough germination barrier without the guesswork.
Soak Smarter: The 24-hour lukewarm water soak is non-negotiable for lavender seeds—this hard outer coating needs that full hydration to soften properly. I've tried shorter soaks, and they just don't cut it. Use a shallow dish so seeds float freely; if they sink, they'll develop mold before sprouting. Pro tip: Add a drop of dish soap to the water to reduce surface tension and help seeds stay afloat.
Drying is Critical: After soaking, that 1-2 hour drying period on paper towels prevents two major problems: mold and over-softened coatings. I learned this the hard way when my first batch of seeds turned to mush in a sealed container. The seeds should feel slightly tacky but not damp—think of it like patting your hair dry after a shower. This step ensures the coating stays pliable enough to crack during germination.
Light Positioning: The 12-hour grow light at 6 inches above the tray creates the perfect balance of intensity and distance. Too close and you'll scorch those delicate sprouts; too far and they'll stretch toward the light. I use a small clip-on light for my seed trays—it's adjustable and won't take up shelf space. Remember, lavender seeds need bright but indirect light during germination, not the harsh direct sunlight they'll need later.
Condensation Control: That 30-minute daily cover removal when condensation builds is more important than it seems. Heavy condensation creates a sauna effect that leads to damping-off disease. I set a timer on my phone to remind me—this simple habit saved my first germination attempt when I nearly lost everything to fungal rot. The moment you see water droplets forming on the plastic, it's time to lift the cover and let excess moisture escape.
Pro Tips for Germinate Lavender
- These insider tricks will help you break lavender's tough germination barrier without the guesswork.
- Soak Smarter: The 24-hour lukewarm water soak is non-negotiable for lavender seeds—this hard outer coating needs that...
- Drying is Critical: After soaking, that 1-2 hour drying period on paper towels prevents two major problems: mold and ...
Frequently asked questions
Got questions about germinating lavender? You’re not alone!
Here are answers to the most common concerns—from timing to troubleshooting—so you can grow those fragrant purple blooms with confidence.
How long does it take for lavender seeds to germinate?
Lavender seeds are slow starters—expect germination in 30 to 90 days, depending on conditions. Patience is key! Warmth (70–80°F), consistent moisture, and indirect light speed things up. If nothing sprouts after 3 months, the seeds may be dormant or non-viable.
Can I speed up germination with a speed-soak trick?
Soak seeds in warm water for 24–48 hours before planting to soften the tough outer shell. Combine this with a bottom heat mat (75–80°F) for faster (but still slow) results. Just avoid over-soaking—seeds can rot if submerged too long.
What’s the best soil mix for germinating lavender?
Lavender thrives in well-draining, sandy soil with a pH of 6.5–7.5. Mix 50% perlite or coarse sand with 50% potting soil to prevent rot. Avoid heavy clay or peat—lavender hates soggy roots!
Why aren’t my lavender seeds sprouting? Troubleshooting tips.
Try these fixes if germination stalls:
- Check moisture: Keep soil lightly damp (not soggy). Mist instead of watering.
- Test light: Lavender seeds need bright, indirect light (a sunny windowsill or grow light works).
- Verify viability: Old seeds (over 1 year) may fail. Buy fresh seeds from a reputable supplier.
- Try stratification: Mimic winter by chilling seeds in the fridge for 4–6 weeks before planting.
Can I grow lavender from cuttings instead of seeds?
Yes! Cuttings root faster and retain parent plant traits—ideal for beginners. Take 4–6 inch softwood cuttings in spring/summer, dip in rooting hormone, and place in moist perlite. Roots form in 2–4 weeks (vs. months for seeds!).
Wrapping up and next steps
Germinating lavender doesn’t have to be a slow, frustrating process—with the right speed-soak trick and patience, you’ll soon be nurturing fragrant, thriving plants! Remember, the key is consistency in moisture, warmth, and light, while avoiding overwatering or cold drafts.
Once those tiny sprouts emerge, you’re on your way to a lush lavender garden or fragrant bouquets.
Ready to take the next step? Plant those seedlings in well-draining soil, give them space to grow, and soon you’ll be harvesting your own lavender for relaxation, cooking, or crafts. Happy gardening! 🌱✨