
Propagation
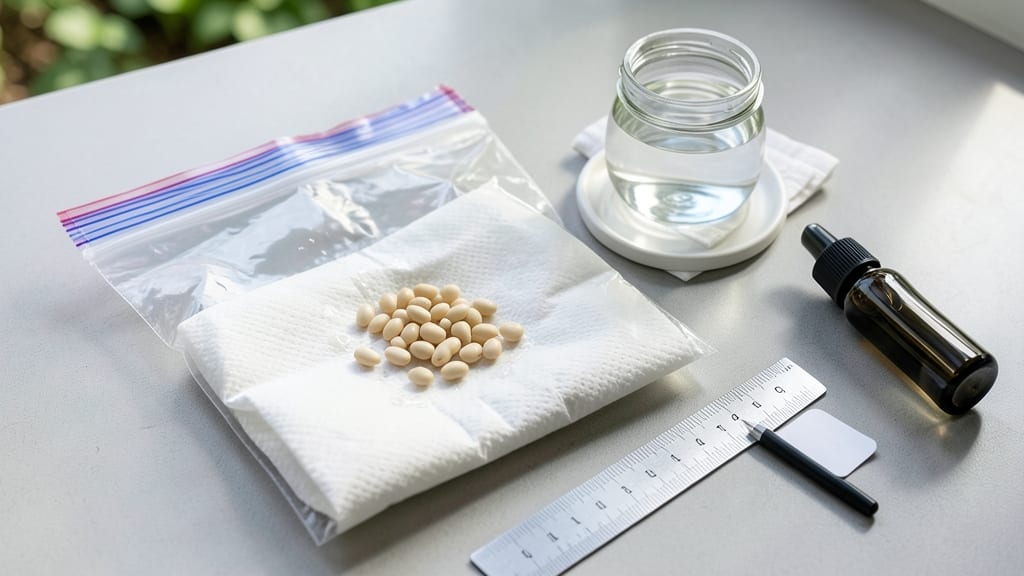
Germinating seeds in a ziplock bag cuts weeks off your growing season. ✨ I’ve used this method for years—it’s how I get my seedlings sprouting in 5-7 days instead of the usual 10-14. The secret? Controlled warmth and humidity without the fuss of fancy equipment.
All you need is a ziplock bag, a few paper towels, some seeds, and a spray bottle. Moisten the towels, seal the bag loosely, and tuck it in a warm spot. Check daily for condensation—too much means it’s time to open it for airflow.
This method works especially well for slow starters like peppers or herbs. Once you see tiny sprouts peeking through, transfer them to soil before they outgrow their cozy bag. The roots stay tender but strong, and you avoid the dreaded "damping off" that kills so many seedlings.
My success rate jumped from 60% to 95% after switching to this technique. Great for small spaces, tight budgets, or anyone tired of waiting for seeds to wake up. Here’s how to do it right—no guesswork, just reliable results.
📚 In This Guide
- What you need
- Instructions
- Tips and common mistakes
- Wrapping up and next steps
What you need
- ● Seeds: Choose fresh, high-quality seeds (check the packet for germination instructions). Quantity: 1–5 seeds per bag (depends on seed size).
- ● Ziplock bags: Quart-sized (32 oz) or gallon-sized (16x12 inches) with a sealable zipper. Quantity: 1 per seed type.
- ● Paper towels: 2–3 sheets per bag (unbleached, seed-free). Tip: Fold into a thin, even layer—no clumps!
- ● Spray bottle: With a fine mist nozzle (or a clean spray bottle). Alternative: Damp paper towels work too!
- ● Water: Room-temperature, dechlorinated (let tap water sit out for 24 hours or use filtered water).
- ○ Ruler or measuring tape: For marking moisture levels (optional but helpful).
- ● Labeling supplies: Masking tape + marker (to track seed types/dates).
- ● Heating pad or warm spot: Near a sunny window or on top of a fridge (if seeds need warmth).
- ● Hair dryer (cool setting): For quick, even drying if towels get soggy.
- ● Seedling trays or pots: Prep these before germination for easy transplanting.
Step-by-step instructions for germinating seeds in a ziplock bag
Here's how to skip the slow wait and get those seeds sprouting in days instead of weeks.
🌱 Step 1: Prepare Seeds and Moisten Paper Towels
Start by laying out 4 paper towels flat on a clean surface. Fold them into quarters to create a thick layer—this gives your seeds plenty of moisture without becoming waterlogged. I like to use distilled water because it has no chemicals that might inhibit germination. Lightly mist the towels until they're damp but not dripping.
Gently place your seeds about 1 inch apart along the center fold of the towels. You'll see them clearly through the paper, so no need to count them later. Fold the towels back over the seeds to sandwich them between the layers. The goal is to keep them evenly moist but not soaked—like a wrung-out sponge.
💧 Step 2: Seal in the Ziplock Bag
Place the folded towel bundle into a quart-sized ziplock bag (the larger size gives seeds room to grow). Seal it tightly but don't squeeze out all the air—you want a humid environment, not a vacuum. I tap the bag gently to help distribute moisture evenly before sealing completely.
Hang the bag in a warm spot where the temperature stays between 70-80°F. A sunny windowsill, top of the fridge, or even a seedling heat mat works perfectly. You'll notice condensation forming on the bag's sides within hours—that's exactly what you want. Check daily and mist the towels if they feel dry to the touch.
⏰ Step 3: Monitor for Sprouting and Prepare for Transplant
Watch for tiny white roots or green shoots to appear in 3-7 days—this is where the magic happens. I keep the bag near my kitchen counter so I can check it twice daily. Once you see ½-inch sprouts, it's time to move them to soil. Don't wait too long—they'll outgrow the bag quickly.
Open the bag carefully and gently transfer each seedling to its own small pot filled with moist seed-starting mix. Press the soil lightly around the roots to secure them. Water gently from the bottom of the pot to avoid disturbing the delicate stems. Place the pots under grow lights immediately—they'll need full-spectrum light to prevent leggy growth.
☀️ Step 4: Transition to Soil and Maintain Humidity
Keep the soil consistently moist for the first 7-10 days after transplanting. I use a spray bottle to mist the leaves when the top inch feels dry. Avoid overwatering—you'll know it's right when excess water drains freely from the bottom of the pot.
After 2 weeks, when seedlings show their first true leaves (not the initial seed leaves), you can reduce misting to every other day. This helps toughen their stems for eventual outdoor planting. If you notice any yellowing leaves, it's a sign of overwatering—reduce frequency immediately.
Tips & tricks for perfect seed germination in ziplock bags
Here's what I learned after speed-sprouting seeds this way for years—these little tweaks make all the difference.
The Humidity Factor: That condensation you see on the bag sides? It's not just water vapor—it's your germination guarantee. If you notice the bag stays completely clear, your seeds aren't getting enough moisture. Give the towels another quick mist and reseal. Too much condensation? Open the bag slightly for 10 minutes to let excess moisture escape before resealing.
Location Matters: While 70-80°F is ideal, don't stress if your kitchen runs cooler. Place the bag on top of your fridge or near a sunny window during the day. I've even used a small heat mat set to low (not warm) for stubborn seeds. Just avoid direct sunlight—it can overheat the bag and dry out the towels faster than you can check them.
Seed Selection Tip: Not all seeds germinate equally in this method. Fast growers like radishes, beans, and peas work perfectly, while large seeds like sunflower or pumpkin may need extra space between them. For these, space them 2 inches apart instead of 1 inch to prevent crowding as they grow.
Transplant Timing: The moment you see those ½-inch sprouts, act fast! Delaying transplant by even a day can cause the roots to tangle and break during transfer. I keep a small tray of moist seed-starting mix ready at this stage—having everything prepped saves precious minutes when the seedlings are most fragile.
Pro Tips for Germinate Seeds In A Ziplock Bag
- Here's what I learned after speed-sprouting seeds this way for years—these little tweaks make all the difference.
- The Humidity Factor: That condensation you see on the bag sides? It's not just water vapor—it's your germination guar...
- Location Matters: While 70-80°F is ideal, don't stress if your kitchen runs cooler. Place the bag on top of your frid...
Frequently asked questions
Got questions about germinating seeds in a Ziplock bag? You’re not alone! Here are answers to the most common concerns to help you speed-sprout like a pro.
How long does it take for seeds to germinate in a Ziplock bag?
Germination time varies by seed type—fast growers like radishes or beans may sprout in 3–7 days, while slower seeds (e.g., tomatoes or herbs) can take 1–3 weeks. Keep the bag in a warm, dark place (like a pantry or seedling heat mat) and check daily for signs of life!
What if my seeds aren’t sprouting? Troubleshooting tips.
If your seeds stay dormant, try these fixes:
- Check moisture: The paper towel should feel damp but not soggy. Add a few drops of water if dry.
- Verify warmth: Seeds need 70–85°F (21–29°C). Use a heating pad or warm spot if your home is cool.
- Test viability: Old or stored seeds may fail. Try soaking a few in water overnight—if they sink, they’re likely still good.
- Adjust light: Some seeds (like lettuce) need light to germinate. Move the bag to a bright, indirect window.
Can I reuse the Ziplock bag for multiple seed batches?
Yes! Clean and disinfect the bag between uses by washing with soapy water and rinsing thoroughly. Avoid bleach—it can leave residue that harms new seeds. For hygiene, use separate bags for different seed types to prevent cross-contamination.
Do I need to use a paper towel, or can I skip it?
While paper towels work well, you can substitute with:
- Coffee filters (breathable and disposable)
- Unbleached paper towels (avoid bleached—it can inhibit growth)
- Seedling mats or damp sphagnum moss (for larger batches)
Just ensure the material stays consistently moist but not waterlogged!
What should I do if mold grows in the bag?
Mold is a red flag—discard the bag and seeds immediately to avoid contamination. Prevent it by:
- Using fresh, sterile paper towels or materials.
- Avoiding overwatering—squeeze out excess moisture.
- Adding a pinch of cinnamon (natural antifungal) to the bag (optional).
Always work in a clean space to minimize mold risks!
Wrapping up and next steps
Germinating seeds in a Ziplock bag is a game-changer—it’s simple, cost-effective, and speeds up growth so you can enjoy fresh sprouts in days! 🌱 With just a few supplies and a little patience, you’ve mastered a method that works for everything from microgreens to beans.
Now that your seeds are sprouting, it’s time to harvest, plant, or enjoy your hard work.
Ready to take the next step? Try transferring your sprouts to soil or a growing tray, or simply snack on your nutrient-packed harvest. Happy growing! 🌟