
Pests
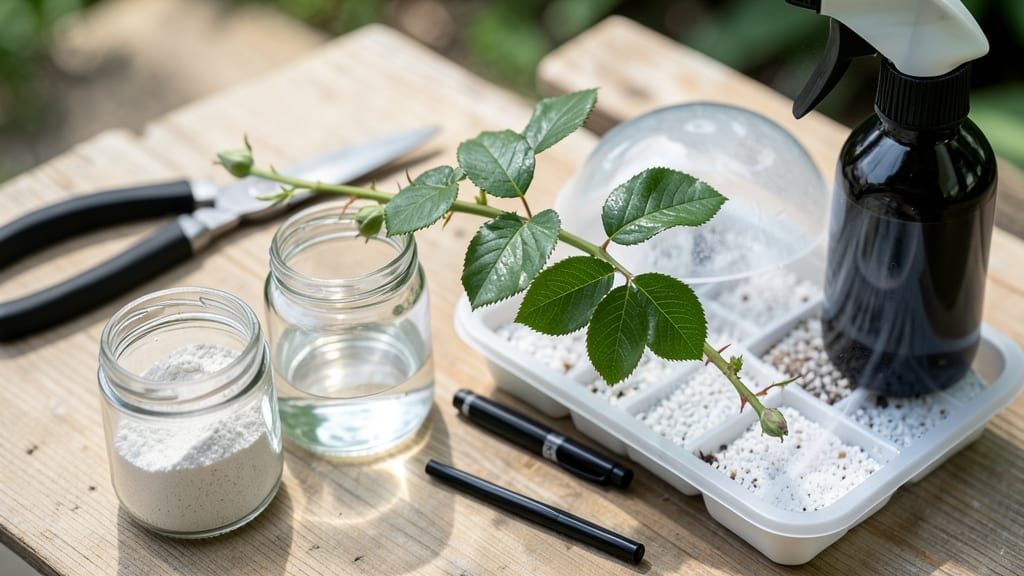
How to get a rose cutting to root—that first green shoot peeking from your cutting is magic if you do it right. 🌱 I’ve rooted dozens of cuttings, and the humidity dome hack turns what feels like gambling into a reliable process, even for black thumbs like mine. The secret isn’t expensive gear—just a clear plastic bottle, sharp scissors, and knowing when to cut. Hybrid teas and climbers root differently, but the dome trick levels the playing field. You’ll see roots forming in 4-6 weeks if you nail the light, moisture, and air flow. No more wilting cuttings or rotten stems—just sturdy new plants ready to transplant. The dome keeps humidity high where roots need it most, while still letting fresh air circulate. It’s the one thing that finally made my cuttings survive. Works for garden roses, shrubs, or even those stubborn climbers. Let’s get those stems growing roots!
📚 In This Guide
- What you need
- Instructions
- Tips and common mistakes
- Wrapping up and next steps
What you need
- ● Rose cuttings: 4–6 inches long, with 3–5 leaves (use healthy, disease-free stems from this year’s growth).
- ● Rooting hormone: A powder, gel, or liquid (like Clonex or Dip ‘N Grow) to boost rooting success.
- ● Well-draining potting mix: A blend of 50% perlite or sand and 50% peat moss or coco coir (sterilized). 1–2 gallons per batch of cuttings.
- ● Small pots or trays: 4–6 inch diameter (one per cutting) or a propagation tray with drainage holes.
- ● Clear plastic dome or bag: A humidity tent (like a plastic clamshell propagator) or a large ziplock bag (cut to size).
- ● Spray bottle: Filled with room-temperature water (avoid tap water if it’s chlorinated—let it sit out for 24 hours).
- ● Scissors or pruning shears: Clean and sharp (sterilize with rubbing alcohol).
- ● Rubbing alcohol (70% isopropyl): For sanitizing tools and cutting surfaces.
- ● Twist ties or rubber bands: To secure the humidity dome in place.
- ● A heating mat (70–75°F) to speed up rooting (especially in cooler climates).
- ● Misting fan (for airflow while maintaining humidity).
- ● Fertilizer (like diluted fish emulsion) to add nutrients after roots form (4–6 weeks).
- ● Grow lights if natural light is <10+ hours/day (roses love bright, indirect light!).
- ● Journal or labels to track cutting dates, varieties, and rooting progress.
Step-by-Step instructions for propagating rose cuttings
Here's the foolproof method I've used to root dozens of rose cuttings—no fancy tools, just smart timing and patience.
🌱 Step 1: Take Cuttings at the Right Time and Place
Choose a healthy, non-flowering stem from this year's growth, about 4-6 inches long with 3-5 leaves. Use clean, sharp pruners to make a clean cut just below a leaf node—this is where roots will form. I always take cuttings on a cloudy morning when the plant's water content is high.
Remove the bottom leaves, leaving only the top 2-3 leaves attached. Trim the remaining leaves in half to reduce moisture loss. Here's the thing—if your cutting has soft, green growth, it's ready. Avoid woody, brown stems; they won't root easily.
💧 Step 2: Prepare the Rooting Hormone and Planting Medium
Dip the cut end of your rose cutting into rooting hormone powder to encourage root growth. Shake off any excess so it doesn't clump around the stem. Fill a small pot or container with a mix of 50% perlite and 50% peat moss—this combination drains well while holding enough moisture.
Moisten the mix until it's damp but not soggy. You'll know it's right when a handful squeezes together but doesn't drip water. Stick the cutting 2-3 inches deep into the medium, pressing gently to help it stand upright. I like to use a pencil to make a hole first—it keeps the cutting from bending.
🪴 Step 3: Create the Humidity Dome for Success
Place the potted cutting inside a clear plastic bag or under a humidity dome to trap moisture. This creates the perfect environment for rooting—think of it like a mini greenhouse. Secure the bag loosely with a rubber band or twist tie, leaving a little airflow so the cutting doesn't suffocate.
Set the dome in a warm, bright spot with indirect light. Too much direct sun will overheat the cutting, while too little light slows root growth. I keep mine on an east-facing windowsill where it gets morning sun but stays cool in the afternoon. Check the soil every few days—it should stay moist but not waterlogged.
⏰ Step 4: Monitor and Maintain Until Roots Form
Wait 4-8 weeks before checking for roots. You'll know it's time when new leaves appear on the top of the cutting—that's your signal roots are growing below. Gently tug on the stem; if you feel slight resistance, roots have formed. If not, give it more time and keep the humidity high.
Once roots appear, gradually remove the humidity dome over 5-7 days to acclimate the cutting to normal air. Water lightly but consistently, keeping the soil moist but never soggy. Real talk: if you see yellowing leaves, you're overwatering. Let the top inch of soil dry out between waterings.
🌿 Step 5: Transplant and Care for New Roses
After 6-8 weeks of strong root growth, transplant your new rose into a larger pot or directly into the garden. Choose a spot with full sun (6+ hours daily) and well-draining soil. Water deeply after transplanting to help the roots settle in.
Keep the soil consistently moist for the first few weeks, then gradually reduce watering as the plant establishes. You'll see new growth within a few weeks—that's your reward for patience. I always fertilize lightly after the first month to encourage strong, healthy blooms.
Tips & tricks for perfect rose cutting propagation
These little details make all the difference when you're working with delicate plant cuttings.
Timing Secret: The 4-6 inch length and 3-5 leaves in Step 1 are non-negotiable for success. Here's what I learned the hard way: if your cutting has fewer than 3 leaves, it won't have enough energy to grow roots. And if it's longer than 6 inches, the bottom portion will rot before roots can form. Always make your cut just below a leaf node—this is where the magic happens for root development.
Medium Mix Matters: That 50% perlite to 50% peat moss ratio in Step 2 is perfect because it balances drainage and moisture retention. Too much peat moss can make the mix too dense, while too much perlite won't hold enough moisture. Pro tip: sterilize your mix by microwaving it for 2 minutes in a damp paper towel—this kills any potential pathogens that could harm your cuttings.
Humidity Dome Hack: When creating your humidity dome in Step 3, leave about 1 inch of space between the cutting and the plastic. This tiny gap allows for just enough airflow to prevent mold while maintaining that crucial humidity. I've found that using a clear plastic bag with a twist tie works better than a rigid dome—it's easier to adjust and check on your cuttings without disturbing them.
Root Check Technique: In Step 4, that gentle tug test is your best friend. If you feel even slight resistance when you tug, roots have formed! Here's the thing: don't be fooled by the appearance of new leaves on top—this is your signal that roots are developing below, but you need that physical confirmation. I always check roots by carefully removing a cutting from its pot after 6 weeks to see the progress.
Pro Tips for Get A Rose Cutting To Root
- These little details make all the difference when you're working with delicate plant cuttings.
- Timing Secret: The 4-6 inch length and 3-5 leaves in Step 1 are non-negotiable for success.
- Medium Mix Matters: That 50% perlite to 50% peat moss ratio in Step 2 is perfect because it balances drainage and moisture retention.
Frequently asked questions
Got questions about rooting rose cuttings? You’re not alone! Here are some of the most common concerns—and their answers—to help you grow confident with your humidity dome hack.
How long does it take for a rose cutting to root?
With the right humidity dome setup, most rose cuttings will show early root signs (like tiny white nubs) in 2–4 weeks. Full root development can take 6–8 weeks, depending on the variety and conditions. Patience is key—check gently by tugging the stem (if it resists, roots are forming!).
Can I root rose cuttings in water first?
While possible, water rooting is riskier for roses because it can rot stems before roots form. The humidity dome method mimics natural conditions better, encouraging stronger, faster roots. If you try water, change it every 2–3 days and use a small container to limit bacterial growth.
What’s the best time of year to take rose cuttings?
The ideal window is late spring to early summer (after flowering) or early fall (before frost). Avoid extreme heat or cold—60–75°F (15–24°C) is perfect. Mature canes (this year’s growth) root best, as they’re flexible but not woody.
Why are my rose cuttings turning yellow or mushy?
Yellowing or mushiness usually signals overwatering, rot, or poor airflow. Check for:
- Condensation: If your dome is foggy 24/7, lift it daily to air out.
- Temperature: Keep cuttings away from drafts or direct sun.
- Root rot: Trim black/mushy stems and dip in hydrogen peroxide (3%) to disinfect.
Can I use any rose variety for cuttings?
Most hybrid teas, floribundas, and climbing roses root well, but some heirlooms or grafted roses (like those with "own-root" labels) may struggle. Stick to healthy, disease-free stems from non-flowering parts of the plant. If unsure, ask your local nursery!
Wrapping up and next steps
Growing roses from cuttings is a rewarding journey—especially when you master the humidity dome hack! With the right tools, patience, and a little science, you’ll watch those cuttings transform into thriving plants. Celebrate your success and share your newfound skills with fellow gardeners!
Ready to expand your garden? Try propagating more rose varieties or experiment with other plants like hydrangeas or mint. The world of gardening is your oyster—happy growing! 🌱✨