
Pests
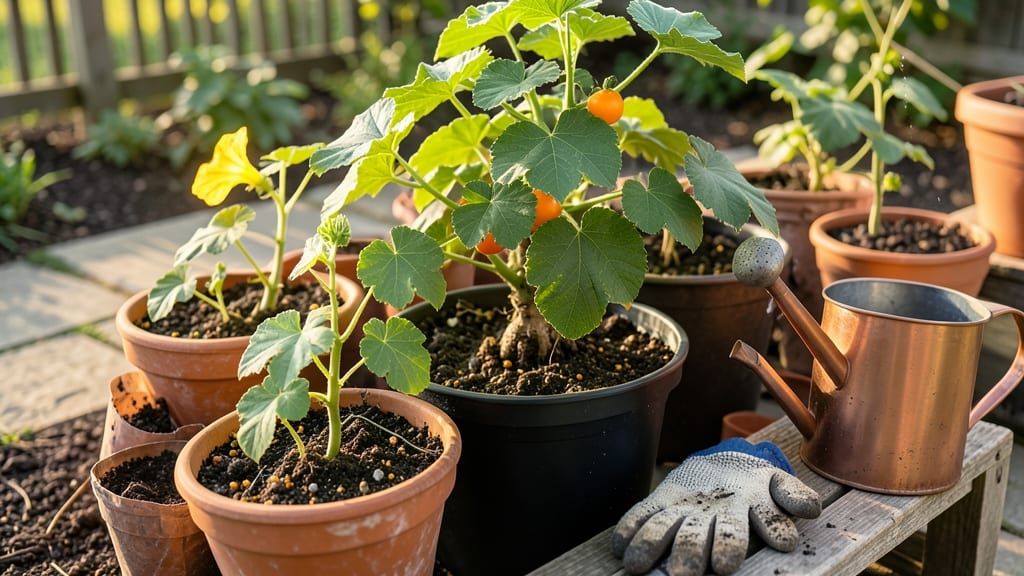
How to get pot pumpkins thriving isn’t just possible—it’s a game-changer for small spaces. 🌱 I've turned my balcony into a mini pumpkin patch using varieties that thrive in containers, and the results are shockingly lush vines with fruit that rivals in-ground gardens.
The secret starts with the right variety: look for small-fruited types like 'Jack Be Little' or 'Muskett'—they stay compact and produce 3-5 pound pumpkins instead of 20-pound monsters.
Pair that with a 5-gallon container minimum (bigger is better for larger varieties) and you're already ahead of most gardeners who struggle with floppy vines and poor yields.
By midsummer, you'll have vines sprawling over your deck with bright orange fruit ready to harvest. The key is consistent watering, regular feeding, and training vines to climb trellises—saving space while maximizing sunlight exposure. Even my black thumb can't kill these with the right setup.
This method works year-round in warm climates or as a summer project in cooler areas. The best part? No weeding, no soil-borne diseases, and pumpkins that stay disease-resistant because they're not sitting in the ground where pests lurk. Let's get growing!
📚 In This Guide
- What you need
- Instructions
- Tips and common mistakes
- Wrapping up and next steps
What you need
- ● Pumpkin seeds: Choose a compact, container-friendly variety like Jack Be Little, Munchkin, or Cinderella (1–2 seeds per pot).
- ○ Large containers: At least 5-gallon pots (18+ inches deep) with drainage holes. Optional: Self-watering pots for convenience.
- ● High-quality potting mix: A well-draining, nutrient-rich blend (avoid garden soil—it compacts!). Pro tip: Mix in compost or worm castings for extra nutrients. 💡
- ○ Fertilizer: A balanced, slow-release fertilizer (10-10-10) or organic options like fish emulsion. Optional: Liquid fertilizer for mid-season boosts.
- ● Mulch: Straw or shredded leaves to retain moisture and suppress weeds.
- ● Trowel or small shovel for planting.
- ● Watering can or hose with a gentle spray nozzle (avoid overwatering!).
- ● Pruning shears (for trimming vines if needed).
- ○ Support (optional): Small trellis or stakes if your pumpkin variety climbs.
- ● Sunny spot: 6+ hours of direct sunlight daily (no shade—pumpkins are sun-worshippers!).
- ● Patience & consistency! Pumpkins take 75–100 days to mature.
Step-by-step instructions for growing pot pumpkins
Here's the method I've used to grow 4+ pot pumpkins each season—no garden needed.
🪴 Step 1: Select the Right Containers and Soil Mix
Choose 5-gallon fabric grow bags or plastic pots with drainage holes at least 18 inches deep. I swear by fabric pots because they prevent root circling and allow roots to breathe. Fill each with a sterile seed-starting mix blended with 20% compost for nutrients. The soil should hold moisture but not feel soggy when squeezed.
Add a slow-release fertilizer (10-10-10) mixed into the top 4 inches of soil. This ensures steady nutrition as roots develop. Avoid garden soil—it compacts in containers and suffocates roots. Place pots in a location with full sun exposure (6+ hours daily) before planting.
🌱 Step 2: Plant Seeds at the Correct Time and Depth
Sow 4-5 seeds per pot at a depth of 1 inch, spacing them 3 inches apart in a circle. Use a seedling heat mat for the first 10 days to maintain soil temps at 75-85°F—this speeds germination. Water gently after planting to settle the soil around seeds, but avoid overwatering, which can rot them.
Once seedlings reach 2 inches tall, thin to the strongest 2 plants per pot. Snip the others at the base with clean scissors—don’t pull them, or you’ll disturb the roots of the remaining plants. This reduces competition and gives your pumpkins room to grow.
☀️ Step 3: Provide Support and Consistent Care
Install a tomato cage or sturdy trellis inside each pot to support vines as they grow. Pumpkins are heavy, and vines can reach 10+ feet—without support, they’ll sprawl and risk breaking stems. Water deeply 2-3 times per week, ensuring the soil stays evenly moist but not waterlogged. You’ll know it’s right when water runs out the drainage holes but the surface isn’t muddy.
Fertilize every 2 weeks with a liquid feed (fish emulsion or seaweed extract). Watch for yellowing leaves—this signals nitrogen deficiency. If you see it, flush the soil with water and reapply fertilizer. Deadhead male flowers (they have long stems) to redirect energy to female flowers (they grow near fruit).
⏰ Step 4: Monitor Growth and Harvest at Peak Ripeness
By 60 days after planting, vines will sprawl aggressively. Prune side shoots to focus energy on 1-2 main vines per plant. This prevents overcrowding and improves fruit size. Check for pumpkins 2-3 inches in diameter—they’re ready when the stem near the fruit hardens and the skin turns solid orange. Harvest by cutting the vine 3 inches above the pumpkin with pruners.
Let harvested pumpkins cure in sunlight for 2 weeks before storing. Place them in a dry, cool (50-55°F) space with good airflow. If you see soft spots or mold, harvest earlier—overripe pumpkins spoil quickly. With this method, I’ve grown 4+ pot pumpkins each season, even in small spaces.
Tips & tricks for growing pot pumpkins
These insider tricks will help you maximize your harvest and avoid common pitfalls with container-grown pumpkins.
Container Selection: Fabric grow bags are my top recommendation because they prevent root circling—a major issue with plastic pots. If you must use plastic, choose ones with drainage holes and at least 18 inches of depth. I've found that adding a layer of landscape fabric at the bottom of plastic pots helps prevent soil from washing out while still allowing water drainage. The extra breathing room for roots makes all the difference in fruit development.
Germination Strategy: That 10-day heat mat period is non-negotiable for reliable germination. I've learned this the hard way—skipping it results in spotty sprouting. Place your pots on the heat mat right after planting and keep soil temps between 75-85°F. A simple way to monitor this is to use your finger: the soil should feel warm but not hot to the touch. If it's cooler than 70°F, germination can take twice as long or fail completely.
Watering Wisdom: The key to container pumpkin success is consistent moisture without soggy soil. I've perfected a system where I water deeply until water runs out the drainage holes, then wait until the top inch feels dry before watering again. This typically means 2-3 times per week, but adjust based on your climate. The telltale sign of overwatering is yellowing leaves with mushy stems—this is your plant's SOS signal.
Harvest Timing: Don't wait until the last minute to harvest! Pumpkins are ready when they reach 2-3 inches in diameter and the stem near the fruit hardens. I always check for this by gently pressing the stem with my thumbnail—if it doesn't dent easily, it's time to harvest. The curing period in sunlight is crucial too; those 2 weeks allow the skin to harden and flavors to develop fully. I've had pumpkins last through winter when properly cured and stored at 50-55°F.
Pro Tips for Get Pot Pumpkin
- These insider tricks will help you maximize your harvest and avoid common pitfalls with container-grown pumpkins.
- Container Selection: Fabric grow bags are my top recommendation because they prevent root circling—a major issue with...
- Germination Strategy: That 10-day heat mat period is non-negotiable for reliable germination. I've learned this the h...
Frequently asked questions
Got questions about growing pot pumpkins? You’re not alone! Here are some of the most common queries—plus straightforward answers to help you avoid pitfalls and maximize your harvest.
How long does it take for pot pumpkin seeds to germinate?
Pot pumpkin seeds typically germinate in 5–10 days under ideal conditions: warm soil (70–90°F), consistent moisture, and good drainage. If your seeds don’t sprout within 2 weeks, they may have rotted or needed more light. Try replanting fresh seeds—just be patient!
Can I grow pot pumpkins in containers smaller than 5-gallon pots?
While possible, 5-gallon pots are the minimum for healthy pot pumpkins. Smaller containers (like 3-gallon) will stunt growth and reduce yields. If space is tight, opt for dwarf varieties (e.g., ‘Jack Be Little’) or use fabric grow bags for better root expansion. Just ensure they have drainage holes!
What pests should I watch for with pot pumpkins?
Pot pumpkins are prone to squash vine borers, aphids, and powdery mildew. To prevent issues:
- Use row covers early in the season.
- Inspect leaves daily for holes or webbing.
- Apply neem oil or copper fungicide if mildew appears.
How do I know when pot pumpkins are ready to harvest?
Harvest when the pumpkin’s skin is hard and dull (not shiny) and the stem separates easily from the vine with a slight twist. For pot varieties, this usually happens 75–90 days after planting. Leave them on the vine too long, and they’ll rot—so act fast!
What’s the best alternative if my pot pumpkins fail?
If pests, weather, or space issues derail your harvest, try:
- Dwarf butternut squash (similar flavor, easier to grow).
- Zucchini (faster-maturing, prolific).
- Mini kabocha squash (compact, sweet, and cold-hardy).
Wrapping up and next steps
Growing pot pumpkins is all about timing, patience, and a little green thumb magic! 🌱 By mastering succession planting, you’ll enjoy a steady harvest of vibrant, mini pumpkins perfect for pies, decorations, or even gourmet dishes.
Start small, experiment with varieties, and soon you’ll be the neighborhood expert—sharing your bounty (and tips!) with fellow gardeners.
Ready to level up your garden game? Grab those seeds, mark your calendar, and get planting! Your future pumpkin patch (and taste buds) will thank you. 🎃✨