
Pests
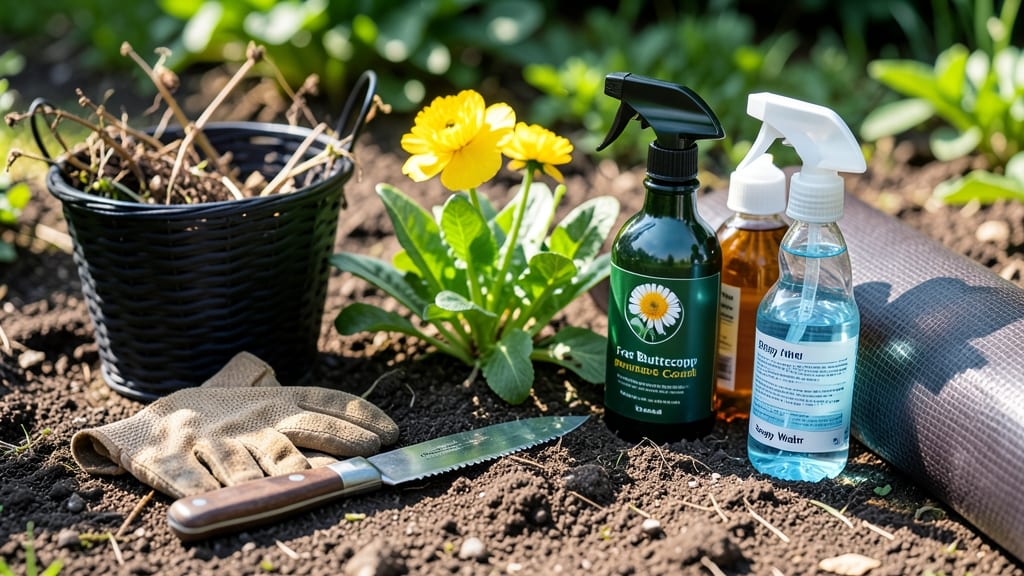
How to get rid of buttercup weeds—those stubborn yellow splotches that ruin lawns—can be tackled with a surprisingly simple trick: boiling water. I’ve battled them for years—until I discovered its secret weapon: instant root eradication that stops regrowth in its tracks. The key is timing: hit them on a dry, sunny day when the soil’s soft but the roots are still vulnerable. One pour of 200°F water directly on the stem and leaves kills the plant down to the roots—no digging required. Just be ready to repeat in 2-3 weeks for stubborn patches, because buttercup seeds lurk in the soil for years. For larger areas, smothering with cardboard or thick mulch works too—just bury those seeds deep where they can’t sprout. And if you’re dealing with a full lawn, a selective herbicide (like triclopyr) targets buttercups without harming grass, but always spot-treat to avoid overspray. Prevention starts with healthy soil and competitive ground covers—thick grass or clover crowds out buttercups naturally. The goal? A lawn so dense they can’t take hold at all.
📚 In This Guide
- What you need
- Instructions
- Tips and common mistakes
- Wrapping up and next steps
What you need
- ● Boiling water: At least 1-2 gallons per treatment session (use a large pot or kettle).
- ● Gloves: Heavy-duty gardening or heat-resistant gloves (buttercups can irritate skin!).
- ○ Trowel or hand fork: A small, sturdy tool for digging out stubborn roots (optional but helpful).
- ○ Watering can or hose (optional but useful): For pre-wetting soil if it’s dry.
- ● Trash bags or compost bin: To dispose of weeds and roots properly.
- ● Vinegar (20-30% acetic acid): Mix with boiling water (1:1 ratio) for extra kill power (great for stubborn patches!).
- ● Salt (rock salt): Sprinkle lightly around roots after boiling to deter regrowth (use sparingly—it can harm soil).
- ● Mulch or landscape fabric: Apply after treatment to block sunlight and prevent new sprouts.
- ● Spray bottle: For targeted vinegar/salt applications if you prefer precision.
Step-by-step instructions for eradicating buttercup weeds with boiling water
This method targets the roots while keeping your garden chemical-free and your skin safe.
Identify and Prepare the Target Area
Buttercup weeds thrive in moist, disturbed soil, so focus on areas where they’re dense or spreading aggressively. Look for their bright yellow, cup-shaped flowers and deeply lobed leaves—these plants multiply rapidly if left unchecked. Clear away any surface debris like leaves or mulch within a 12-inch radius of each weed cluster, as hidden roots can regenerate from fragments.
Wear long sleeves and gloves—boiling water causes steam burns, and buttercup sap can irritate sensitive skin. If working in full sun, do this early morning or late afternoon when temperatures are cooler. Mark the perimeter of your treatment zone with small stakes or a garden hose to avoid accidentally scalding nearby plants.
Boil Water and Apply Directly to the Roots
Use a large, heavy pot (at least 2 gallons) to boil 2-3 quarts of water per cluster of buttercups. The water must be rolling boil—not just steaming—to penetrate the tough taproots. For stubborn patches, boil 4-5 quarts in batches and apply immediately to avoid cooling.
Pour the boiling water slowly and evenly over the center of each weed, aiming for the base where the roots meet the soil. You’ll see the leaves wilt instantly, but the real work happens underground as the heat kills the root system. Repeat this process 2-3 times per cluster if the area is heavily infested, spacing applications 3-5 days apart to ensure no roots survive.
Monitor and Repeat for Regrowth
Buttercup roots can be resilient, so check the treated area 7-10 days after your first application. New shoots may appear if any roots escaped the heat—these are your warning signs. For these, repeat the boiling water treatment, this time focusing on the entire root zone (dig gently with a trowel to expose hidden roots if needed).
Once the area is clear for 3-4 weeks, apply a 2-inch layer of landscape fabric or cardboard topped with mulch to prevent new seeds from germinating. Buttercups spread via both roots and seeds, so blocking sunlight and moisture is key to long-term control. Avoid tilling the soil afterward—this can bury live root fragments and trigger regrowth.
Prevent Future Buttercup Infestations
Buttercups favor disturbed soil, so minimize digging or tilling in affected areas. Instead, maintain a thick mulch layer (3-4 inches) of wood chips or straw to smother emerging weeds. If you notice new buttercup seedlings, pull them immediately—they’re easier to remove by hand when small. Regularly inspect high-risk zones (like garden edges or pathways) every 2 weeks during the growing season.
For stubborn cases, consider vinegar-based herbicides (a 20% acetic acid solution) as a follow-up, but test on a small area first—it can harm nearby plants. The boiling water method is your first line of defense, but consistency is critical. Once you’ve eliminated the roots, your garden will stay buttercup-free for seasons to come.
Tips & tricks for effective buttercup weed eradication
This method works best when you understand the science behind it—heat penetration and root system targeting make all the difference.
Precision in Water Application: The key to success lies in delivering that rolling boil directly to the root zone. I’ve found that using a watering can with a narrow spout works better than pouring from a pot—it gives you more control over the flow. Aim for the base of the plant where the stem meets the soil, and let the water soak in rather than running off. For large patches, consider using a turkey baster or even a small garden sprayer designed for boiling water applications.
Timing is Everything: Buttercup roots are most vulnerable when the soil is moist, which is why early morning or late afternoon treatments work best. The moisture in the soil conducts heat more effectively, ensuring the boiling water penetrates deeper. If you’re treating a dry area, water the soil first—this isn’t about drowning the plants, just enough to help the heat work its magic. Remember, the 7-10 day check is critical; don’t skip it, even if the area looks clear.
Equipment Upgrade: While a large pot works, I’ve had better results with a dedicated boiling water weed killer tool—these are available online and make the process much more efficient. They’re designed to hold and dispense boiling water safely, with handles that keep your hands protected. If you’re treating multiple clusters, this upgrade is worth the investment. For those working on a budget, a heavy-duty kettle with a long spout can be a good alternative.
Safety First: This method is chemical-free, but that doesn’t mean it’s risk-free. I can’t stress enough how important it is to wear long sleeves, gloves, and closed-toe shoes when applying boiling water. The steam alone can cause burns, and buttercup sap is notorious for irritating skin. If you’re working near delicate plants, create a buffer zone by marking it with flags or stakes—accidental spills can damage your garden’s intended flora.
Pro Tips for Get Rid Of Buttercup Weeds
- This method works best when you understand the science behind it—heat penetration and root system targeting make all the difference.
- Precision in Water Application: The key to success lies in delivering that rolling boil directly to the root zone.
- Timing is Everything: Buttercup roots are most vulnerable when the soil is moist, which is why early morning or late afternoon treatments work best.
Frequently asked questions
Got questions about tackling buttercup weeds?
You’re not alone—these stubborn invaders can be tricky! Below, we’ve answered the most common queries to help you finally reclaim your garden.
How do I know if I’m dealing with buttercup weeds?
Buttercups (like Ranunculus species) have bright yellow, cup-shaped flowers and jagged leaves. They often grow in lawns, fields, or disturbed soil. If your weeds have milky sap and a slightly bitter taste, they’re likely buttercups. Pro tip: Pull one to check the roots—deep, fibrous roots mean they’ll regrow if not treated properly!
When is the best time to treat buttercup weeds?
Target buttercups before they flower (spring to early summer) for best results. Young plants are easier to remove, and boiling water works fastest when weeds are actively growing. Warning: Avoid treating in extreme heat (boiling water can scorch nearby plants) or during drought—soil moisture matters!
Will boiling water kill buttercup roots completely?
Yes! Boiling water coagulates plant proteins instantly, killing roots and preventing regrowth. For stubborn patches, reapply after 3–5 days to ensure no sprouts remain. Alternative: Vinegar (20% acetic acid) mixed with dish soap can work, but it’s less effective on deep roots.
Can I use natural remedies instead of boiling water?
Try these eco-friendly options:
- Salt + Vinegar: Mix 1 cup salt + 1 gallon vinegar, spray on weeds (avoid desirable plants—it’s harsh!).
- Corn Gluten: Apply as a pre-emergent in fall to block seeds.
- Hand-Pulling: Use a weeding tool to grasp roots (wear gloves—sap causes skin irritation!).
What should I do if buttercups keep coming back?
Persistent buttercups often mean hidden seeds or roots. Dig deeper (6+ inches) to remove root fragments, then:
- Mulch treated areas with cardboard + compost to smother regrowth.
- Reapply boiling water or herbicide (like glyphosate) to stubborn patches.
- Improve soil health with clover or grass to outcompete weeds.
Are buttercup weeds toxic to pets or kids?
Buttercups contain protoanemonin, a compound that can irritate skin or cause stomach upset if ingested. Keep pets/kids away while treating and rinse skin if sap touches it. Good news: They’re not deadly, but prevention (like regular mowing) reduces exposure.
Wrapping up and next steps
Getting rid of buttercup weeds doesn’t have to be a battle—with the right tools and techniques, you can reclaim your garden fast! 🌱 The boiling water hack is a powerful, eco-friendly way to zap those stubborn roots for good.
Whether you opt for manual removal, vinegar solutions, or natural repellents, consistency is key.
Now that you’re armed with these tips, take action today! Start small—clear a patch, monitor progress, and soon your garden will be weed-free. Happy gardening! 🌿