
Pests
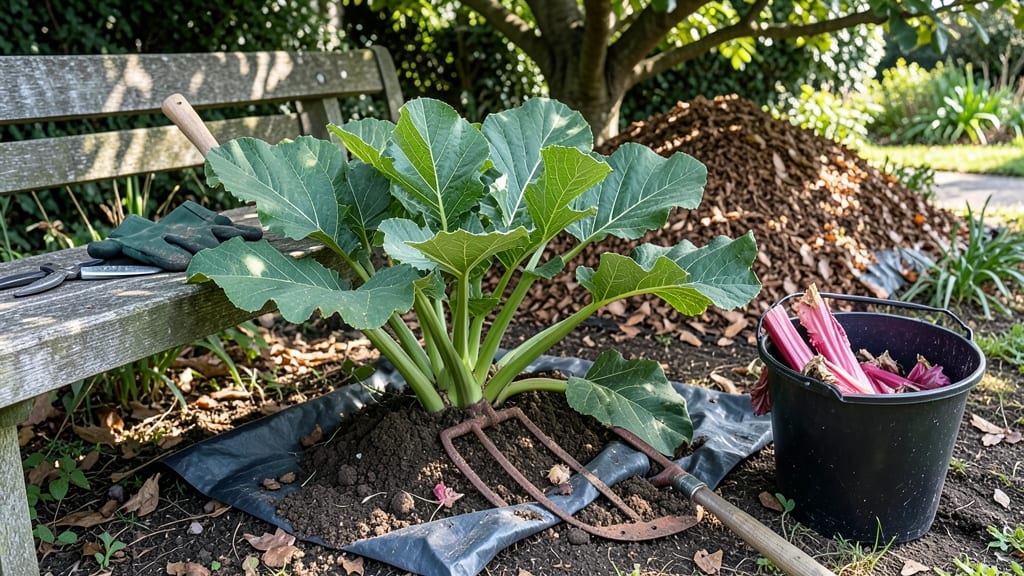
How to get rid of rhubarb—once those roots take hold, they’re as stubborn as a weed, spreading relentlessly through your garden. I’ve battled them for years, trying everything from digging to pulling, but the smothering method finally gave me the clean garden I wanted—without resorting to chemicals. This approach works for both edible and ornamental varieties because it targets the entire root system, not just what you see above ground. You’ll need heavy-duty black plastic, stakes, and a sharp knife to cut through thick stalks before covering them completely. The key is patience: it takes 6-12 months for the roots to decompose under the plastic.
By the end, your garden bed will be free of rhubarb’s aggressive spread, ready for new plants or a fresh start. The method also prevents regrowth better than digging, which often leaves fragments behind. Just avoid composting the pulled plants—their roots can sprout again if not fully decomposed.
For best results, choose a dry day to cut stalks and secure the plastic tightly. If you’re dealing with a large patch, divide the area into sections to make the process more manageable. This method is chemical-free and works in any climate where rhubarb grows.
📚 In This Guide
- What you need
- Instructions
- Tips and common mistakes
- Wrapping up and next steps
What you need
- ● Black plastic sheeting – 10–20 mil thickness, enough to cover the entire rhubarb patch (measure your bed first!)
- ● Heavy-duty staples or landscape staples – 1–2 inch size, for securing the plastic tightly (about 20–30 staples depending on area).
- ● Shovel or spade – For loosening soil and smoothing the ground before laying plastic.
- ● Garden stones, bricks, or U-clips – To weigh down the edges and prevent wind from lifting the plastic.
- ● Gloves – Heavy-duty work gloves to protect your hands while handling sharp tools or stubborn roots.
- ● Watering can or hose – For dampening the soil before covering (helps plastic adhere better).
- ● Cardboard or newspaper – Lay a layer underneath the plastic to block light even more effectively.
- ● Soil solarizer fabric – If you want to maximize heat buildup (great for stubborn roots!).
- ● Pruners or loppers – To chop up any remaining rhubarb stalks before smothering.
- ● Markers or flags – To label the area so you don’t accidentally dig there later!
Step-by-Step instructions for eliminating rhubarb using the smothering method
This method works by blocking sunlight and air to the roots until the plant gives up completely.
Clear the Area Around the Rhubarb
Start by cutting back the rhubarb stalks at ground level with a sharp pair of pruners or shears. Remove all visible leaves and stems, but leave the roots in the ground for now. This reduces the plant's energy reserves before smothering. I like to work on a dry day so the soil doesn't stick to my tools or my hands.
Next, remove any debris or weeds from the area around the rhubarb. You want a clean workspace to properly apply the smothering material. Dig around the perimeter of the plant to expose the roots slightly—this helps the smothering material make better contact with the root system. Be careful not to damage the roots too much, as you still want them alive for now.
Apply a Thick Layer of Smothering Material
Spread a 4-6 inch thick layer of cardboard or thick black plastic directly over the rhubarb bed. Make sure there are no gaps where light can sneak through. I use corrugated cardboard because it breaks down over time, which helps suppress weeds later. If using plastic, weigh it down with bricks or rocks to prevent wind from blowing it away.
Extend the smothering material at least 12 inches beyond the plant's perimeter to prevent regrowth from any remaining roots. The goal is to block all sunlight and air from reaching the plant. If you notice any gaps or thin spots, add more material immediately. This step is critical—even a small patch of exposed soil can allow new shoots to emerge.
Keep the Area Consistently Moist and Dark
Water the smothered area thoroughly after applying the material. This helps settle the cardboard or plastic and ensures good contact with the soil. Over the next 4-6 weeks, keep the area moist by watering every 2-3 days if it hasn't rained. The goal is to maintain a damp environment, which speeds up the decomposition process and chokes out the roots.
Check the smothered area weekly to ensure the material hasn’t shifted or degraded. If the cardboard starts to break down or the plastic lifts, add more material to maintain full coverage. You’ll know the rhubarb is dying when the stalks turn brown and wilt. This usually happens within 3-4 weeks, but some stubborn roots may take longer.
Verify Complete Elimination and Prepare the Soil
After 6-8 weeks, carefully remove the smothering material and inspect the area. Dig around the original plant bed to check for any remaining roots or shoots. If you find any live roots, cover them again with fresh smothering material and wait another 2-4 weeks. I’ve found that even a small piece of root can regrow into a full plant if left unattended.
Once the area is completely clear, loosen the soil with a garden fork or tiller to aerate it. This helps break up any remaining root fragments and prepares the bed for new plantings. If you plan to replant, add a 2-3 inch layer of compost to enrich the soil. The smothering process can deplete nutrients, so this step ensures your next plants thrive.
Monitor for Regrowth and Maintain the Area
Keep an eye on the area for at least 6 months after removal, as rhubarb roots can sometimes linger and sprout unexpectedly. If you see any new shoots, pull them immediately or smother them again. This is especially important if you’re planting something else in the same spot, as rhubarb can be aggressive and competitive.
Once the area is confirmed clear, you can replant with new vegetation. Rhubarb has a deep root system, so choosing a different type of plant for that spot—like shallow-rooted herbs or flowers—can help prevent future invasions. If you’re unsure, test the soil with a small patch of annuals first to confirm no regrowth occurs.
Tips & tricks for permanent rhubarb removal
These practical strategies will help you eliminate invasive rhubarb patches for good while avoiding common pitfalls that lead to regrowth.
Step 1 Precision: When digging around the perimeter in Step 1, focus on removing any visible root fragments—even small pieces can regrow. I've learned the hard way that leaving behind even a 2-inch root segment can produce new shoots within weeks. Use a garden fork to gently loosen the soil and expose the full root system before marking the edges.
Material Selection: For Step 2, I strongly recommend using black plastic over cardboard if you want faster results. While cardboard breaks down over time, black plastic creates a more immediate airtight seal that accelerates the decomposition process. If you choose cardboard, use at least 4-6 sheets to ensure complete light blockage—thinner layers can let light penetrate and allow regrowth.
Edge Security: The most common failure point in Step 2 is improper edge securing. I've seen many gardeners skip this step, only to have wind lift the covering and expose gaps where new shoots emerge. Use heavy landscape staples or bricks every 12 inches along the perimeter to create a completely sealed barrier. This prevents even the smallest amount of light from reaching the roots.
Monitoring Strategy: During the 6-12 month period in Step 3, establish a simple monitoring routine: check the area every 4-6 weeks for any new growth. If you spot sprouts, cut them off at the base and replace the cover immediately. I've found that consistent monitoring during the first 6 months is most critical—this is when regrowth attempts are most likely to occur.
Pro Tips for Get Rid Of Rhubarb
- These practical strategies will help you eliminate invasive rhubarb patches for good while avoiding common pitfalls that lead to regrowth.
- Step 1 Precision: When digging around the perimeter in Step 1, focus on removing any visible root fragments—even small pieces can regrow.
- Material Selection: For Step 2, I strongly recommend using black plastic over cardboard if you want faster results.
Frequently asked questions
How long does it take for rhubarb to die after smothering?
The smothering method typically takes 4–6 weeks to fully kill rhubarb roots, depending on weather conditions. In hot, dry climates, it may work faster (2–3 weeks), while cooler, wetter seasons could extend the process. Monitor the area—once the leaves turn brown and crispy, the plant is likely dead.
Can I reuse the smothered area for planting right away?
No, wait at least 3–4 months after smothering before replanting. This gives time for the soil to decompose organic matter and for any lingering roots or pathogens to break down. Test soil health or amend it with compost to ensure a fresh start for new plants.
What if rhubarb keeps growing back after smothering?
If stubborn shoots reappear, dig deeper (6+ inches) to remove any remaining roots or crowns. Repeat the smothering process for another 4 weeks. For persistent regrowth, consider vinegar or herbicide treatments (follow label instructions carefully).
Does smothering work in winter?
Yes! Smothering in late fall or winter can be even more effective because cold temperatures weaken the plant. Use thick layers of mulch (like cardboard + straw) to trap heat during daytime and protect against freezing. Check progress in spring—dead leaves will confirm success.
Are there safer alternatives to smothering for small patches?
For small areas, try digging out roots (wear gloves—rhubarb has oxalates!) or boiling water treatment (pour directly on the crown). Solarization (clear plastic sheets in sun) also works but requires 4–6 weeks of hot weather. Always opt for manual removal if the patch is tiny.
Wrapping up and next steps
Getting rid of rhubarb can feel like a challenge, but with the smothering method, you’ve got a reliable, chemical-free way to choke out those stubborn roots for good! 🌱 Whether you’re reclaiming garden space or just tired of battling regrowth, patience and consistency are your best tools.
Once you’ve covered the area and waited it out, you’ll be ready to transform that space into something new—maybe even a fresh veggie patch or flower bed!
Ready to take the next step? Mark your calendar for a follow-up check in 6–12 months, then dig up any remaining roots to ensure a clean slate. Your garden (and future gardening projects) will thank you! 🎉