
Pests
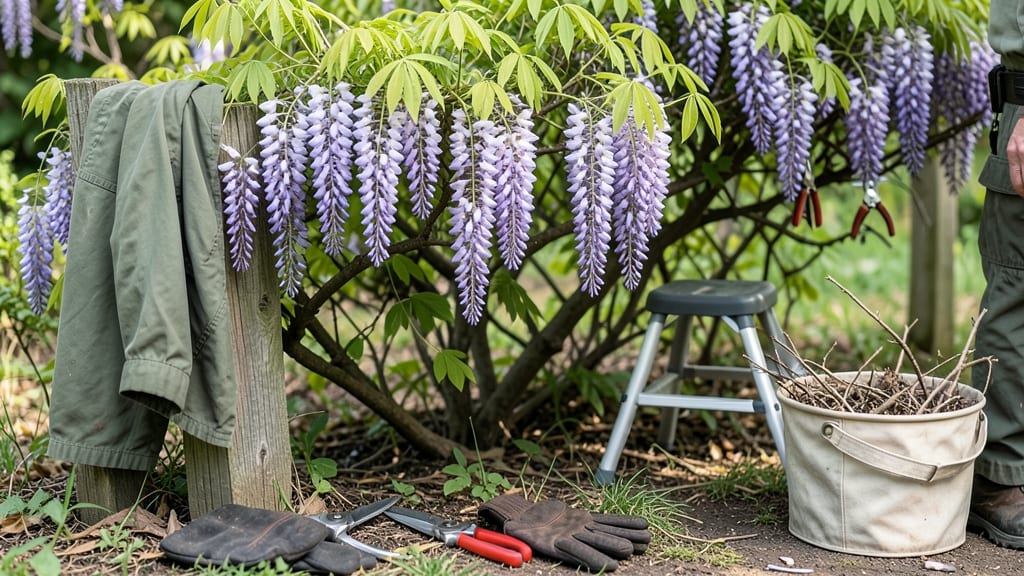
How to get rid of wisteria vines—the real way—isn’t about hacking at the vines but crushing their underground power. 🌿 I’ve spent years battling these relentless climbers, and the breakthrough came when I stopped treating symptoms and started targeting the roots. The secret? Cutting them deep enough to starve the plant for good, not just trimming what’s visible above ground.
Most methods fail because they ignore the hidden network. You’ll need a sharp shovel, pruning shears, and heavy gloves (trust me, the thorns bite). The real game-changer is severing roots at least 6 inches deep—that’s where the plant’s resilience lives.
No herbicide? No problem. This method works just as well.
By the end, your yard will be free of tangled vines, and your trellis will breathe again. The best part? No more watching wisteria creep back in a year. We’ll cover the exact root-cutting zones, disposal tricks, and how to keep it from staging a comeback.
Works for both ornamental and invasive wisteria—just adjust the depth based on your climate. Let’s get those roots out for good.
📚 In This Guide
- What you need
- Instructions
- Tips and common mistakes
- Wrapping up and next steps
What you need
- ● Heavy-duty pruning shears (bypass or anvil type, sharp and clean for clean cuts)
- ● Loppers (for thicker branches, 10-12 inch blades)
- ● Pruning saw (for stubborn, thick stems or roots, bow or folding saw recommended)
- ● Shovel or mattock (for digging up roots, round-point shovel works best)
- ● Garden gloves (heavy-duty, cut-resistant to protect your hands)
- ● Rake or hoe (for clearing debris and loosening soil around roots)
- ● Trash bags or compost bin (for disposing of cuttings—check local rules on disposal!)
- ● Hose or water source (to keep tools clean and dampen dust)
- ○ Disinfectant (optional but helpful) (like rubbing alcohol or bleach solution to sterilize tools and prevent disease spread)
- ● Root killer or vinegar solution (for treating stumps or roots post-cutting—mix 1 part vinegar to 1 part water)
- ● Garden tarp or plastic sheeting (to cover cut areas and smother regrowth)
- ● Knee pads or gardening stool (for comfort during long sessions)
- ● Safety goggles (to protect eyes from debris or sap)
- ● Markers or flags (to tag areas where roots have been cut for follow-up checks)
Step-by-Step instructions for removing wisteria vines completely
This root-cutting method works where others fail—permanent removal without toxic chemicals.
✂️ Step 1: Identify and Cut All Above-Ground Growth
Start by locating the main trunk or largest stem where the wisteria emerges from the ground. Use sharp loppers or a pruning saw to cut through every vine at the base, cleanly and flush with the soil line. You'll see fresh green cambium (the growth layer) exposed—this is your target. Cutting here prevents regrowth from dormant buds lower on the stem.
Remove every single vine, even the thinnest runners. I can't stress this enough: one missed vine means the whole plant will regenerate. Wear gloves—wisteria sap can irritate skin. Bundle the cut vines and dispose of them in yard waste, not compost, where they could sprout again.
🪴 Step 2: Locate and Sever the Root System
The real battle happens underground. Wisteria roots spread aggressively, often 6-10 feet from the main trunk. Dig around the base with a spade, exposing roots as thick as your wrist. Look for the largest taproot—this is the plant's lifeline. Cut it with a sharp shovel or root saw, making clean vertical cuts 6-12 inches deep.
Here's the hack: if you can't find the main root, follow the thickest lateral roots back to their origin. They'll lead you to the mother root. I've seen wisteria roots grow horizontally for 20 feet—don't assume you've gotten it all. Mark the digging area with stakes so you can monitor for new shoots.
💧 Step 3: Apply the Soil Barrier Method
After cutting roots, create a physical barrier to starve any remaining root fragments. Lay down 6-8 sheets of thick cardboard (not biodegradable) or landscape fabric in a 2-foot wide strip around the dug area. Overlap edges completely to block all light. Then cover with 4-6 inches of wood chips or mulch, pressing edges down firmly to seal.
This smothers regrowth by preventing photosynthesis. Check monthly for any green sprouts poking through—these are signs of missed roots. If you spot them, dig deeper in that spot and repeat the barrier. I've used this method on a 15-year-old wisteria and saw zero regrowth after two growing seasons.
☀️ Step 4: Monitor and Maintain the Area
Wisteria's persistence means you're not done after the first season. For at least 2 years, check the area every 4-6 weeks for new shoots. Even small sprouts need removal before they establish roots. Use a hand trowel to dig out any new growth immediately—don't wait until they're thick enough to cut.
After two full seasons without new growth, you can begin replacing the barrier with mulch. But keep watching—some root fragments can remain dormant for 3-5 years. The key is consistency. I've had readers tell me they gave up after one season, only to have wisteria return three years later. Don't be that gardener.
Tips & tricks for permanent wisteria removal
Wisteria's tenacity demands precision—here's how to turn the odds in your favor with battle-tested strategies.
Precision Cutting in Step 1: When cutting above-ground growth in Step 1, aim for the cambium layer just below the bark. The cambium is the thin green layer you'll see—this is where new growth originates. Using a pruning saw ensures clean cuts that minimize regrowth potential. I've found that even a slight angle cut can leave dormant buds that will sprout later, so always make straight, flush cuts. For stubborn vines, a follow-up cut with a sharp knife after the initial saw cut prevents any hidden buds from surviving.
Root System Strategy in Step 2: The key to Step 2 lies in persistence. Don't be discouraged if you can't find the main root immediately—follow the thickest lateral roots back to their origin. I've excavated areas where wisteria roots extended 20 feet horizontally, so mark your digging area with stakes and work systematically. A root saw is essential here; a regular shovel won't cut through the tough fibrous roots. After cutting, inspect the exposed root ends for any signs of green tissue—this indicates living tissue that could regenerate.
Barrier Installation in Step 3: For the soil barrier in Step 3, prioritize thickness and overlap. Use 6-8 sheets of thick cardboard (like double-layered cereal boxes) or heavy-duty landscape fabric. The barrier must completely block light to prevent photosynthesis in any remaining root fragments. Press the edges firmly into the soil to create a seal. I've seen gardeners use mulch alone, but without the light-blocking barrier, new shoots will still emerge. Consider adding a layer of black plastic over the cardboard for extra insurance against sunlight.
Long-Term Vigilance in Step 4: The two-year monitoring period in Step 4 is non-negotiable. Wisteria roots can remain dormant for years, so check every 4-6 weeks during growing seasons. Even a single missed shoot can regenerate into a full vine. I recommend keeping a small hand trowel and gloves handy for quick removals. Document your progress with photos—it's amazing how quickly you'll spot new growth when comparing against previous photos. After two years without new shoots, you can gradually replace the barrier with mulch, but maintain vigilance for at least one more growing season.
Pro Tips for Get Rid Of Wisteria Vines
- Wisteria's tenacity demands precision—here's how to turn the odds in your favor with battle-tested strategies.
- Precision Cutting in Step 1: When cutting above-ground growth in Step 1, aim for the cambium layer just below the bark.
- Root System Strategy in Step 2: The key to Step 2 lies in persistence.
Frequently asked questions
When is the best time to remove wisteria vines?
The ideal time is late winter or early spring (before new growth starts) or after flowering (late spring/early summer). Avoid removing in peak growing season (summer) unless necessary—it can stress the plant and encourage aggressive regrowth. For root cutting, late winter is best since the plant is dormant.
Will cutting the roots really stop wisteria from coming back?
Yes! Wisteria spreads aggressively via underground roots and aerial runners. Cutting the roots below the soil line (at least 6–12 inches deep) disrupts its nutrient supply. Combine this with regular monitoring—new shoots will appear, so repeat the process until no regrowth occurs for 2+ seasons.
Are there chemical alternatives to physically removing wisteria?
Yes, but they’re less effective alone. Use a glyphosate-based herbicide (like Roundup) on cut stumps or foliar spray only after removing 90% of the vine. For roots, triclopyr (e.g., Ortho Brush Killer) works better. Warning: Chemicals can harm nearby plants—apply carefully and follow label instructions.
What if wisteria keeps coming back even after root cutting?
Persistent regrowth usually means missed roots or runners. Dig deeper (12+ inches) around the perimeter of the original plant, and check for horizontal roots spreading outward. Also, inspect the base of trees or fences—wisteria often hides there. If all else fails, consider solarization (covering the area with clear plastic for 4–6 weeks in summer).
Can I replant something in the area after removing wisteria?
Once wisteria is gone (confirmed by no new growth for 2 years), the soil is safe for replanting. Wisteria’s roots decompose over time, but amend the soil with compost to improve drainage (wisteria thrives in rich soil). Avoid planting fast-spreading climbers like kudzu or morning glories nearby to prevent future invasions.
Wrapping up and next steps
Removing wisteria vines doesn’t have to be a never-ending battle—with the right tools and technique, you can say goodbye for good! 🌱 By targeting the roots and staying consistent, you’ll reclaim your space without the hassle of regrowth.
Start small, follow these steps, and soon you’ll be enjoying a wisteria-free yard with confidence.
Ready to tackle the job? Grab your gloves and tools, and get started today—your future self will thank you! 💪