
Container Gardens
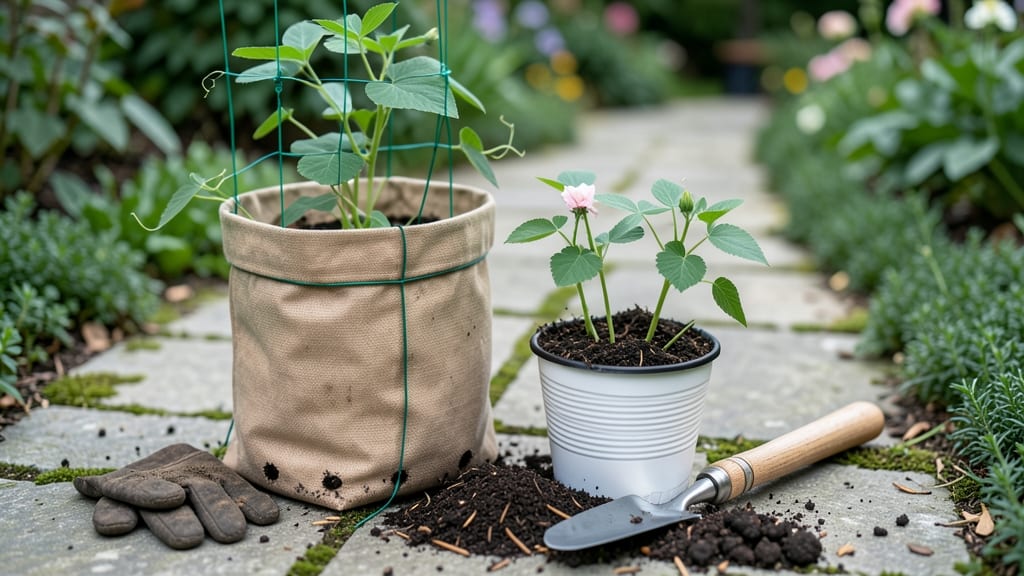
How to grow black-eyed peas in containers will give you bold greens and edible pods just feet from your door. ✨ I learned this after struggling with leggy seedlings in my tiny balcony garden, but once I adjusted the containers and sunlight, they became my most productive plants. The secret? A deep enough pot to support their sprawling vines and a soil mix that stays loose but retains moisture.
You’ll need 5-gallon containers (or larger) with drainage holes, a mix of potting soil and compost, and a sunny spot getting 6-8 hours of light daily. Plant seeds 1 inch deep, 2-3 inches apart, and thin to the strongest sprouts.
These peas love warmth—wait until soil reaches 60°F before planting, and they’ll germinate in 7-10 days if kept consistently moist but not soggy.
By midsummer, you’ll be harvesting tender young pods (like snap peas) and lush leaves for salads. The vines will climb or sprawl, depending on your setup, and with proper care, they’ll keep producing until frost.
The key to success? Pruning regularly to encourage bushier growth and watch for aphids—a quick spray of soapy water keeps them at bay.
Works in patios, balconies, or even hanging baskets with trellises. Once you try container-grown black-eyed peas, you’ll never buy them again—they’re sweeter, fresher, and endlessly versatile in the kitchen. Ready to grow yours?
📚 In This Guide
- What you need
- Instructions
- Tips and common mistakes
- Wrapping up and next steps
What you need
- ● Container: At least 5-gallon size (or larger) with drainage holes. Options: Fabric grow bags (12"–18" deep)
- ● Plastic or ceramic pots (12"–18" diameter)
- ● Self-watering planters (ideal for beginners!)
- ● Potting Mix: Well-draining, organic mix (avoid garden soil). 1 bag (1–2 cubic feet) per container.
- ● Black-Eyed Pea Seeds: 3–5 seeds per container (or 1–2 seeds per 6" of container width). Choose heirloom varieties like "Purple Hull" or "Crowder".
- ● Drainage Layer: Small pebbles, perlite, or broken pottery (1–2 inches at the container’s bottom).
- ● Fertilizer: Balanced organic fertilizer (e.g., 10-10-10) at planting.
- ○ Slow-release granules (optional, mix into soil).
- ● Watering Can or Hose: With a gentle spray nozzle for even moisture.
- ○ Trellis or Cage (Optional but Recommended): A 4–5 foot tall stake or trellis to support vines (black-eyed peas climb!).
- ● Mulch: Straw or shredded leaves to retain moisture and suppress weeds.
- ● Compost: Mix 1–2 cups into soil for extra nutrients.
- ● Epsom Salt: 1 tablespoon dissolved in water (spray on leaves) for magnesium boost.
- ● Shade Cloth: If growing in hot climates (30–50% shade for seedlings).
- ● Harvest Scissors: Small, sharp pruners for clean pod snipping.
Step-by-step instructions for growing black eyed peas in containers
Here's my foolproof method for growing these nutrient-packed legumes in pots—no sprawling vines, just compact plants that deliver fresh greens and pods all season.
🌱 Step 1: Select the Right Containers and Prepare Soil
Black eyed peas need 5-gallon containers minimum—their roots grow deep, and shallow pots stunt growth. I use fabric grow bags because they allow roots to breathe and prevent waterlogging, which these plants hate. Drill extra drainage holes if your pot doesn't have them; black eyed peas rot quickly in soggy soil.
Fill the container with a mix of 60% potting soil, 30% compost, and 10% perlite for drainage. The soil should crumble easily when squeezed—black eyed peas won't tolerate dense, compacted dirt. Add a handful of balanced 10-10-10 fertilizer to the bottom layer to give roots a nutrient boost from day one.
🌱 Step 2: Plant Seeds at Correct Depth and Spacing
Sow 3-4 seeds per container, placing them 1 inch deep and 2 inches apart in a loose circle. Planting too deep delays germination, while shallow planting exposes seeds to drying out. I like to use a pencil to make small holes—it keeps spacing consistent and prevents overcrowding.
Cover seeds lightly with soil and water gently until the surface feels evenly moist. Black eyed peas germinate best in 70-80°F soil, so if your space runs cooler, place the pot on a seedling heat mat for 5-7 days until sprouts appear. You'll see tiny green hooks breaking through the soil in about 7-14 days—that's your cue to stop the heat mat.
☀️ Step 3: Provide Support and Optimal Light
Black eyed peas are vining plants, but in containers, they need support to grow upright. Install a 4-foot tall trellis or tomato cage immediately after planting—these plants twine naturally and will climb aggressively if given the chance. I use bamboo stakes tied with twine for a rustic look that blends into any garden.
Place your containers in a spot with 6-8 hours of direct sunlight daily. South-facing windows or a sunny patio work well, but if you're growing indoors, supplement with a grow light kept 6 inches above the plants. Leggy stems with pale leaves mean your plants aren't getting enough light—adjust their position immediately.
💧 Step 4: Water and Fertilize for Continuous Harvest
Keep the soil consistently moist but never soggy—black eyed peas wilt quickly when thirsty but also rot if overwatered. Water when the top 1-2 inches of soil feel dry, aiming for 1 inch of water per week. I use a moisture meter to check, but sticking your finger in the soil works just as well.
When plants reach 6 inches tall, switch to a low-nitrogen fertilizer like 5-10-10 to encourage flowering and pod production. Feed every 4-6 weeks during the growing season. You'll know you're doing it right when you see yellow flowers followed by pods in 6-8 weeks—that's when the real harvest begins.
✂️ Step 5: Harvest and Prune for Ongoing Production
Harvest young pods when they're 3-4 inches long and still tender for the best flavor. Pinch off pods with your fingers—don't use scissors, as they can damage the vine. I harvest every 2-3 days during peak production to encourage more flowers and pods to form.
After the main harvest, prune back any leggy growth to 12 inches tall to promote bushier growth. Black eyed peas often produce a second flush of pods if given proper care. When frost threatens, you can still harvest the pods—just bring the container inside to a sunny window and keep it watered until the plants finish producing.
Tips & tricks for growing black eyed peas in containers
Here's what nobody tells you about growing these hardy legumes in small spaces—tricks that'll make all the difference between struggling plants and a bountiful harvest.
Container Size Matters: The 5-gallon minimum isn't just a suggestion—black eyed peas develop deep taproots that need space to grow. If you're tempted to use smaller pots, you'll end up with stunted plants that produce fewer pods. I've seen firsthand how plants in 3-gallon containers struggle to support themselves, even with trellises. For best results, invest in larger containers or use fabric grow bags that allow roots to expand naturally.
Soil Mix is Non-Negotiable: That 60-30-10 ratio of potting soil, compost, and perlite isn't arbitrary—it creates the perfect balance of nutrients and drainage these plants crave. I learned this the hard way after using regular garden soil, which compacted and led to root rot. Test your mix by squeezing a handful: if it holds its shape like wet sand, add more perlite. The goal is soil that crumbles easily when dry.
Germination Trick: The 7-14 day germination window can feel like forever, but you can speed things up by soaking seeds overnight before planting. Place them in a bowl of warm water for 8-12 hours, then drain and plant as directed. This pre-hydration jumpstarts growth, especially in cooler conditions. Just be sure to plant them at the same 1-inch depth—they won't tolerate being buried deeper after soaking.
Lighting Hack: When indoor growing, position your grow light just 4-6 inches above the plants—closer than you might think. I used to keep mine 8 inches away, which left my plants leggy and weak. The key is to adjust the height as they grow: when you can fit two fingers between the light and plant tops, you're at the perfect distance. Rotate containers weekly to ensure even growth all around.
Pro Tips for Grow Black Eyed Peas In Containers
- Here's what nobody tells you about growing these hardy legumes in small spaces—tricks that'll make all the difference between struggling plants and a bountiful harvest.
- Container Size Matters: The 5-gallon minimum isn't just a suggestion—black eyed peas develop deep taproots that need space to grow.
- Soil Mix is Non-Negotiable: That 60-30-10 ratio of potting soil, compost, and perlite isn't arbitrary—it creates the perfect balance of nutrients and drainage these plants crave.
Frequently asked questions
Got questions about growing black-eyed peas in containers?
You’re not alone! Here are some of the most common queries—and their easy, actionable answers to help you succeed.
How deep do containers need to be for black-eyed peas?
Black-eyed peas thrive in containers that are at least 12–18 inches deep. Their roots can grow surprisingly long, so deeper is always better—especially if you’re growing for edible pods. If space is tight, opt for a large pot or fabric grow bag and train vines upward with a trellis to save space.
When is the best time to plant black-eyed peas in containers?
For year-round harvests, plant in early spring (after frost) or late summer (60–90 days before first frost). In warm climates, they grow well in fall or winter too! Just ensure soil temps stay above 60°F (15°C)—they’re sensitive to cold. Start seeds indoors 4–6 weeks early if your season is short.
Why aren’t my black-eyed peas flowering or producing pods?
Lack of flowers or pods usually means heat, poor pollination, or nutrient deficiencies. Try these fixes:
- Boost heat tolerance: Move containers to a shadier spot if temps exceed 90°F (32°C).
- Hand-pollinate: Gently shake plants or use a soft paintbrush to transfer pollen.
- Fertilize: Add a balanced, low-nitrogen fertilizer (like 5-5-5) when flowers appear.
Can I grow black-eyed peas in hanging baskets or small pots?
While possible, hanging baskets or tiny pots (under 10 inches deep) limit root growth and pod production. Instead, use large pots (12+ inches deep) or fabric grow bags for better yields. If you’re set on small containers, choose bush varieties (like ‘Purple Hull’) and harvest only the peas—not the pods.
What pests should I watch for when growing black-eyed peas in containers?
Keep an eye out for:
- Aphids: Spray with soapy water or introduce ladybugs.
- Spider mites: Mist plants daily to deter them.
- Bean beetles: Handpick adults or use neem oil.
Containers help reduce soil-borne pests, but inspect leaves regularly and remove damaged foliage promptly. A row cover can also protect young plants.
Wrapping up and next steps
Growing black-eyed peas in containers is a rewarding way to enjoy fresh, homegrown greens and edible pods—no sprawling garden required! 🌱 With the right setup, a little patience, and these simple steps, you’ll be harvesting vibrant leaves and tender pods in no time.
Whether you’re a beginner or a seasoned gardener, this method proves that even small spaces can yield big results.
Ready to dive in? Start by gathering your supplies, choose your favorite variety, and get planting! Before you know it, you’ll be savoring the crisp, nutritious rewards of your container-grown black-eyed peas—straight from your balcony to your plate. Happy growing! 🌟