
Propagation
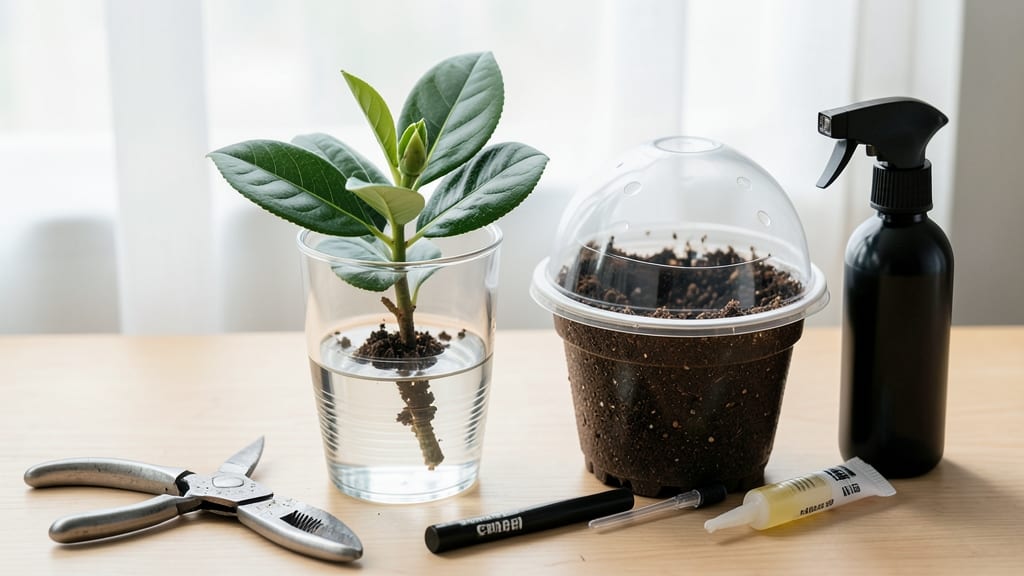
How to grow gardenias from clippings—there’s nothing like the scent of summer bottled in a tiny jar. 🌿 I've rooted dozens of these fragrant cuttings, and the secret isn't complicated—just timing, sharp scissors, and a little patience. Most gardeners throw away those lush green clippings after pruning, but they're actually free plants waiting to happen.
The magic happens in 4 weeks with the right setup: 6-inch cuttings from healthy stems, a rooting hormone dip, and a cozy mix of perlite and peat. Humidity is key—covering them with a plastic bag creates the tropical conditions they crave.
I've even rooted cuttings in simple water glasses when I forgot the propagation box, though the soil method works faster.
By week 4, you'll see tiny roots forming, and those glossy leaves will tell you everything's on track. The first blooms might take a year, but the fragrance alone makes it worth the wait. These rooted cuttings grow into bushier plants than store-bought ones, with more flowers and stronger scent.
Timing matters—spring and early summer give you the best success rates, but with a heat mat, you can try year-round. The biggest mistake? Overwatering or using old, woody stems. Stick with fresh, green growth from this season's pruning, and you'll be smelling gardenias in no time.
📚 In This Guide
- What you need
- Instructions
- Tips and common mistakes
- Wrapping up and next steps
What you need
- ● Healthy gardenia clippings: 4–6 inches long, with at least 2–3 leaf nodes (non-flowering stems work best).
- ● Rooting hormone: 1 small bottle (powder or gel formula, like Clonex or Rootone).
- ● Well-draining potting mix: 1 small container (4–6 inches deep) of a peat-perlite mix (50/50 ratio) or cactus/succulent soil.
- ● Spray bottle: 8–16 oz (for misting clippings).
- ● Plastic bag or clear container: Large enough to cover the cutting (e.g., a gallon-sized zip-top bag or a propagator).
- ● Scissors or pruning shears: Clean and sharp (sterilize with rubbing alcohol).
- ● Water: Room-temperature, filtered if possible.
- ○ Humidity dome or plastic wrap: Optional but helpful for maintaining moisture.
- ○ Heat mat: Germinating mat (optional for faster rooting in cooler climates).
- ● Fertilizer: Diluted seaweed extract or fish emulsion (use sparingly after roots form).
- ● Grow lights: LED or fluorescent (if natural light is <10 hours/day).
- ● Small pots: 4–6 inch pots with drainage holes (for transplanting after rooting).
- ● Label markers: To track clipping dates and progress!
Step-by-step instructions for growing gardenias from clippings
Here’s how I’ve turned gardenia clippings into thriving plants—no fancy equipment needed.
🌱 Step 1: Select and Prepare Healthy Clippings
Choose 4-6 inch cuttings from new growth with at least 2-3 leaf nodes (those little bumps where leaves meet the stem). Use sharp pruners to make a clean cut just below a node at a 45-degree angle—this increases surface area for root development. Avoid woody stems; they root poorly.
Strip the lower leaves off the cutting, leaving only the top 2-3 leaves. This reduces moisture loss and directs energy toward root growth. Dip the cut end in rooting hormone (optional but helpful for faster results). I like to work in the morning when stems are firm and hydrated.
💧 Step 2: Plant in Moistened Root Medium
Fill a small pot or container with perlite or a 50/50 mix of perlite and peat moss—this ensures drainage while keeping moisture. Moisten the mix until it feels like a wrung-out sponge: damp but not dripping. Stick your prepared clippings 1-2 inches deep into the medium, spacing them 2 inches apart if planting multiple.
Gardenias root best in warmth (70-75°F). Place the container in a clear plastic bag (like a gallon-sized one) to create a humid microclimate. Secure loosely with a rubber band—you want airflow but trapped moisture. Keep the medium consistently damp, not soggy, by misting lightly every 2-3 days.
☀️ Step 3: Provide Indirect Light and Warmth
Set your clippings in bright, indirect light—think east-facing window or under grow lights set to 12-14 hours/day. Direct sun will scorch the leaves before roots form. I’ve seen clippings fail when placed in harsh light; watch for yellowing leaves as a warning sign.
Keep the temperature steady at 70-75°F—a heat mat can help if your home runs cooler. Roots typically appear in 4-6 weeks, but don’t rush it. You’ll know it’s working when tiny white bumps form along the stem (future roots) and new growth emerges at the top.
✂️ Step 4: Transplant When Roots Establish
Once roots reach 1-2 inches long (gently tug the cutting—resistance means success), it’s time to transplant. Fill a 6-inch pot with well-draining potting mix (add perlite for aeration). Plant the cutting at the same depth it was rooted, firming soil around the base to eliminate air pockets.
Water thoroughly, then reduce frequency—gardenias hate soggy roots. Place the new pot in bright, indirect light again and avoid fertilizing for 4-6 weeks to let the plant adjust. You’ll see fresh growth in 2-3 weeks, signaling it’s thriving.
🌿 Step 5: Maintain for Blooms and Growth
After transplanting, keep soil evenly moist (check top inch daily) and feed every 2 months with acidic fertilizer (pH 5.0-6.0). Gardenias love humidity—group pots together or use a pebble tray with water to mimic their tropical habitat. Prune leggy growth to encourage bushier shape.
Blooms arrive in 3-6 months, but patience pays off. Deadhead spent flowers to redirect energy into new growth. If leaves yellow, it’s often overwatering—let the top inch dry out before watering again. With care, your clippings will reward you with fragrant blooms year after year.
Tips & tricks for perfect gardenia propagation
A few simple tricks can make all the difference when growing gardenias from clippings—especially when you're working with delicate stems.
Timing Secret: The morning is the best time to take cuttings because the stems are fully hydrated and firm. I’ve found that working in the early hours reduces stress on the plant and gives it a better chance to root successfully. Avoid cutting on hot afternoons when the stems are at their most vulnerable.
Rooting Hormone Tip: While rooting hormone is optional, it can significantly speed up the process—sometimes cutting the rooting time by half. If you choose to use it, make sure to dip the cut end just enough to coat it lightly; excessive hormone can actually harm the delicate tissue. I’ve had the best luck with powdered rooting hormone applied immediately after cutting.
Humidity Control: The plastic bag creates a greenhouse effect, but it’s crucial to balance moisture and airflow. If you notice condensation forming on the inside of the bag, that’s a good sign—it means the humidity level is just right. Open the bag for 5-10 minutes every few days to prevent mold growth, which can be deadly to your cuttings.
Lighting Strategy: If you don’t have an east-facing window, consider using a simple LED grow light on a timer set to 12-14 hours per day. I’ve had great success with basic grow bulbs placed about 6 inches above the cuttings. Just be sure to keep the light away from the leaves to prevent burning—it’s easy to overlook this detail when you’re excited about the process.
Pro Tips for Grow Gardenias From Clippings
- A few simple tricks can make all the difference when growing gardenias from clippings—especially when you're working with delicate stems.
- Timing Secret: The morning is the best time to take cuttings because the stems are fully hydrated and firm.
- Rooting Hormone Tip: While rooting hormone is optional, it can significantly speed up the process—sometimes cutting the rooting time by half.
Frequently asked questions
Got questions about propagating gardenias from clippings? You’re not alone! Here are some of the most common concerns—and their answers—to help you grow confidently.
How do I know if my gardenia clipping is healthy enough to root?
A healthy clipping should have at least 3-4 nodes (those little bumps where leaves grow) and firm, green stems. Avoid woody or mushy cuttings—they won’t root well. Look for new growth (soft, flexible stems) for the best success!
Can I grow gardenias from clippings year-round, or is there a best time?
Gardenias root best in spring or early summer when temperatures are warm (70–80°F) and days are long. Avoid winter or fall cuttings—they struggle in cooler weather. If you’re in a mild climate, late spring is ideal!
Why aren’t my clippings rooting? Troubleshooting tips?
Common issues include:
- Rot: Overwatering or poor drainage? Let the soil dry slightly between waterings.
- No roots: Check humidity—try a plastic bag or propagator. Low light can also slow growth.
- Yellow leaves: Too much direct sun or fertilizer burn. Move to bright, indirect light.
Can I use gardenia leaves or flowers for propagation?
Nope! Only stem cuttings with nodes will root. Leaves or flowers won’t develop roots on their own. Stick to healthy, non-flowering stems (they focus energy on rooting, not blooming).
What’s the best soil mix for rooting gardenia clippings?
A light, airy mix works best: combine 50% perlite or sand with 50% peat moss or coconut coir. Avoid heavy garden soil—it holds too much moisture and suffocates roots. Sterilize the mix by baking it at 200°F for 30 minutes to kill pests!
Wrapping up and next steps
Growing gardenias from clippings is a rewarding way to expand your fragrant garden—with patience and care, you’ll soon enjoy lush, blooming plants! 🌿 By following the right steps—selecting healthy cuttings, rooting them in water or soil, and providing consistent moisture—you’ll accelerate growth and boost success rates.
Once rooted, transplant your new gardenias into well-draining soil and watch them thrive in sunny, slightly acidic conditions.
Now that you’re armed with the know-how, roll up your sleeves and start clipping! Share your progress with fellow gardeners or experiment with different propagation methods. Happy growing—your garden (and nose) will thank you! 🌸