
Container Gardens
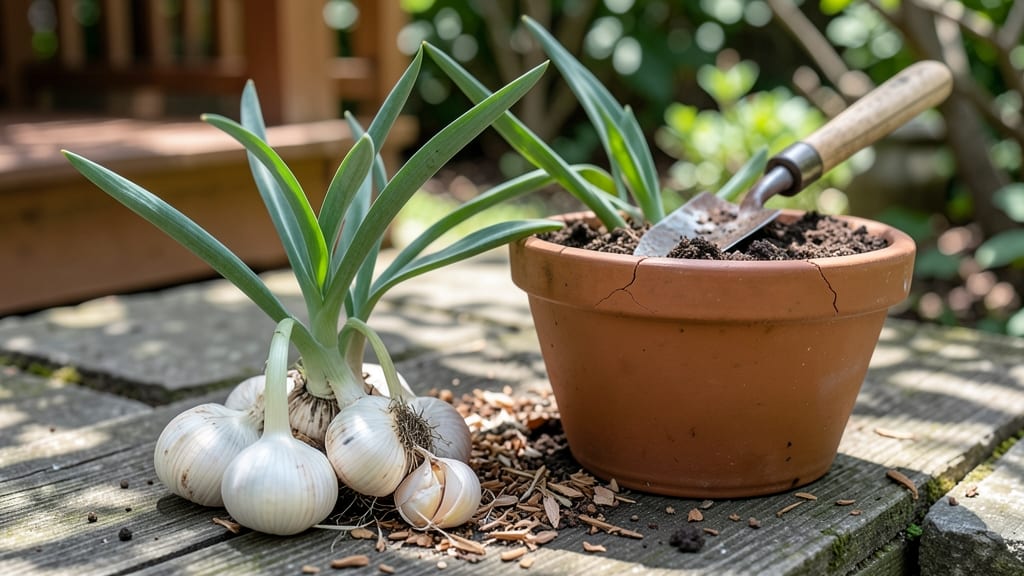
How to grow garlic from cloves in containers delivers bold, pungent harvests without needing a backyard. 🌱 I’ve turned my balcony into a garlic-growing powerhouse using nothing but five-gallon buckets and a sunny windowsill, and you can too—no fancy equipment required.
The secret lies in the right container size (at least five gallons per plant), well-draining soil, and a little winter patience. Garlic thrives in cool weather, so plant cloves in fall for a summer harvest.
Just dig two inches deep, space them four to six inches apart, and keep the soil moist but not soggy.
By midsummer, you’ll snip scapes (those curly green shoots) for flavorful cooking, then harvest plump bulbs when lower leaves brown. Even in small spaces, this method yields three to four times more garlic than store-bought—plus, it’s organic and disease-resistant.
Containers work year-round in mild climates, but if frost hits, move pots to a sheltered spot. The key? Consistent moisture and full sun. Skip the fertilizers—garlic grows best with minimal fuss. Ready to grow your own bold harvest?
📚 In This Guide
- What you need
- Instructions
- Tips and common mistakes
- Wrapping up and next steps
What you need
- ● Garlic cloves: 8–12 hardneck or softneck cloves (choose organic, disease-free bulbs).
- ● Containers: At least 2–3 containers (12" deep, 12" wide) with drainage holes. Options: fabric pots, wooden barrels, or plastic bins.
- ● Potting mix: 10–15 gallons of well-draining, organic-rich soil (amend with compost or aged manure).
- ● Mulch: 2–3 inches of straw or shredded leaves (to retain moisture and regulate temperature).
- ● Watering can or hose: With a gentle spray nozzle for even moisture.
- ○ Fertilizer (optional but helpful): Balanced organic fertilizer (e.g., 5-5-5) or compost tea.
- ● Plant labels (to track varieties).
- ● Row covers (for frost protection in early spring).
- ● pH testing kit (ideal soil pH: 6.0–7.0).
- ● Drip irrigation system (for consistent watering).
Step-by-step instructions for growing garlic from cloves in containers
Here's how I transform small spaces into garlic powerhouses—no yard needed.
🌱 Step 1: Select and Prepare Your Garlic Cloves
Choose hardneck garlic varieties for best flavor and storage potential. Break apart a whole bulb, ensuring each clove remains attached to its papery skin—this prevents drying. Discard any soft or sprouted cloves, as they won’t thrive. For 4 plants, you’ll need 4 large cloves (about 1 per container). I like to soak them in lukewarm water for 2 hours before planting—this jumpstarts root growth and ensures better establishment.
Here’s the thing—planting too early or too late ruins the harvest. Aim for 6-8 weeks before your last frost date in fall or early spring (just as soil reaches 50°F). If your zone has mild winters, fall planting works best; warmer climates should plant in winter. The key is cool soil—garlic needs a chilling period to form bulbs properly.
🪴 Step 2: Choose Containers and Soil for Optimal Growth
Use containers at least 6 inches deep with drainage holes—garlic roots need room to spread downward. I recommend 8-inch pots for each clove, as they prevent overcrowding and allow bulbs to swell. Fill with well-draining potting mix (never garden soil—it compacts and causes rot). Amend with compost for nutrients, but avoid fresh manure, which burns roots.
Garlic hates soggy feet. I always add a 1-inch layer of gravel at the bottom of each pot before soil to improve drainage. Press the mix down lightly—you want it loose but firm enough to support the clove. The goal is fluffy, airy soil that mimics loose garden beds. Pre-moisten the mix until it’s damp but not dripping; garlic roots need consistent moisture but won’t tolerate waterlogged conditions.
💧 Step 3: Plant Cloves Correctly for Strong Bulbs
Break the clove in half lengthwise—you’ll see a flat side and a pointed side. Plant the flat side down, 2 inches deep, with the pointed tip facing up. This orientation ensures the bulb forms properly above ground. Space 4 inches apart in larger containers or use individual pots to avoid competition. Gently firm the soil around the clove to eliminate air pockets.
Water immediately after planting to settle the soil and trigger root growth. Keep the soil evenly moist (not soggy) until green shoots appear—usually 2-3 weeks. Here’s where most people mess up: overwatering. Garlic rots faster than it grows if the soil stays wet. You’ll know moisture is right when the top inch feels damp but not glistening. Mulch with 1 inch of straw to retain moisture and suppress weeds.
☀️ Step 4: Provide Light and Care Through the Growing Season
Garlic thrives in full sun (6-8 hours daily) but tolerates partial shade in hot climates. Place containers where they get morning sun and afternoon shade if temperatures exceed 85°F. I move mine to a shadier spot midday during summer heat waves—wilting leaves mean the plant is struggling, not dying.
Fertilize once in early spring with a balanced organic fertilizer (like 5-5-5) to encourage leafy growth. Stop fertilizing 8 weeks before harvest—too much nitrogen produces big leaves but small bulbs. Watch for scapes (the curly stem that appears in late spring)—these indicate maturity. Pinch them off to redirect energy to bulb formation. When leaves yellow and flatten (usually late summer), it’s harvest time.
⏰ Step 5: Harvest and Cure for Long-Term Storage
Gently lift bulbs from the soil when lower leaves turn brown but before they shatter. Shake off excess dirt and lay them in a single layer on a screen or tray in a dry, shaded, well-ventilated area for 2-3 weeks. This curing process hardens the skins and prevents rot. I place mine under a fan to speed drying—humidity is the enemy here.
Once bulbs feel light and papery, trim roots and stems, leaving ½-inch stems attached. Store in a cool (60-65°F), dark, dry place with good airflow. Properly cured garlic lasts 6-8 months—the secret to winter flavor without spoilage. If you miss the curing window, bulbs will sprout or mold. Trust me, patience here pays off with bold, pungent harvests all winter long.
Tips & tricks for container-grown garlic success
These practical insights will help you avoid common pitfalls and maximize your container garlic harvest.
Clove Selection: The quality of your garlic starts with the cloves. Look for plump, firm cloves with intact papery skins—these hold moisture better and resist rot. I always test cloves by gently squeezing them; if they feel soft or mushy, they won't grow well. For best results, use hardneck varieties like Rocambole or German White, as they produce larger bulbs and scapes in containers. The 2-hour lukewarm water soak before planting is non-negotiable—it kickstarts root growth and gives you a head start on establishment.
Container Depth and Drainage: Never skimp on container size. While the instructions call for 6-inch minimum depth, I recommend 8-inch pots for each clove to prevent overcrowding and allow bulbs to develop properly. The 1-inch gravel layer at the bottom isn't just for drainage—it creates an air pocket that prevents waterlogging, which is garlic's biggest enemy. If you're using decorative containers without drainage, add a 2-inch layer of gravel at the bottom and drill holes yourself. Remember, garlic roots need both room to spread downward and excellent drainage to thrive.
Planting Orientation: The flat side down, pointed tip up orientation in Step 3 is crucial—it ensures the bulb forms above ground where we can harvest it. Here's what nobody tells you: the pointed tip contains the shoot that will become your garlic plant, while the flat side anchors the bulb. If you plant with the tip down, you'll end up with a tangled mess of roots and no harvestable bulb. After planting, give the soil a gentle press around the clove to eliminate air pockets, which can cause rot during the initial rooting phase.
Harvest Timing: The 2-3 week curing period after harvest is where most container gardeners fail. Don't rush this step—proper curing is what makes your garlic last all winter. I place my curing trays under a small fan on low setting to circulate air without creating drafts. Watch for the papery skins to become completely dry and brittle; if they still feel slightly damp, extend the curing time. The 60-65°F storage temperature is ideal for preventing sprouting while maintaining flavor. If you're impatient, you can speed up drying by moving the trays to a warmer spot (up to 70°F), but don't exceed this temperature or the skins will darken.
Pro Tips for Grow Garlic From Cloves In Containers
- These practical insights will help you avoid common pitfalls and maximize your container garlic harvest.
- Clove Selection: The quality of your garlic starts with the cloves. Look for plump, firm cloves with intact papery sk...
- Container Depth and Drainage: Never skimp on container size. While the instructions call for 6-inch minimum depth, I ...
Frequently asked questions
Got questions about growing garlic in containers? You’re not alone—this method takes patience, but the payoff is worth it! Here are answers to the most common queries to help you grow bold, healthy garlic with confidence.
How long does it take to grow garlic from cloves in containers?
Garlic is a slow grower! Plant cloves in fall (8–12 weeks before the first frost) for a summer harvest, or in early spring for a smaller fall crop. Expect bulbs to mature in 90–120 days after sprouting, depending on your climate and variety.
Can I use store-bought garlic cloves to grow new plants?
Yes, but opt for organic, untreated cloves from the outer bulb (they’re healthier). Avoid supermarkets that treat garlic with sprout inhibitors—look for seed garlic (available at garden centers) for the best success. If using store-bought, soak cloves in lukewarm water for 24 hours to kickstart sprouting.
What if my garlic cloves rot or mold in the container?
Rot is usually caused by overwatering or poor drainage. Ensure your container has drainage holes and use a well-draining potting mix (like 60% soil, 30% compost, 10% perlite). If cloves rot, remove them immediately and let the soil dry out before replanting. Never let containers sit in standing water!
Do I need to fertilize container garlic, and if so, when?
Garlic is low-maintenance but benefits from balanced fertilizer (like 10-10-10) at planting and again in early spring (for fall-planted garlic). Avoid high-nitrogen fertilizers—they promote leafy growth over bulbs. A light compost top-dressing in spring also works!
What’s the best container size for growing garlic?
Garlic bulbs need space to spread—aim for a container at least 6–8 inches deep and 12+ inches wide per 3–4 cloves. For multiple bulbs, use a 5-gallon bucket or larger (e.g., 10–12 cloves in a 12”x12” container). Wider > deeper!
How do I know when container-grown garlic is ready to harvest?
Harvest when 60% of the lower leaves turn brown (usually late spring/early summer). Gently loosen soil around bulbs with a fork, then pull them up. Don’t wait too long—overripe garlic splits and spoils. Cure in a dry, shady spot for 2–3 weeks before storing.
Still stumped? Drop your question in the comments—we’re happy to help you grow garlic like a pro!
Wrapping up and next steps
Growing garlic from cloves in containers is a rewarding journey that turns small spaces into flavor-packed gardens! 🌱 With just a few simple steps—choosing the right cloves, preparing your pots, and providing consistent care—you’ll soon enjoy fresh, homegrown garlic straight from your balcony or patio.
Whether you're a seasoned gardener or a curious beginner, this method proves that big harvests start with bold confidence.
Now that you’re armed with the know-how, why not plant your first cloves this week? Start small, experiment with varieties, and watch your container garden thrive. Happy growing—and get ready to savor the taste of success! 🌟