
Propagation
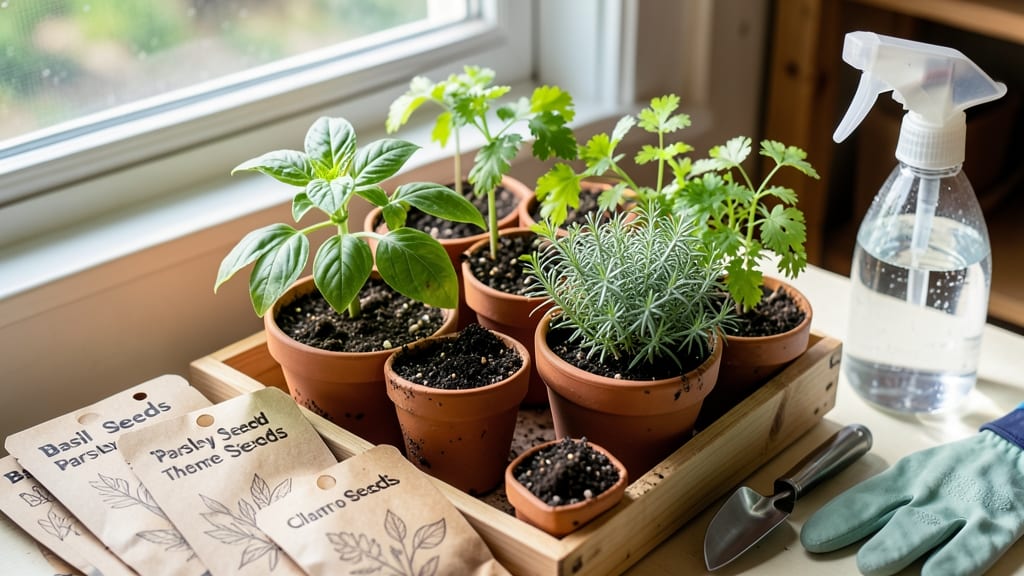
How to grow herbs from seeds in pots lets you have fresh basil, parsley, and mint year-round—even on a tiny windowsill. 🌱 I’ve turned my kitchen into a mini herb garden after struggling with store-bought pots that wilted within days. The secret? The right soil, pots, and a little patience. You’ll need 4-6 inch pots (or a single tray for multiple seeds), well-draining potting mix, and a sunny spot—even a south-facing window works. Most herbs germinate in 7-14 days if kept moist but not soggy. Basil and parsley are the easiest for beginners, while mint spreads aggressively (so give it its own pot!). By week 3, you’ll see tiny sprouts pushing through the soil, and by month 2, you’ll have enough to snip for cooking. The best part? No more wilting herbs from the grocery store—just fresh, fragrant leaves whenever you need them. This method works for apartments, balconies, or even a sunny office desk. Here’s how to avoid the most common pitfalls and keep your herbs thriving all season long.
📚 In This Guide
- What you need
- Instructions
- Tips and common mistakes
- Wrapping up and next steps
What you need
- ● Herb seeds: Choose fast-growing varieties like basil, parsley, chives, or mint (start with 1–2 types for beginners).
- ● Containers: 4–6-inch pots with drainage holes (1–2 per herb type).
- ● Window box or shallow tray (if growing multiple herbs together).
- ● Potting mix: Lightweight, well-draining seed-starting mix or organic potting soil (avoid garden soil—it’s too dense!).
- ● Drainage material: Small pebbles or perlite (1–2 inches per pot).
- ● Watering can or spray bottle: With a fine mist nozzle for gentle watering.
- ● Labels: Wooden sticks or plant markers (to track growth stages!).
- ● Grow lights: LED or fluorescent full-spectrum bulbs (if natural light is <12 hours/day).
- ● Humidity dome: Clear plastic wrap or a seedling heat mat (to retain moisture).
- ● Fertilizer: Organic liquid fertilizer (like fish emulsion) or slow-release granules.
- ● Herb-specific tools: Pruning shears (for harvesting) or a small trowel for repotting.
- ● Decorative touches: Painted pots, saucers, or a cute plant stand for style points!
Step-by-step instructions for growing herbs from seeds in pots
Here's how to transform tiny seeds into a thriving indoor herb garden—no green thumb required.
🌱 Step 1: Prepare Pots and Planting Mix
Fill your 4-inch pots with a lightweight seed-starting mix—never garden soil. I press the mix down gently until it's firm but still loose enough for roots to push through. The goal is a fluffy texture that holds moisture without compacting. Tap the pot once or twice on the table to settle everything evenly.
Moisten the mix with room-temperature water until it feels like a damp sponge—no puddles, just consistent dampness. This ensures seeds won't dry out immediately after planting. I like to use a spray bottle for this step because it waters gently without displacing the soil.
🌱 Step 2: Sow Seeds at the Right Depth
Check your seed packet for depth—most herbs need planting at ¼ inch deep. I use my finger to make a small hole, drop in 2-3 seeds per pot (just in case they don't all germinate), then cover lightly with more mix. Planting too deep slows germination because the seedling has to work harder to reach light.
Label each pot immediately with the herb name and date. After a week, identical seedlings look identical—you'll forget which is which! I use toothpicks and masking tape for labels because they're easy to write on and won't degrade in moisture.
💧 Step 3: Create Ideal Germination Conditions
Cover the pots with clear plastic wrap or a humidity dome to trap warmth and moisture. Herbs germinate best at 70-75°F, so if your home runs cooler, place pots on a seedling heat mat. Expect sprouts in 7-14 days, depending on the herb—basil germinates quickly, while parsley can take two weeks.
Check daily but don't water yet. The dome traps enough moisture that the soil stays damp without intervention. Once 50% of seeds have sprouted, remove the dome immediately—trapped humidity invites damping-off disease, which collapses seedlings overnight.
☀️ Step 4: Provide Bright Light Immediately
The instant seedlings break through the soil, they need 12-16 hours of bright light daily. A south-facing window rarely provides enough intensity, so I use a grow light positioned 2-3 inches above the plants. Raise it as they grow to maintain that gap—too close causes leaf burn.
Without sufficient light, seedlings stretch toward the light (called "leggy") and never recover. You'll know your setup is right when seedlings have thick stems, deep green color, and leaves spaced 1 inch apart. Rotate pots a quarter turn daily so they grow straight instead of leaning.
🌿 Step 5: Thin and Care for Strong Seedlings
When seedlings have 2 true leaves (not the initial seed leaves), thin to the strongest plant per pot. Use scissors to snip weak seedlings at soil level—pulling risks disturbing roots. The remaining plant will have more space to develop strong roots and foliage.
Water when the top inch of soil feels dry, using room-temperature water. I water at the base to avoid wetting leaves, which prevents fungal diseases. Fertilize lightly with a balanced liquid fertilizer (like 10-10-10) diluted to half-strength every 2 weeks once seedlings have 4 leaves.
Tips & tricks for growing thriving herbs in pots
Real talk: Even the smallest details make the difference between herbs that thrive and ones that barely survive. Here's what I learned after watching my first batch of seedlings stretch toward the light like they were auditioning for a horror movie.
Lighting Setup: That 12-16 hours of light isn't just a suggestion—it's non-negotiable for strong stems. I use a simple LED grow light on a timer so I don't forget to turn it on/off. Position it just 2-3 inches above your seedlings and raise it as they grow. Too close? You'll get crispy leaves. Too far? Your herbs will stretch like they're trying to escape their pots.
Germination Temperature: The 70-75°F range is crucial, but most homes don't stay that warm. I place my seed trays on a heating pad set to low—it's like giving your seeds a cozy blanket. If you don't have one, group pots together under a heat lamp or move them to a warm spot like near your oven (when it's off). Just don't let them get above 80°F or they'll overheat.
Thinning Technique: When you're thinning to keep the strongest seedling, use clean scissors to snip at soil level rather than pulling. I've seen people tug seedlings out and accidentally pull up the winner too. The goal is to minimize root disturbance—your remaining plant will thank you with bushier growth. This is where patience pays off, especially when you've got multiple pots.
Watering Wisdom: The top inch dry test works, but I've found that watering from the bottom actually encourages deeper root growth. Place your pots in a shallow tray of water for 10-15 minutes until moisture reaches the top. This prevents surface drying and fungal issues. Just make sure your pots have drainage holes—herbs hate soggy feet.
Pro Tips for Grow Herbs From Seeds In Pots
- Real talk: Even the smallest details make the difference between herbs that thrive and ones that barely survive. Here...
- Lighting Setup: That 12-16 hours of light isn't just a suggestion—it's non-negotiable for strong stems. I use a simpl...
- Germination Temperature: The 70-75°F range is crucial, but most homes don't stay that warm. I place my seed trays on ...
Frequently asked questions
Got questions about growing herbs from seeds in pots? You’re not alone—let’s tackle the most common ones to help you succeed!
How long does it take for herb seeds to germinate?
Germination time varies by herb. Fast growers like basil and cilantro sprout in 5–14 days, while slower seeds (e.g., dill or thyme) may take 2–3 weeks. Keep soil moist and warm (70–75°F) to speed things up. Patience is key—don’t overwater once sprouted!
Can I grow herbs from seeds indoors year-round?
Herbs thrive indoors with 4–6 hours of sunlight daily (a sunny windowsill or grow light works). Just ensure pots have drainage, and rotate them occasionally for even growth. In winter, supplement with LED grow lights (12–16 hours/day) to mimic spring conditions.
Why are my herb seedlings wilting or turning yellow?
Wilting often means overwatering (check soil moisture—top inch should dry slightly between waterings). Yellow leaves? Could be underwatering, poor drainage, or nutrient deficiency. Try these fixes:
- Use well-draining soil (mix potting soil with perlite).
- Water at the base, not overhead, to avoid fungal issues.
- Fertilize lightly with a balanced liquid fertilizer (10-10-10) every 4–6 weeks.
What’s the best pot size for starting herb seeds?
Start small! Use 2–3 inch pots or seed trays for germination, then transplant to 6–12 inch pots (depending on the herb) when seedlings have 2–3 true leaves. Herbs like basil and parsley need more space, while thyme or oregano can share pots.
Can I reuse pots from last year’s herbs?
Yes, but sterilize them first! Scrub pots with hot, soapy water and rinse well. For extra safety, soak in a 10% bleach solution (1 part bleach to 9 parts water) for 10 minutes, then rinse thoroughly. This prevents soil-borne diseases from lingering.
What herbs are easiest to grow from seeds for beginners?
Start with these low-maintenance, fast-growing herbs:
- Basil – Loves warmth and frequent harvesting.
- Cilantro – Grows quickly but bolts in heat (sow in cool weather).
- Parsley – Slow but reliable; great for beginners.
- Dill – Self-seeds easily (let some flowers go to seed!).
Wrapping up and next steps
Growing herbs from seeds in pots is a rewarding journey that brings fresh flavors and greenery right to your kitchen! With the right containers, soil, and a little patience, you’ll enjoy a thriving indoor garden in just a few weeks.
Start small, experiment with your favorites, and soon you’ll be harvesting basil for pesto or mint for tea—all while saving money and reducing waste.
Ready to take the next step? Try starting with one or two easy herbs like basil or parsley, then expand your collection as you gain confidence. Happy growing—your future meals (and Instagram-worthy pots!) will thank you. 🌱✨