
Propagation
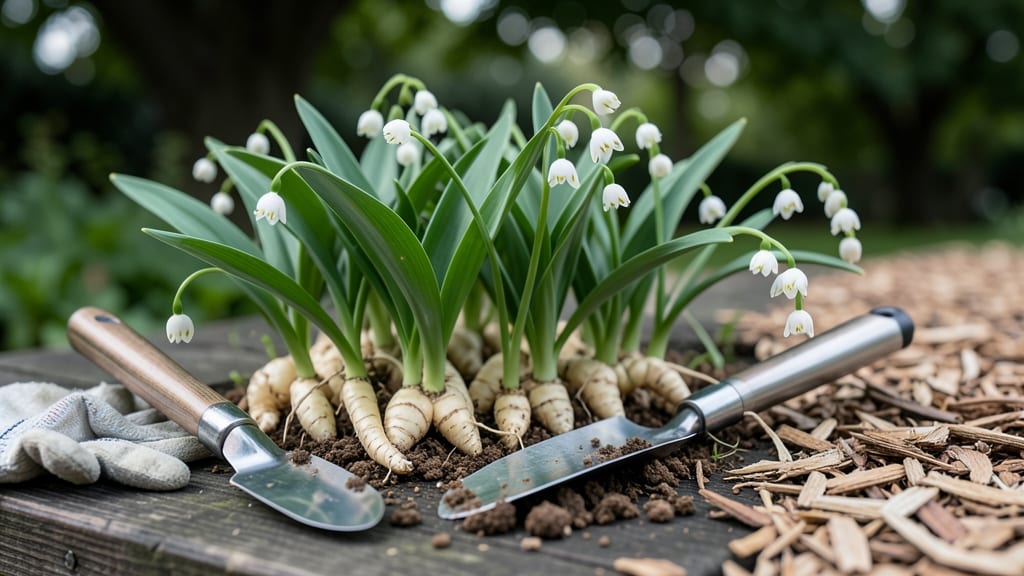
How to grow lily of the valley from roots means fragrant clusters in your garden within two seasons. 🌿 I’ve propagated these delicate perennials for years, and the secret lies in timing, soil prep, and gentle handling—no fancy tools required. The key? Dividing roots at the right moment and giving them the perfect spot to settle in. You’ll need a shovel, a bucket of well-draining soil mix, and a partially shaded area with moist but not soggy conditions. Most gardeners overlook the importance of root health—if they’re mushy or dried out, they’ll struggle to establish. The best time to divide is in early spring or fall, when the plant’s energy is focused on growth, not flowering. Once planted, keep the soil consistently moist (not wet) and watch as new shoots emerge within 4-6 weeks. By the second season, you’ll have lush, fragrant foliage and those iconic bell-shaped blooms. The scent alone makes it worth the patience—like a whisper of spring in your garden all year. This method works for both ground covers and container plantings. Just avoid heavy clay soil, and you’ll see results faster than you’d expect. Let’s get those roots growing!
📚 In This Guide
- What you need
- Instructions
- Tips and common mistakes
- Wrapping up and next steps
What you need
- ● Lily of the Valley roots: Healthy, dormant rhizomes (purchased from a nursery or dug from a trusted source). Aim for 3–5 roots per plant for best results.
- ● Well-draining potting mix: A blend of 50% peat moss or coconut coir and 50% perlite or coarse sand (avoid heavy garden soil—it causes rot!).
- ● Containers: Pots with drainage holes (6–8 inches in diameter for each root cluster) or a raised garden bed with loose soil.
- ● Watering can or spray bottle: For gentle hydration—no harsh streams!
- ● Pruning shears (sterilized): To trim dead or damaged roots if needed.
- ○ Mulch (optional but helpful): A thin layer of pine needles or shredded bark to retain moisture and suppress weeds.
- ● Slow-release fertilizer: A balanced 10-10-10 or organic compost (sprinkle lightly at planting time).
- ● Rooting hormone: Speeds up growth if propagating from cuttings (though roots often thrive without it!).
- ● Shade cloth: For hot climates—Lily of the Valley prefers partial shade (30–50% sunlight).
- ● Garden gloves: Protects your hands from the plant’s mild toxins (especially if handling roots frequently).
Step-by-step instructions for propagating lily of the valley from roots
Here’s how to multiply your fragrant garden with minimal effort—just roots, patience, and the right timing.
🌱 Step 1: Select and Prepare Healthy Root Divisions
Choose established clumps with at least 3-5 mature stems per division—each stem should have a fan of leaves and a small root system. Use a sharp knife or trowel to slice through the rhizomes, ensuring each piece has one or two growth points. I like to work in early spring or early fall when the plant isn’t actively flowering, as this reduces stress.
Dust the cut surfaces with fungicide powder to prevent rot. If you’re dividing a large clump, I recommend spacing the divisions 6-8 inches apart in their new location—crowding leads to weak, leggy growth. The roots will establish best in partial shade, so avoid full sun until they’ve had a season to settle in.
🪴 Step 2: Plant Divisions in Moist, Well-Draining Soil
Dig holes 1-2 inches deeper than the roots were growing in their original spot. Lily of the valley thrives in loamy, slightly acidic soil with a pH between 6.0 and 7.0. Amend heavy clay or sandy soil with 2-3 inches of compost mixed into the bottom of the hole—this ensures the roots have the organic matter they crave.
Place each division so the top of the rhizome sits just below the soil surface. Press the soil gently around the roots but don’t compact it—lily of the valley roots need air to breathe. Water deeply right after planting, then let the soil settle for 3-4 days before watering again. Overwatering now can drown the delicate new roots.
☀️ Step 3: Provide Consistent Moisture and Light
The first year is all about root establishment, so keep the soil evenly moist but never soggy. I water mine once a week in spring and fall, but twice a week during summer heat. You’ll know moisture is right when the soil feels like a slightly damp sponge—not dripping, not bone-dry. Mulch with 2 inches of shredded bark to retain moisture and suppress weeds.
While lily of the valley tolerates shade, morning sun for 3-4 hours encourages stronger growth. If your garden is shadier, expect slower but steady expansion. Avoid fertilizing during the first season—too much nitrogen now will promote leafy growth at the expense of root development. Wait until spring of the second year to add a balanced 10-10-10 fertilizer lightly around the base.
⏰ Step 4: Monitor Growth and Encourage Flowering
By late spring of the second year, you should see new foliage emerging from the divisions. This is your cue that the roots have taken hold. If growth is sparse, check for yellowing leaves—this usually means the soil is too alkaline. Amend with sulfur or peat moss to lower pH if needed.
Flowering typically begins in year 3, but you can hasten it by deadheading spent blooms in early summer. The plant will redirect energy to root growth instead of seed production. I also divide clumps every 3-4 years to prevent overcrowding—this keeps the flowers abundant and the fragrance strong. The more you divide, the more you multiply those signature bell-shaped blooms.
✂️ Step 5: Overwinter and Plan for Expansion
Lily of the valley is hardy in zones 3-8, but in colder climates, protect new divisions with a 3-inch layer of mulch before the first frost. The roots will survive winter dormancy, but the mulch prevents soil heaving and temperature swings. In zone 9 and warmer, water lightly during dry winter months to keep the soil from drying out completely.
By early spring, you’ll notice the divisions have spread 2-3 inches wider—this is how lily of the valley naturally colonizes. Now’s the time to re-divide any overgrown clumps and share with neighbors. A single division can become a foot-wide patch in just two seasons, so plan your garden layout accordingly. With patience, you’ll have fragrant clusters spilling over garden edges in no time.
Tips & tricks for perfect lily of the valley growth
Here's what I learned after years of growing these fragrant beauties—tricks that'll help you skip the common pitfalls.
Root Selection Wisdom: The 2-3 hour soaking time in lukewarm water isn't just about hydration—it's your chance to test root quality. Place your selected roots in a bowl of water and watch which ones float. Healthy roots should sink immediately (they're dense with stored energy), while hollow or damaged ones will float. This simple test saves you from planting roots that won't establish. I've found that roots with at least 3-5 buds per section give the best results for immediate blooming.
Soil Preparation Secret: When working 2-3 inches of compost into the top 6 inches of soil, don't just mix it in—create a "compost pocket" about 1 inch below where your roots will sit. This concentrated nutrient zone gives your plants an immediate energy boost during their critical first 3-4 weeks. I also recommend adding a handful of perlite to the planting holes to ensure that perfect drainage these roots crave.
Watering Strategy: The instructions mention watering once a week if rainfall is less than 1 inch, but here's the real trick: use a moisture meter to check soil moisture at 4 inches deep. Lily of the valley roots hate soggy conditions but also won't thrive if their soil dries out completely. Aim for soil that feels like a wrung-out sponge—moist but not dripping. In summer months, you might need to water every 4-5 days depending on your climate, especially if you're using the recommended mulch layer.
Timing Your Division: While the instructions suggest dividing in early fall, I've found that late August works even better in many climates. This gives the divided sections a full 6-8 weeks to establish before winter dormancy. Look for days when temperatures are mild (60-70°F) and there's no rain forecast for 24 hours. This timing minimizes transplant shock and gives your new plantings the best chance to root before cold weather sets in.
Pro Tips for Grow Lily Of The Valley From Roots
- Here's what I learned after years of growing these fragrant beauties—tricks that'll help you skip the common pitfalls.
- Root Selection Wisdom: The 2-3 hour soaking time in lukewarm water isn't just about hydration—it's your chance to tes...
- Soil Preparation Secret: When working 2-3 inches of compost into the top 6 inches of soil, don't just mix it in—creat...
Frequently asked questions
Got questions about growing lily of the valley from roots?
You’re not alone! Here are answers to the most common queries to help you cultivate these fragrant beauties with confidence.
Can I grow lily of the valley from store-bought roots, or do I need to dig them up myself?
While you can use store-bought roots, freshly dug ones from a trusted source (like a local garden center or a friend’s yard) often establish faster. If buying, ensure the roots are firm, plump, and free of mold or soft spots. Avoid grocery store bunches—they’re often treated to prevent sprouting!
How long does it take for lily of the valley roots to grow and flower?
Patience is key! Roots may take 1–2 years to fully establish before flowering. In the first year, focus on healthy foliage growth. After that, you’ll likely see clusters of bell-shaped blooms in late spring (April–May in most zones). Mulching and consistent moisture speed up the process.
Why aren’t my lily of the valley roots sprouting? Troubleshooting tips?
If your roots refuse to sprout, check these common issues:
- Poor drainage: Roots rot in soggy soil. Amend with perlite or sand if needed.
- Too much shade: These plants thrive in partial shade (4–6 hours of sun).
- Dormant roots: Store-bought roots may need 2–3 months of cold stratification (refrigerate in a paper bag).
- Pests: Slugs and snails adore young shoots. Use organic barriers or diatomaceous earth.
Can I grow lily of the valley in containers? What’s the best pot size?
Use a 5–7 gallon container with drainage holes and well-draining soil. Plant roots 2–3 inches deep and space them 4–6 inches apart. Containers dry out faster, so water regularly and fertilize lightly in spring. Just note: Potted plants may take longer to flower than in-ground varieties.
Is lily of the valley toxic? Should I wear gloves when handling it?
Yes, all parts of lily of the valley (roots, leaves, flowers) are toxic if ingested, especially to pets and children. Wear gloves when handling roots or soil to avoid skin irritation. Keep it out of reach of curious pets—symptoms in animals include vomiting, diarrhea, or drooling. Always wash hands after gardening!
Wrapping up and next steps
Growing lily of the valley from roots is a rewarding journey that brings fragrant blooms to your garden in just two seasons! 🌿 With the right soil, patience, and a little care, you’ll soon enjoy clusters of delicate white flowers that fill the air with their sweet scent.
Start by selecting healthy roots, prepare your planting site, and let nature do the rest—your garden will thank you for the effort.
Ready to take the next step? Share your progress with fellow gardeners or experiment with different planting techniques to see what works best in your climate. Happy growing—your future blooms are waiting! 🌸