
Vegetables
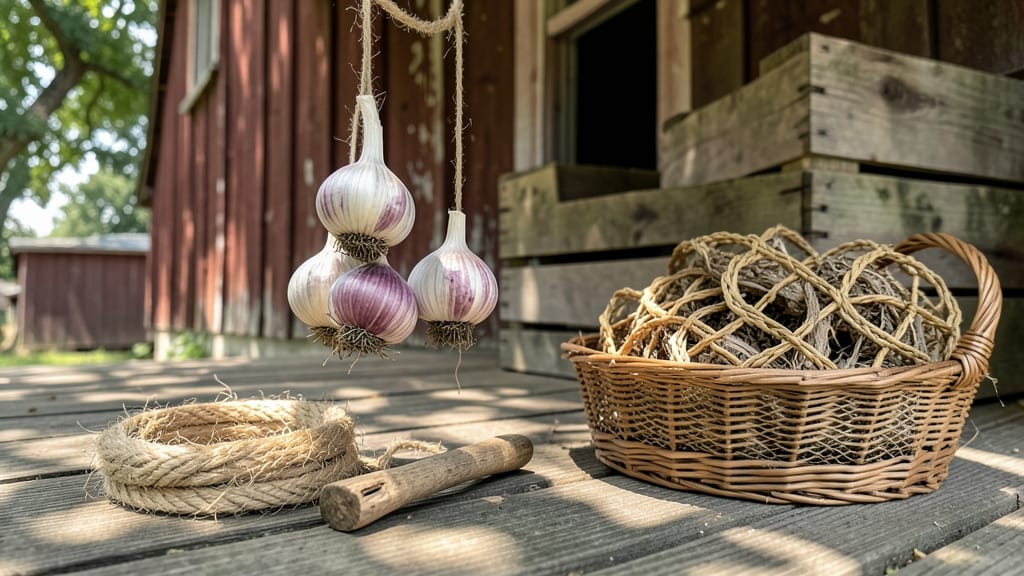
How to hang garlic to cure transforms fresh harvests into bold, flavorful bulbs that last all year. 🌱 I’ve cured garlic for years, and the difference between store-bought and home-cured is night and day—richer taste, tighter cloves, and no regrets when winter rolls around.
The secret lies in patience and perfect conditions: 60-70°F temperatures, good airflow, and low humidity. Too much moisture? Mold. Too dry? Brittle stems. I learned this the hard way after a damp summer ruined half my harvest.
But once you nail the balance, you’ll end up with bulbs that stay fresh for 6+ months.
Start with healthy, mature garlic—no soft spots or sprouting. Bundle stems with twine and hang upside down in a dry, shaded spot. In 2-3 weeks, the skins will turn papery and the stems crispy. That’s your cue to trim and store in a cool, dark place.
Common mistakes? Overcrowding (blocks airflow) or rushing the process (uneven drying). But get it right, and you’ll have garlic so good, you’ll forget to buy it. Ready to try?
📚 In This Guide
- What you need
- Instructions
- Tips and common mistakes
- Wrapping up and next steps
What you need
- ● Fresh garlic bulbs: Choose hardneck varieties (like Rocambole or Silverskin) for best results—aim for 20-30 bulbs depending on your curing space.
- ● Twine or natural fiber string: 10-15 feet of 1/8-inch thick twine (jute or hemp works best for breathability).
- ● Dry, well-ventilated space: A cool (55–65°F), dark, and airy area like a pantry, basement, or garage with low humidity (below 70%).
- ● Wooden pegs, hooks, or a garlic hanger: Ensure they’re sturdy and rust-resistant (cedar or untreated wood is ideal).
- ○ Small mesh bags or cheesecloth (optional but helpful): For bulbs prone to sprouting or mold—use 1-2 per bulb if needed.
- ● Garlic braiding kit: For a decorative twist—includes elastic bands and a template to weave bulbs into braids.
- ● Food-grade diatomaceous earth: Sprinkle lightly (1 tsp per bulb) to deter pests during curing.
- ● Hygrometer: A $10–$20 tool to monitor humidity levels in your curing space.
- ● Labeling tags: Write the variety and date on each bulb for easy tracking.
Step-by-step instructions for hanging and curing garlic
Here's the foolproof method I've used for years to dry garlic with perfect flavor and texture.
🪴 Step 1: Harvest and Prepare the Garlic
Wait until the lower leaves turn brown and dry completely before harvesting—this usually happens 4-6 weeks after flowering. Use a fork to gently loosen the soil around the plants, then pull them up by the stems. Shake off excess dirt but leave the roots attached; they help draw moisture from the bulbs during curing.
Trim the stems to 2-3 inches above the bulbs, leaving just enough to create a natural hanger later. Remove any loose outer skins but avoid damaging the cloves. Lay the garlic in a single layer on a tray in a dry, well-ventilated spot indoors. This initial drying phase lasts 3-5 days until the outer skins feel dry and papery to the touch.
☀️ Step 2: Bundle and Hang the Garlic
Gather 4-6 stems together and tie them tightly at the top with twine or raffia, leaving 4-6 inches of stem exposed. I like to use natural fibers because they allow airflow while holding the bundles securely. Hang the bundles from a sturdy hook or rafter in a spot with indirect sunlight and temperatures between 60-70°F.
Choose a location with good circulation—garages, porches, or attics work well if they're not too humid. The garlic needs 2-4 weeks of drying time, depending on humidity levels. You'll know it's ready when the stems are completely dry and brittle, and the cloves rattle when shaken gently.
⏰ Step 3: Store the Cured Garlic
Once fully dried, remove the garlic from the bundles and trim the stems to ½ inch above the bulbs. Brush off any remaining loose skins, but don't peel them—this helps preserve freshness. Store the garlic in a mesh bag, open basket, or paper bag to allow airflow while keeping pests out.
Place the storage container in a cool, dark place like a pantry or cellar. Check periodically for soft spots or mold—discard any affected bulbs immediately. Properly cured garlic stays fresh for 6-12 months, with peak flavor in the first 3-4 months. The longer you store it, the more mellow and sweet the flavor becomes.
🌱 Step 4: Troubleshooting and Quality Check
If your garlic develops mold during curing, it's usually from too much humidity. Move the bundles to a drier location immediately and separate any affected bulbs. For soft or shriveled garlic, check your storage conditions—too much moisture or heat causes these issues. The ideal cured bulb should feel firm, dry, and have tight, papery skins.
Here's the thing—don't rush the curing process. I've seen garlic cured too quickly turn bitter, while properly dried garlic develops that rich, complex flavor we all love. Patience here makes all the difference in your final product.
Tips & tricks for perfectly cured hanging garlic
Real talk: The difference between sweet, mellow garlic and bitter, shriveled disappointment often comes down to these small but critical details.
Harvest Timing is Everything: The 4-6 week window after flowering is non-negotiable for proper maturation. I've learned this the hard way—harvesting too early means underdeveloped bulbs, while waiting too long risks splitting. Look for that telltale brown on the lower leaves, then give it one more week to be sure. The roots should also be starting to dry out naturally.
Bundle Size Matters: Those 4-6 stems per bundle aren't arbitrary—they create the perfect airflow balance. Smaller bundles dry faster but can become brittle, while larger ones may not cure evenly. I've found that 5 stems per bundle gives me consistent results across my entire harvest. Use your fingers to gently spread the bulbs slightly before tying to ensure even air circulation between them.
Temperature Control: The 60-70°F range is ideal because it's warm enough to evaporate moisture quickly but cool enough to prevent spoilage. If your space runs hotter, move the bundles to a cooler location during peak afternoon heat. I've had success using a small fan on low setting near the bundles to create gentle airflow without creating drafts that could cause uneven drying.
Storage Wisdom: That ½-inch stem trim isn't just about looks—it's about preventing moisture buildup at the bulb's base. For long-term storage, I like to use breathable cotton mesh bags rather than plastic containers. The key is maintaining that airflow while keeping pests out. Check your stored garlic every 2-3 months, discarding any bulbs that develop soft spots or mold before they can spread.
Pro Tips for Hang Garlic To Cure
- Real talk: The difference between sweet, mellow garlic and bitter, shriveled disappointment often comes down to these...
- Harvest Timing is Everything: The 4-6 week window after flowering is non-negotiable for proper maturation. I've learn...
- Bundle Size Matters: Those 4-6 stems per bundle aren't arbitrary—they create the perfect airflow balance. Smaller bun...
Frequently asked questions
Got questions about hanging and curing garlic? You’re not alone! Here are some of the most common concerns—and straightforward answers—to help you master the process like a pro.
How long does it take for garlic to fully cure when hanging?
Curing time varies, but most garlic is ready in 2–4 weeks when hung in a dry, well-ventilated spot (like a pantry or garage). Check for readiness by gently squeezing a clove—it should feel firm and papery. If it’s still soft or moldy, leave it a few more days. Patience is key!
What’s the best temperature and humidity for curing garlic?
Aim for a 60–70°F (15–21°C) space with 50–60% humidity to prevent mold or spoilage. Avoid damp basements or hot attics—consistent airflow is critical. A small fan on low can help circulation if your space feels stuffy. Think “cozy but not sweaty.”
Can I speed up the curing process?
Nope! Rushing the cure can lead to mold or uneven drying. However, you can shorten the process slightly by:
- Choosing hardneck garlic (it cures faster than softneck).
- Using a dehumidifier or hanging garlic in a mesh bag near a vent.
- Avoiding high heat (like an oven)—it’ll cook the garlic instead of curing it.
What if my garlic starts to mold during curing?
Mold is a red flag! If you spot fuzzy spots, remove the affected bulb immediately and check nearby garlic for signs. To prevent future mold:
- Ensure your curing space is dry and well-ventilated.
- Avoid overcrowding—garlic needs airflow.
- Use food-grade diatomaceous earth (sparingly) if mold is recurrent.
Are there alternatives to hanging garlic for curing?
Yes! If you lack space or prefer other methods:
- Braiding: Weave garlic stalks into a braid and hang it upside down (similar to onions).
- Drying on a rack: Lay bulbs on a mesh screen in a single layer for 2–3 weeks.
- Oven drying (low-heat): Set to 170°F (77°C) for 2–3 hours, then cool completely.
How should I store cured garlic long-term?
Once fully cured, store garlic in a cool (55–65°F), dark, and dry place—like a pantry or root cellar. Avoid plastic bags (they trap moisture). For extra longevity:
- Keep bulbs whole and unpeeled.
- Use mesh bags or breathable fabric sacks.
- Check periodically for soft spots or sprouting.
Wrapping up and next steps
Hanging and curing garlic is a simple yet rewarding way to extend its shelf life while preserving its bold, savory flavor. With just a few supplies and a little patience, you can enjoy homegrown or store-bought garlic for months—perfect for cooking, healing remedies, or gifting.
Now that you’re equipped with the know-how, give it a try! Start small with a few braids, experiment with your favorite recipes, and soon you’ll be the go-to source for fresh, flavorful garlic year-round. 🌱✨