
Picking
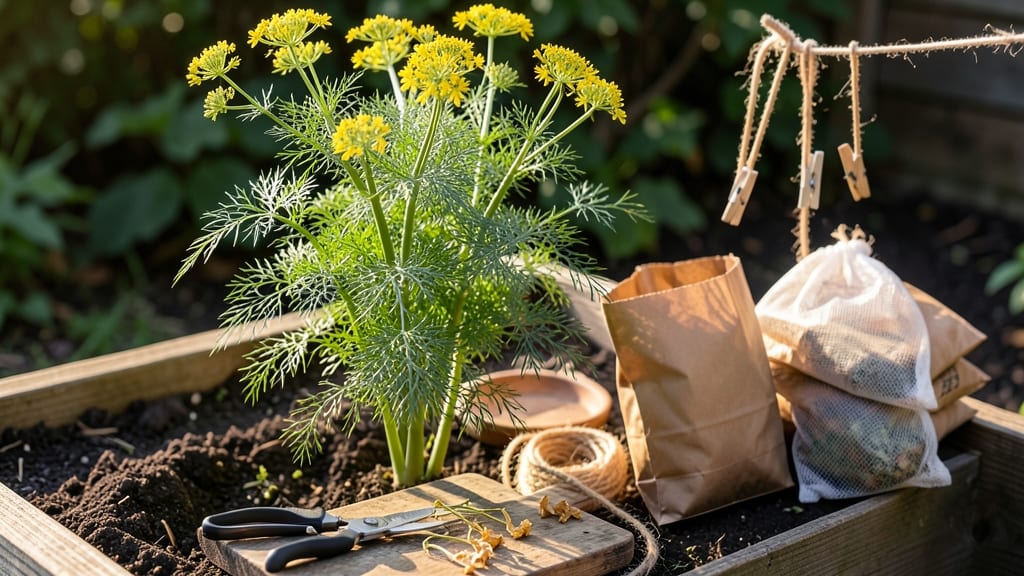
How to harvest and dry dill turns your kitchen into a fragrant spice factory. 🌿 I learned the hard way—waiting too long means bitter stems and lost flavor. Snip leaves when plants are 12-18 inches tall, before flowering begins, for the freshest taste that lasts all winter.
Drying dill requires just two things: clean bunches and a dry, dark spot. Gather stems in small bundles, tie with twine, and hang upside-down. Within 2-3 weeks, the leaves will crumble easily—perfect for soups, pickles, or seasoning blends. The key is patience; rushing causes wilting or mold.
Once dried, store in airtight containers away from light. A little goes a long way—just 1 teaspoon dried equals 1 tablespoon fresh. The flavor deepens over time, making it worth the wait for year-round cooking.
Troubleshooting tip: If mold appears, spread bundles in a single layer to dry faster. And never skip the twine—loose stems scatter and lose potency. Your pantry will thank you!
📚 In This Guide
- What you need
- Instructions
- Tips and common mistakes
- Wrapping up and next steps
What you need
- ● Fresh dill plants – Choose fully mature plants (about 6–8 weeks old) with vibrant green leaves and stems.
- ● Sharp pruning shears or scissors – A clean, sterilized pair (alcohol wipe works!) to avoid disease transfer.
- ● Twine, rubber bands, or hair ties – For bundling stems (3–5 inches of twine per bundle).
- ● Paper bags or brown paper lunch bags – 1–2 per batch (for air-drying).
- ○ Drying racks or mesh screens – Optional but helpful for flat drying (ensure they’re elevated and well-ventilated).
- ● Dark, dry storage containers – Airtight jars or containers with lids (8 oz–1 quart size).
- ● Food dehydrator – Set to 95°F–115°F for faster drying (2–4 hours).
- ● Oven (low-heat method) – If no dehydrator, use 170°F or lower with the door cracked open.
- ● Labeling tags or masking tape – To mark harvest dates (dill loses potency after 6–12 months).
- ○ Essential oil diffuser (optional) – A few drops of lavender or lemon oil in your storage jars can repel pests naturally.
Step-by-step instructions for harvesting and drying fresh dill
Here's how I preserve dill's bright flavor for months—no fancy equipment needed, just patience and a sunny spot.
🌿 Step 1: Harvest at Peak Freshness
Wait until your dill plants have at least 6-8 inches of growth and are in full bloom, but before the flowers fully open. This is when the leaves pack the most flavor. I like to harvest in the morning after the dew has dried—leaves are crisp and full of moisture, which helps preserve their flavor during drying.
Use clean, sharp scissors or pruning shears to cut 3-4 inch stems just above a leaf node. This encourages bushier growth. Avoid harvesting more than one-third of the plant at a time—you want to leave enough foliage for the plant to keep producing. If you're harvesting for drying, cut entire stems rather than individual leaves.
🌿 Step 2: Bundle Stems for Even Drying
Gather 4-5 stems at a time and tie them together loosely with twine or rubber bands at the base. I like to bundle them in small groups so they dry evenly—larger bundles can create uneven drying, leading to mold or wasted stems. Leave 2-3 inches of stem exposed at the top to ensure proper airflow around the leaves.
Hang the bundles upside down in a warm, dry, well-ventilated spot with indirect sunlight. A kitchen window, pantry shelf, or even a porch works well. The goal is to dry the dill slowly over 1-2 weeks—rushing the process can result in brittle, flavorless herbs. If your home is humid, consider using a dehydrator set to 95°F for more consistent results.
☀️ Step 3: Check for Proper Drying
After 5-7 days, gently rub a leaf between your fingers. If it crumbles easily and feels dry to the touch, the dill is ready. If it still feels slightly pliable, give it another 2-3 days. Overdrying turns dill bitter, while underdrying leaves it prone to spoilage. You'll know it's perfect when the leaves turn a duller green and the stems feel crisp.
Once fully dried, remove the leaves from the stems by rubbing them between your palms or gently pulling them off. Store the dried leaves in an airtight container away from light and heat. Properly dried dill keeps its flavor for up to a year—though I usually use mine within 6 months for the freshest taste.
⏰ Step 4: Store for Long-Term Use
Fill a small jar or resealable bag with the dried dill leaves, leaving about ½ inch of space at the top. I like to crush the leaves slightly with my fingers before storing—they release more aroma and flavor when stored this way. Seal the container tightly and label it with the date.
Store in a cool, dark place like a pantry or cupboard. Check the dill every few months—if it smells musty or loses its bright green color, it's time to use it up. For best results, replace your dried dill supply every 6 months to ensure peak flavor in your cooking.
Tips & tricks for perfect dill preservation
These simple strategies will help you preserve dill's vibrant flavor and prevent common drying mistakes.
Harvest Timing Secret: The morning after dew dries is ideal for harvesting because the leaves contain the most moisture, which helps maintain their freshness during drying. I avoid harvesting after rain or when leaves feel limp—they won't dry properly and can develop mold. Also, focus on stems with at least 6-8 inches of growth and full bloom but before flowers fully open, as this is when the flavor peaks.
Bundle Size Matters: Stick to 4-5 stems per bundle as instructed—this ensures even airflow and prevents mold from forming in the center of larger bundles. I've found that leaving 2-3 inches of stem exposed at the top creates a natural chimney effect, helping moisture escape more efficiently. If you're drying a large batch, consider making multiple small bundles instead of one giant one.
Drying Environment: While indirect sunlight works well, a warm, dry spot with good ventilation is key. If your home is humid, use a dehydrator set to 95°F as specified—this creates consistent conditions. I've had success with a kitchen window during dry seasons, but in damp climates, the dehydrator prevents uneven drying and potential spoilage. Just avoid direct sunlight, which can bleach the leaves and reduce flavor.
Storage Wisdom: Once dried, store your dill in an airtight container with about ½ inch of space at the top to prevent moisture buildup. I crush the leaves slightly before storing because this releases more aroma and flavor when you open the container. Labeling with the date helps track freshness—dill loses potency after 6 months, even if it looks fine. A cool, dark pantry is perfect for long-term storage.
Pro Tips for Harvest And Dry Dill
- These simple strategies will help you preserve dill's vibrant flavor and prevent common drying mistakes.
- Harvest Timing Secret: The morning after dew dries is ideal for harvesting because the leaves contain the most moistu...
- Bundle Size Matters: Stick to 4-5 stems per bundle as instructed—this ensures even airflow and prevents mold from for...
Frequently asked questions
When is the best time to harvest dill for drying?
The ideal time to harvest dill for drying is when the seeds are just starting to form but haven’t fully matured—usually 6-8 weeks after planting. Wait until the flowers fade slightly, but before the seeds turn brown. Harvesting too late can reduce flavor intensity. For leaf-only drying, pick just before flowering when leaves are lush and aromatic.
How long does it take to dry dill properly?
Dill bundles typically take 1-3 weeks to dry completely, depending on humidity and airflow. Check daily: the leaves should crumble easily when rubbed between fingers. If mold appears (fuzzy spots), increase airflow or reduce humidity. For speed, use a dehydrator (2-4 hours at 95°F/35°C) or a warm, dark closet with a fan.
Can I dry dill in the microwave or oven?
Yes, but with caution! For the microwave, spread leaves on a paper towel and zap in 30-second bursts (low power) until crispy. For the oven, lay leaves on a baking sheet at 200°F (93°C) for 1-2 hours, stirring occasionally. Avoid high heat—it burns flavor and nutrients. Air-drying outdoors is still the gold standard for potency.
What if my dried dill smells weak or loses flavor?
Weak flavor usually means over-drying (too long) or poor storage. Store dried dill in an airtight container away from light/heat for up to 6 months. To revive flavor, crush leaves gently before use or add a pinch of citric acid (like lemon zest) to recipes. If moldy, discard immediately—it can ruin your harvest.
Can I dry dill stems and leaves separately?
Leaves dry faster and retain more flavor, while stems (especially seed heads) are great for drying whole. Bundle stems with flowers for seed drying, or strip leaves for quicker dehydration. Store them separately: leaves in small containers, stems in mesh bags to preserve seed viability.
Wrapping up and next steps
Harvesting and drying dill at its peak is a simple yet rewarding process that ensures you’ll always have fresh, aromatic herbs on hand—whether for soups, pickles, or homemade remedies! 🌿 By following these steps, you’ll preserve dill’s vibrant flavor and extend its shelf life for months.
Now that you’re equipped with the know-how, why not try experimenting with dill-infused oils, vinegars, or dried herb blends? Your kitchen (and taste buds) will thank you!