
How To
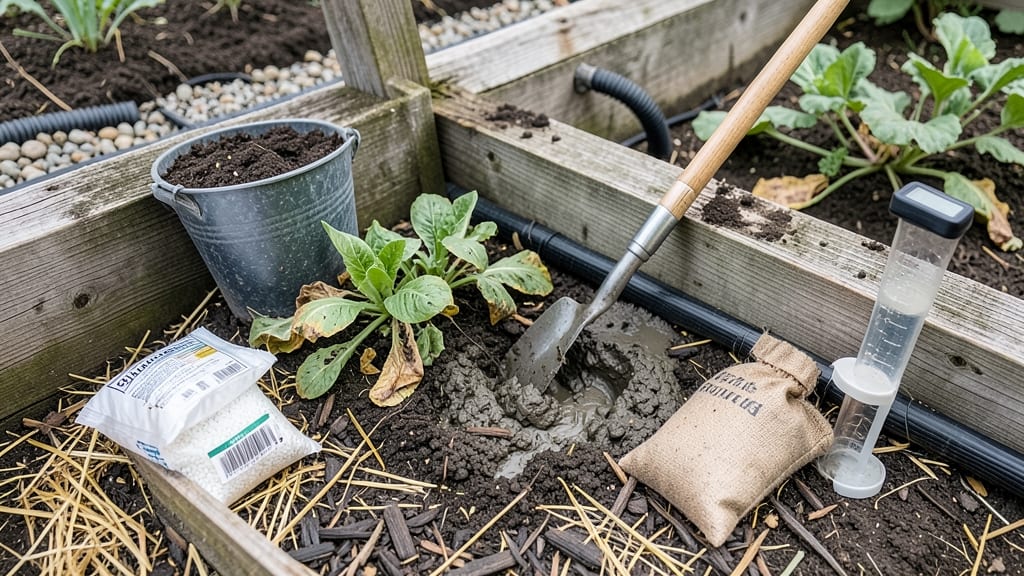
How to improve waterlogged soil isn’t just possible—it’s easier than you think. 🌱 I’ve turned my own clay-heavy soil from a swamp into a well-draining paradise using these simple aeration tricks that actually work. The key? Stop fighting the water and start working with your soil’s natural quirks. Start with organic matter—compost, leaf mold, or even coarse sand—to break up compacted clay. Mix in about 2-3 inches of amendments and let nature do the rest. For stubborn puddles, consider raised beds or swales to redirect water. The goal? Soil that drains in 24-48 hours after rain, not weeks. You’ll see the difference in 4-6 weeks—plants root deeper, blooms stay vibrant, and you won’t hear the dreaded “squish” when you step on your garden. Even my black thumb’s tomatoes thrived after this fix. The best part? These methods work for vegetables, perennials, and lawns alike. Fair warning: Don’t overdo it—too much sand turns soil into concrete, and too much compost can smother roots. Test your progress by digging a hole and checking how water drains. Patience pays off with soil that finally behaves.
📚 In This Guide
- What you need
- Instructions
- Tips and common mistakes
- Wrapping up and next steps
What you need
- ● Garden fork or broadfork: A sturdy, long-handled fork (18–24 inches) to break up compacted soil without turning it over.
- ● Garden rake: A heavy-duty rake with sturdy tines (12–18 inches wide) for leveling and smoothing soil after aeration.
- ● Compost or well-rotted manure: 2–3 cubic feet per 100 sq. ft. of soil (e.g., leaf mold, cow, or horse manure).
- ● Organic mulch: 2–3 inches of straw, wood chips, or pine needles to retain moisture and prevent future waterlogging.
- ○ Sand (optional but helpful): Coarse, gritty sand (like builder’s sand) to improve drainage—mix 1 part sand to 3 parts soil if your soil is extremely clay-heavy.
- ○ Perlite or vermiculite (optional): 1–2 cups per 10 sq. ft. to lighten heavy soil and boost aeration.
- ● Hose with a gentle spray nozzle: For watering post-treatment (avoid heavy pressure!).
- ● Soil test kit: To check pH and nutrient levels before/after amendments.
- ● Drainage pipes or French drains: For severe waterlogging—install 4–6 inches deep around garden beds.
- ● Biochar or coconut coir: 1 part to 5 parts soil to enhance porosity and microbial activity.
- ● Knee pads or gardening gloves: Because comfort matters when you’re forking for hours! 😉
Step-by-step instructions for fixing waterlogged soil
Here's how I turn soggy, suffocating soil into light, airy ground that plants love.
🌱 Step 1: Test and Identify the Problem Areas
Start by pressing your finger 2 inches deep into the soil. If it feels cold, mushy, and water drips out, you've got waterlogging. I like to do this test in multiple spots—some areas might be worse than others. Look for puddles that linger after rain or areas where water pools after irrigation.
Check for signs like yellowing leaves, wilting despite wet soil, or mushrooms popping up—these are red flags. Waterlogged soil starves roots of oxygen, so plants can't absorb nutrients even when they're drowning. Grab a shovel and dig down 6 inches to see how compacted the soil is. If it feels like packing clay, that's your first clue you need serious aeration.
🪴 Step 2: Choose Your Aeration Method
For small areas, I use a manual aerator fork—just jam it into the ground and wiggle it to break up compacted layers. For larger spots, rent a core aerator (the kind with spiky wheels) to pull out 3-inch soil plugs and create deep channels. If your soil is extremely dense, consider deep tilling with a broadfork to loosen it 12 inches down.
Here's the thing—don't skip the aeration. Just adding organic matter on top won't fix the problem if the soil beneath is still like concrete. I always work when the soil is damp but not soggy—easy to crumble in your hands but not dripping. This ensures the tools glide in smoothly without getting stuck.
☀️ Step 3: Amend with Organic Matter
Spread 2-3 inches of compost or well-rotted manure over the aerated area. This isn't just about adding nutrients—it's about improving soil structure. I mix it in 4-6 inches deep using a shovel or broadfork. For clay-heavy soil, blend in coarse sand (like builder's sand) to help break up the particles and improve drainage.
Don't use fresh manure—it burns plants and can make waterlogging worse. Look for dark, crumbly compost that smells earthy, not rotten. Water lightly after amending to help everything settle. You'll see the soil start to look fluffier and darker within a few days—that's your sign it's working.
💧 Step 4: Improve Drainage Long-Term
Install swales (shallow trenches) to redirect water away from problem areas. These should slope 1-2 inches per 10 feet to carry water naturally away. For container gardens, ensure pots have multiple drainage holes and elevate them on feet or bricks to prevent water pooling below.
Plant deep-rooted species like comfrey or blackberries near waterlogged spots—they'll help break up compacted soil over time. Mulch with wood chips or straw to prevent water from pooling on the surface. After heavy rains, check for standing water and adjust your swales or drainage paths as needed. This step prevents future waterlogging, not just fixes current issues.
⏰ Step 5: Monitor and Maintain
Wait 4-6 weeks after amending before planting. This gives the soil time to settle and for beneficial microbes to colonize. Test again by pressing your finger in—it should feel loose and slightly springy, not compacted. Water deeply once a week to encourage deep root growth, but let the top 2 inches dry out between waterings.
If you see water pooling again, it might mean your swales need adjusting or you need to aerate deeper. I check my amended areas every season—sometimes I need to top-dress with more compost. The goal is to create soil that drains well but still holds enough moisture for roots. You'll know you've succeeded when your plants thrive even after heavy rains.
Tips & tricks for perfect soil aeration
Transforming soggy ground into thriving soil takes more than just throwing compost on top—here's what actually makes the difference.
Timing is Everything: Work when soil is damp but not dripping—think of it like working with clay that crumbles easily in your hands. This ideal window (after rain but before it dries completely) lets tools glide through compacted layers without getting stuck. I've learned this the hard way after wrestling with stubborn, waterlogged clods that refused to budge.
Layer-by-Layer Strategy: When mixing in your 2-3 inches of compost, don't just scatter it on top. Dig down to those 4-6 inches where the real compaction lives. This is where roots actually need to breathe. I use my broadfork to create channels first, then fill them with compost—it's like giving your soil a new circulatory system.
Clay Soil Hack: For that heavy, packing-clay texture, blend in coarse sand during Step 3. Just 10-20% sand by volume breaks up the particles without making soil too gritty. Think of it as adding the right amount of grit to concrete—just enough to strengthen the structure without weakening it. This single tweak can cut drainage time in half.
Long-Term Visual Check: After installing swales, mark their edges with landscape fabric or small stakes so you remember where they are. I've found that after heavy rains, I often need to adjust these paths—having visible markers saves me from accidentally digging up my own drainage system later. The goal is to make these improvements invisible once they're working.
Pro Tips for Improve Waterlogged Soil
- Transforming soggy ground into thriving soil takes more than just throwing compost on top—here's what actually makes ...
- Timing is Everything: Work when soil is damp but not dripping—think of it like working with clay that crumbles easily...
- Layer-by-Layer Strategy: When mixing in your 2-3 inches of compost, don't just scatter it on top. Dig down to those 4...
Frequently asked questions
Got questions about fixing waterlogged soil? You’re not alone! Here are some common concerns and straightforward answers to help you get back to healthy, well-drained ground.
How long does it take to improve waterlogged soil?
Improving waterlogged soil isn’t instant—it depends on the severity and methods used. With organic matter (like compost) and proper aeration, you’ll see noticeable drainage improvements in 4-8 weeks. For severe cases, it may take several months to fully restore balance. Patience pays off!
Can I plant anything in waterlogged soil right away?
Nope! Waterlogged soil suffocates roots, so avoid planting until drainage improves. Instead, focus on aeration and amending the soil first. Once the ground feels firm but not soggy (press your foot in—if water pools, wait longer), you can plant drought-tolerant crops like potatoes, carrots, or native grasses.
What’s the cheapest way to fix waterlogged soil?
Skip expensive products—DIY fixes work best! Start with free or low-cost solutions:
- Compost (homemade from kitchen scraps)
- Sand or gravel (from local construction sites)
- Cover crops (like clover or ryegrass)
- DIY aeration (use a garden fork or rent a core aerator)
Will adding sand really help my waterlogged soil?
It depends! Fine sand can make clay soil worse by compacting further. Instead, use coarse sand or gritty materials (like builder’s sand) in small amounts (10-20% of the soil mix). Better yet, combine it with organic matter (like compost) for long-term success. Test your soil first—if it’s heavy clay, focus on aeration and organic amendments.
What if my soil stays waterlogged even after aerating?
If drainage still stinks, you may need deeper solutions:
- Install a French drain (bury a perforated pipe with gravel to redirect water).
- Raise beds (elevate garden beds with wood or bricks).
- Check for poor grading—ensure water flows away from your garden.
Wrapping up and next steps
Improving waterlogged soil is all about patience, persistence, and the right techniques—whether you’re amending clay-heavy plots or boosting drainage in compacted areas. By combining organic matter, proper tilling, and smart plant choices, you can transform soggy ground into fertile, well-draining soil that supports thriving gardens. 🌱
Don’t let waterlogged soil discourage you—start small, track progress, and celebrate each step! Your next move? Pick one method from this guide and give it a try this weekend. Happy gardening!