
Orchid Care
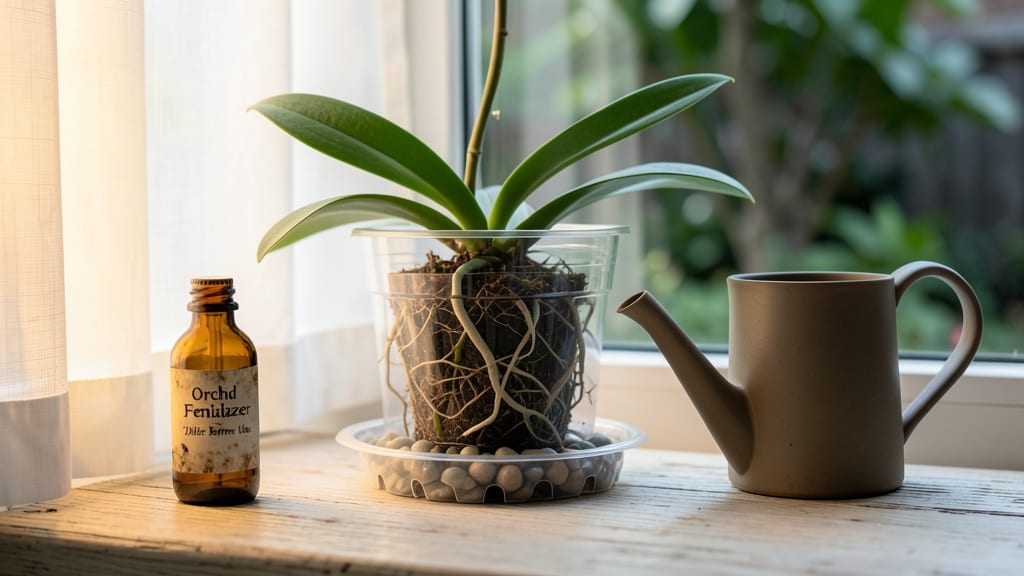
How to keep an orchid alive feels impossible—until you learn their secret. 🌱 Most people overwater or place them in the wrong light, but with three simple adjustments, you’ll have blooms year-round. My first orchid lasted just two weeks before I realized I was drowning its roots. Now, I’ve got a thriving collection that flowers twice a year.
The key is bright, indirect light—think of it like a sunbathing teenager: too much burns them, too little stunts growth. A north-facing window or a grow light 12 inches away works best.
Water only when the roots turn silvery-gray (they store moisture!), and use a chunky bark mix to prevent rot. Most people mess up the watering schedule—this is where 90% of orchids fail.
Once you nail light and water, fertilizing monthly with a diluted orchid food keeps them blooming. Prune spent spikes after they turn yellow, and watch for pests like scale hiding under leaves.
The payoff? Flowers that last 6-8 weeks, even in winter, with minimal effort. My Phalaenopsis blooms twice a year now—proof that orchids aren’t fussy, just misunderstood.
Works for Phalaenopsis, Cattleya, or Dendrobium—just adjust light intensity based on their natural habitat. Here’s how to troubleshoot yellow leaves, flower drop, and other common issues without losing your plants. Let’s get those blooms back!
📚 In This Guide
- What you need
- Instructions
- Tips and common mistakes
- Wrapping up and next steps
What you need
- ● Orchid (Phalaenopsis recommended for beginners) – 1-3 plants (depending on your space)
- ● Clear plastic or glass terrarium – 1 (6"–12" diameter, with drainage holes)
- ● Orchid-specific potting mix – 1 bag (bark-based, not regular soil!)
- ● 6"–8" clay or plastic pots – 1-3 (with slotted sides for airflow)
- ● Sharp, sterilized scissors or pruning shears – 1 (for trimming spent blooms)
- ● Spray bottle (16 oz or larger) – 1 (for misting)
- ● Balanced orchid fertilizer (20-20-20 or 10-10-10) – 1 bottle (dilute to half-strength!)
- ○ Grow lights (LED or fluorescent, 6500K color temp) – 1-2 (optional but highly recommended for low-light areas)
- ● Humidity tray or pebble tray – 1 (to maintain 40–70% humidity)
- ● Orchid stakes or clips – 1-2 (to support heavy blooms)
- ● Thermometer/hygrometer – 1 (to monitor temp/humidity)
- ● Antidesiccant spray (like Vapor Guard) – 1 (for extra humidity in dry climates)
- ● Decorative moss or sphagnum – Small amount (for aesthetic terrariums)
- ● Second set of gloves – 1 (to avoid contaminating pots)
Step-by-Step instructions for keeping orchids thriving year-round
Here's the simple system I use to keep my orchids blooming reliably—no complicated routines, just smart light management.
☀️ Step 1: Position for Bright, Indirect Light
Place your orchid where it gets 10-14 hours of bright, indirect light daily. A north-facing window is ideal—it provides steady light without harsh afternoon sun. I keep mine about 3 feet from an east-facing window where morning light is gentle but strong enough to keep leaves vibrant green.
Watch for signs of too much light: yellow or brown patches on leaves mean it's getting too intense. If the leaves turn dark green or purple, it needs more light. Rotate the pot a quarter turn weekly so all sides get even exposure—you'll notice new growth emerging more evenly this way.
💧 Step 2: Water Only When Roots Signal It's Time
Water your orchid only when the roots turn silvery-gray—this means they're thirsty. I use the finger test: stick your finger about 1 inch into the mix. If it feels dry, water thoroughly until water runs out the bottom. Never let it sit in standing water—orchids hate soggy roots.
I water mine every 7-10 days in winter and 5-7 days in summer, but your schedule depends on your home's humidity. Use room-temperature water to avoid shocking the roots. After watering, let the pot drain completely—empty the saucer after 10 minutes to prevent rot.
⏰ Step 3: Mimic Seasonal Light Changes for Blooms
To encourage reblooming, give your orchid 12 hours of bright light daily for 4-6 weeks in late fall. This simulates shorter days and triggers flower spikes. I move mine to a slightly sunnier spot or add a grow light for 2 hours in the evening—just enough to extend daylight without overdoing it.
Once buds form, keep the light consistent. Too much fluctuation now will cause buds to drop. I notice my orchids develop buds about 8-10 weeks after this light adjustment. After blooms fade, reduce water slightly but keep light bright—this helps the plant recover for next season.
🌱 Step 4: Feed and Refresh the Mix Annually
Fertilize every 4th watering during active growth (spring through fall) with a balanced orchid fertilizer diluted to half-strength. I skip fertilizer in winter when the plant rests. The key is consistency—never over-feed, or you'll get weak growth and fewer blooms.
Repot every 2-3 years or when the mix breaks down. I use firm bark mix because it drains well and holds moisture without suffocating roots. Gently remove the old mix, trim any dead roots with clean scissors, and place the orchid in a pot just 1 inch larger in diameter than the last one—bigger pots hold too much moisture and cause rot.
Tips & tricks for perfect orchid care
Mastering orchid care comes down to a few key habits that keep your plants happy and blooming. Here's what I've learned after years of trial and error.
The Light Factor: That 10-14 hours of bright, indirect light in Step 1 is non-negotiable for vibrant growth. I've found that placing orchids on a rotating stand near an east-facing window ensures even exposure—my plants develop new growth more evenly this way. For cloudy days, supplement with a grow light for just 2 hours to maintain consistency. Too little light means weak stems, while too much causes those dreaded brown patches.
Root Health Secret: The finger test in Step 2 is your best friend—stick that finger 1 inch deep and you'll know exactly when to water. I've ruined orchids by overwatering, so I always empty that saucer after 10 minutes to prevent rot. Pro tip: Use room-temperature water to avoid shocking the roots, which can stress the plant and lead to bud drop.
Bloom Trigger: That 4-6 week light adjustment in late fall is what actually triggers reblooming. I move my orchids to a slightly sunnier spot during this time, and within 8-10 weeks, buds start forming. The key is consistency—don't move them around once buds appear, or you'll risk dropping them. I've seen orchids develop buds after just 6 weeks of this treatment, so patience pays off!
Repotting Wisdom: When you repot every 2-3 years, choose a pot that's just 1 inch larger in diameter than the last one. I've learned the hard way that bigger pots hold too much moisture, which leads to root rot. Use that firm bark mix—it drains well while still holding enough moisture to keep roots happy between waterings.
Pro Tips for Keep An Orchid
- Mastering orchid care comes down to a few key habits that keep your plants happy and blooming. Here's what I've learn...
- The Light Factor: That 10-14 hours of bright, indirect light in Step 1 is non-negotiable for vibrant growth. I've fou...
- Root Health Secret: The finger test in Step 2 is your best friend—stick that finger 1 inch deep and you'll know exact...
Frequently asked questions
Got questions about keeping your orchids thriving? You’re not alone—even experienced plant parents sometimes need a little extra guidance! Below, we’ve rounded up the most common queries to help you troubleshoot and care for your orchids like a pro.
How often should I water my orchid?
Water your orchid only when the roots look silvery-gray and the potting mix dries out. Typically, this means watering every 7–10 days, but adjust based on humidity and temperature. Overwatering is the #1 killer—always use a pot with drainage holes and avoid letting it sit in water.
Why won’t my orchid bloom?
Orchids need a temperature shift (like 10–15°F drop at night) and 12+ hours of indirect light daily to trigger blooms. If it’s been over a year, try moving it to a brighter spot or mimicking seasonal changes with a grow light. Patience is key—some varieties bloom only once a year!
Can I use tap water for my orchid?
Ideally, no. Tap water often contains chlorine or fluoride, which can damage roots. Use filtered, distilled, or rainwater instead. If you must use tap water, let it sit out for 24 hours before watering to allow chemicals to evaporate.
What do I do if my orchid leaves turn yellow?
Yellow leaves usually signal overwatering, root rot, or poor drainage. Check the roots—if they’re mushy or black, trim the bad ones with sterilized scissors and repot in fresh bark mix. Reduce watering and ensure the pot has airflow. One or two lower leaves turning yellow is normal as the plant ages.
How do I revive a dying orchid?
Start by removing the orchid from its pot and inspecting the roots. Trim any black/mushy roots, then repot in fresh bark mix. Water lightly and place it in bright, indirect light (no direct sun!). Avoid fertilizing for 2–4 weeks to let it recover. With patience, many orchids bounce back!
Wrapping up and next steps
Keeping orchids thriving is all about understanding their light needs—just a few simple tweaks can make a world of difference! 🌿 With the right balance of bright, indirect light, occasional shade adjustments, and seasonal light management, your orchids can reward you with stunning, year-round blooms.
Remember, patience and observation are key—your plants will thank you for the care!
Ready to elevate your orchid game? Start by tracking your plant’s response to light and fine-tune your setup. Before you know it, you’ll be the proud owner of a flourishing orchid collection—one happy bloom at a time! 🌸