
Propagation
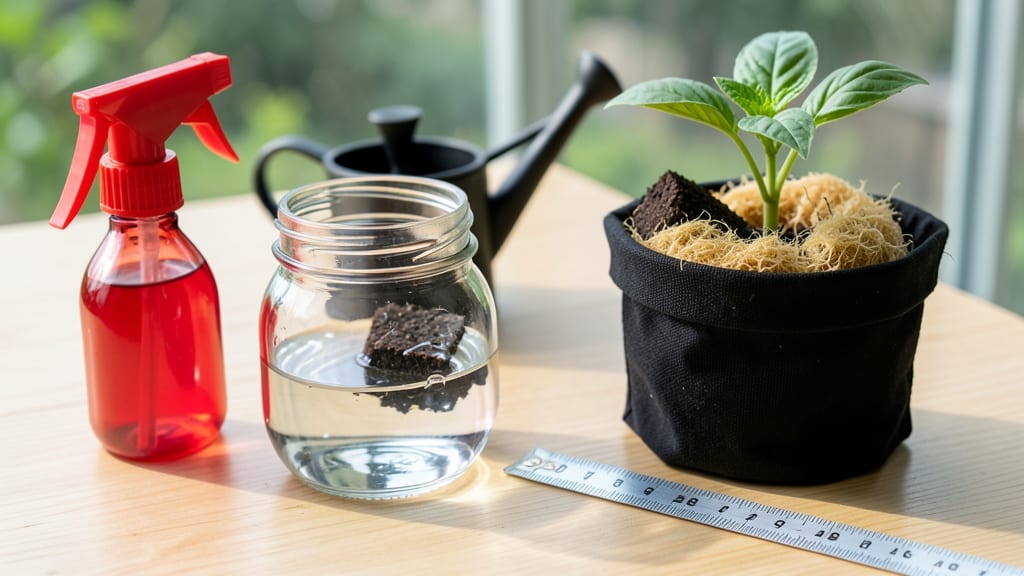
How to keep coco liners from drying out can turn your seed-starting dreams into a lush, thriving success—no more sad, crunchy messes. 🌱 I’ve lost count of the seedlings I’ve watched wilt because of this one frustrating problem—until I learned the simple tricks to lock in moisture where it matters most. The real culprits? Too much airflow, low humidity, or just plain evaporation. Coco liners absorb water like a sponge, but without the right setup, they dry out faster than a summer sidewalk. The fix isn’t complicated—just smarter watering, a little humidity help, and sealing the deal on those delicate roots. You’ll end up with seedlings that stay plump and green, not brittle and brown. The key is balancing airflow (so roots breathe) with moisture retention (so they don’t shrivel). And yes, it works for both tiny seedlings and mature plants ready for transplanting. Here’s how to stop the drying before it starts—no more wasted seeds or heartbreak over crispy liners.
📚 In This Guide
- What you need
- Instructions
- Tips and common mistakes
- Wrapping up and next steps
What you need
- ● Coco liners (coco coir seedling pots) – Choose biodegradable ones (3–4 inches in diameter) for easy transplanting.
- ● High-quality coco coir mix – Opt for a pre-moistened blend (e.g., 70% coco coir + 30% perlite/pumice) to retain moisture without sogginess.
- ● Spray bottle (16–20 oz with fine mist nozzle) – For gentle, even hydration without disturbing seedlings.
- ● Clear plastic dome or humidity tray – A clear plastic lid (like a takeout container) or a humidity tray with a mesh cover works perfectly.
- ● Tray or seedling mat – A shallow plastic or ceramic tray (12"x24" or larger) to hold liners and collect excess water.
- ● pH meter or test kit – Coco coir thrives at 5.8–6.2 pH; adjust with lime (to raise) or sulfur (to lower) if needed.
- ● Small hand trowel or spoon – For gently pressing liners into the mix without compacting.
- ○ Watering can with a fine rose (optional but helpful) – For larger batches of liners.
- ● Hydrogel crystals – Mix a teaspoon per gallon of water to boost moisture retention (great for forgetful gardeners!).
- ● Misting fan or oscillating fan (low setting) – Creates airflow to prevent mold while maintaining humidity.
- ● Bottom watering tray with wicks – DIY with cotton rope or capillary mats for passive hydration.
- ● Humidity monitor – Aim for 70–80% humidity in the early stages (a cheap hygrometer works!).
- ● Seedling heat mat (70–75°F) – Speeds up germination and reduces evaporation in cooler climates.
Step-by-Step instructions for keeping coco liners moist for seedlings
Here’s how I keep my coco liners perfectly damp—no guesswork, just consistent moisture for strong starts.
💧 Step 1: Pre-Moisten Coco Liners Before Planting
Fill each liner with coco coir until it’s about 1 inch from the top. Pour warm water into a shallow tray and let the liners soak for 10-15 minutes until the coir feels evenly damp but not soggy. Squeeze gently—water should drip out but not puddle. This step ensures your seeds start in an ideal moisture environment.
I always use a spray bottle afterward to mist the surface lightly. This prevents the top layer from drying too quickly while seeds germinate. The goal is a consistently moist (not wet) feel throughout the liner.
🪴 Step 2: Use a Humidity Dome or Plastic Wrap
Cover your seed trays with a clear plastic dome or wrap tightly with plastic wrap. This traps moisture and mimics the humid conditions coco coir thrives in. Check daily—condensation on the dome means humidity is perfect. If it’s too dry, mist the inside lightly with a spray bottle.
Remove the dome once 50% of seeds have sprouted. Waiting too long risks fungal issues, while removing too soon causes rapid drying. I test moisture by pressing a finger into the coir—it should feel like a wrung-out sponge, not bone-dry.
☀️ Step 3: Position Trays Strategically for Even Moisture
Place your trays on a moisture-retaining mat or a shallow tray filled with ½ inch of water. The bottom of the liners will wick up moisture as needed, preventing the top from drying. Avoid direct sunlight—heat accelerates evaporation, so keep trays in bright, indirect light.
Rotate trays quarter-turn daily to distribute moisture evenly. You’ll notice one side drying faster if you skip this—especially near windows. A simple turn keeps all seedlings growing uniformly.
💧 Step 4: Water Gently and Frequently
Water from the bottom by placing trays in a shallow tray of water for 10-15 minutes. This ensures water reaches the roots without disturbing seedlings. Let excess water drain completely—soggy liners suffocate roots, while dry ones stunt growth.
Check moisture every 2-3 days by lifting a liner. If it feels light, it’s time to water again. Overwatering is worse than underwatering—coco coir holds moisture well but needs airflow to prevent rot. A light mist on the surface every other day keeps the top layer damp.
⏰ Step 5: Adjust for Humidity and Climate
In dry climates, increase humidity by placing a tray of water near your seedlings or using a small humidifier. In humid areas, reduce watering slightly—coco coir holds moisture longer when ambient air is damp. I monitor leaf edges: crispy edges mean it’s too dry; yellowing means overwatering.
Once seedlings have 2-3 true leaves, reduce humidity gradually to harden them off. This prepares them for transplanting without shock. Keep liners moist but not soggy—they’ll handle slightly drier conditions as they mature.
Tips & tricks for perfectly moist coco liners
These simple tricks will help you maintain that ideal moisture balance—no more guesswork or wilted seedlings.
Moisture Test: In Step 1, when you're checking if the coco coir is damp enough, squeeze a handful firmly—it should feel like a well-wrung-out sponge. If water drips out, it's too wet; if it crumbles, it needs more moisture. This quick test saves you from overwatering or underwatering. The 10-15 minute soak is perfect for achieving this balance, but don't rush it—let gravity work its magic.
Dome Removal Timing: That 50% sprout threshold in Step 2 is your cue to remove the humidity dome. Here's what I learned the hard way: if you wait until all seeds have sprouted, you risk fungal growth from trapped moisture. But if you remove it too early, the seedlings will dry out faster. Watch for condensation on the dome—it's your green light that humidity is working perfectly.
Climate Adjustments: The 2-3 day watering schedule in Step 4 works for average conditions, but your climate matters. In dry climates, I set up a small pebble tray with water under my seed trays—it adds extra humidity without overwatering. In humid areas, I reduce surface misting to every 3-4 days. Always check the coir's weight: a dry liner feels light, while properly moistened coir has noticeable heft.
Light Positioning: That bright, indirect light in Step 3 is crucial. I place my seed trays on the north-facing windowsill where they get morning sun but avoid the hot afternoon rays. If your seedlings lean toward the light, rotate them daily as instructed—but also consider moving the entire tray to a more balanced spot. Uneven light causes uneven moisture evaporation, which is exactly what we're trying to prevent.
Pro Tips for Keep Coco Liners From Drying Out
- These simple tricks will help you maintain that ideal moisture balance—no more guesswork or wilted seedlings.
- Moisture Test: In Step 1, when you're checking if the coco coir is damp enough, squeeze a handful firmly—it should fe...
- Dome Removal Timing: That 50% sprout threshold in Step 2 is your cue to remove the humidity dome. Here's what I learn...
Frequently asked questions
Got questions about keeping your coco liners lush and hydrated? You’re not alone! Here are some of the most common concerns—and their solutions—to help your seedlings thrive without stress.
How often should I water coco liners to prevent drying?
Check moisture daily—coco coir dries out fast! Water lightly when the top inch feels dry (stick your finger in to test). Overwatering is worse than underwatering, so aim for consistent dampness, not sogginess. A spray bottle or misting works best for seedlings.
Can I reuse dried-out coco liners for new seedlings?
Not ideal! Once coco liners dry out, they lose structure and may harbor mold or bacteria. Toss them and start fresh with new liners. If you’re eco-conscious, compost the old ones (avoid if they’ve been treated with chemicals). Prevention is key—keep them sealed until use!
How long can coco liners stay moist if stored unopened?
Unopened coco liners last 6–12 months in a cool, dry place (like a pantry). Once opened, seal them tightly in a ziplock bag with a damp paper towel to extend freshness. If they feel dry to the touch, soak them in water for 10–15 minutes before use.
What’s the best alternative if coco liners keep drying out?
Try these moisture-retaining swaps:
- Peat pellets: Expand with water and hold moisture longer.
- Jiffy-7 pods: Pre-moistened and slow to dry.
- DIY coco + perlite mix: Blend coco coir with perlite (1:1 ratio) for better aeration and retention.
Why do my seedlings look wilted even with moist coco liners?
Wilting can mean:
- Root stress: Coco coir may be too dense—gentle poking with a pencil can loosen it.
- Overcrowding: Seedlings compete for water; thin them if needed.
- Transplant shock: If recently moved, give them 2–3 days to recover in a shaded, humid spot.
Wrapping up and next steps
Keeping your coco liners moist is the secret to happy, thriving seedlings—no more dried-out disappointments! 🌱 With the right materials, like humidity domes, misting bottles, and proper drainage, you’ll create the perfect microclimate for your plants.
Remember, consistency is key, so check moisture levels daily and adjust as needed.
Now that you’re armed with these moisture-locking tricks, it’s time to put them into action. Start with your next batch of seedlings and watch them flourish!
Want to take it further? Experiment with different propagation setups or share your success with fellow gardeners—your green thumb is about to shine even brighter! 🌟