
How To
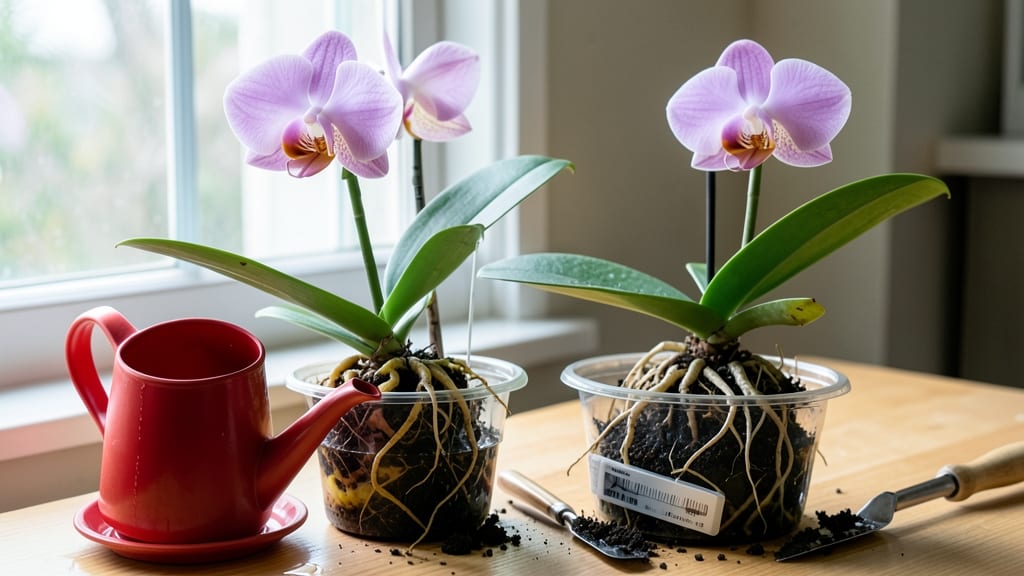
How to know if your orchid is overwatered—yellow leaves and mushy roots are dead giveaways. 🌱 I’ve nursed back more orchids than I’d like to admit, and the first step is always spotting these telltale signs before it’s too late. Overwatering robs orchid roots of oxygen, turning them black and soft—like overcooked pasta. Healthy roots should be firm and greenish-gray, not slimy or hollow. Yellow leaves often follow, starting at the tips and spreading downward, while fungal spots or a sour smell confirm the problem. The fix starts with stopping water immediately and repotting into fresh, airy bark mix. Let the roots dry completely between waterings—only when they’re wrinkled—and ensure your pot has drainage holes. Prevention is key: water only when the top inch of mix feels dry. Most orchids recover within 4-6 weeks with proper care, but act fast. The sooner you catch it, the easier the comeback—and your orchid will thank you with vibrant blooms for years.
Root Causes Of Overwatering Orchids
Orchids are delicate plants that rely on a precise balance of moisture, airflow, and drainage. When this balance tips—often due to human error or environmental factors—your orchid can suffer from overwatering.
Understanding the why behind this common issue helps you avoid it in the future. Let’s break down the key culprits:
Orchids thrive in aerated, chunky media (like bark, sphagnum moss, or perlite) that allows excess water to escape quickly. If your pot lacks drainage holes or uses dense, water-retentive soil (like regular potting mix), water pools at the roots instead of evaporating.
This creates anaerobic conditions, where roots suffocate without oxygen, leading to:
- Root rot: Fungal and bacterial pathogens (e.g., Phytophthora or Pythium) thrive in soggy media, breaking down root cells.
- Mushy, black roots: Healthy roots are silvery-green; overwatered ones turn slimy and dark as they decay.
- Stunted growth: Without oxygen, roots can’t absorb nutrients, causing yellowing leaves or flower spikes that fail to bloom.
Actionable fix: Repot into a terracotta or plastic pot with holes and use orchid-specific media. Pro tip: Elevate the pot on a saucer filled with pebbles to prevent water from sitting at the bottom. 💡
Orchids don’t follow a rigid watering calendar—they need moisture only when the media is nearly dry. Common mistakes include:
- Ignoring the "finger test": Stick your finger 1–2 inches into the media. If it’s damp, wait. If it’s bone-dry, water thoroughly.
- Misting daily: While orchids love humidity (40–70%), misting keeps leaves wet, promoting Botrytis (gray mold) and root stress.
- Using ice cubes: Cold water shocks roots, while room-temperature water mimics natural rainfall better.
Science behind it: Orchid roots are velamen-covered, acting like a sponge to absorb and release water as needed. Overwatering forces them to stay saturated, disrupting this cycle. Pro tip: Water in the morning so excess drains away by evening, reducing fungal risks. ⏰
Orchids are tropical plants, but their water needs shift with temperature and airflow. Here’s how climate plays a role:
| Factor | Overwatering Risk | Solution |
|---|---|---|
| Low temperatures (<60°F/15°C) | Cooler air reduces evaporation, keeping media wet longer. Roots slow down, increasing rot risk. | Water less frequently in winter. Move orchids away from drafty windows. |
| High humidity (>70%) | Stagnant air traps moisture, slowing drying time. Ideal for fungi like Rhizoctonia. | Use a fan for gentle airflow around the plant (not directly on it). |
| No airflow | Stagnant water in crowded pots or closed terrariums breeds bacteria. | Space pots 2 inches apart and avoid glass containers without ventilation. |
Pro tip: If your home is dry (e.g., <30% humidity), use a humidifier near the orchid—but still check media moisture daily. 🌡️
Not all pots are created equal. The material affects moisture retention and root health:
- Plastic: Traps heat and moisture, speeding up rot. Best for Phalaenopsis with frequent watering needs.
- Terracotta: Breathable but dries out fast—ideal for Cattleya or Dendrobium in hot climates.
- Glass (slotted): Aesthetic but requires daily monitoring; water evaporates slowly.
- No holes: A death sentence for orchids. Water pools, suffocating roots.
Science note: Orchid roots need oxygen exchange. Plastic pots create a closed system, while terracotta’s porosity mimics their natural epiphytic habitat. Pro tip: Repot every 1–2 years to refresh media and check for root rot. ✨
By addressing these root causes—drainage, watering habits, climate, and pot choice—you’ll create an environment where orchids thrive, not drown. Next up: how to diagnose overwatering before it’s too late.
How to Fix Overwatered Orchids
Overwatering can feel like a death sentence for orchids, but with the right steps, you can nurse your plant back to health—and even prevent future mishaps. The key is acting fast, diagnosing the damage, and adjusting your care routine.
Below, we’ll break down cause-specific fixes and share prevention tips to keep your orchid thriving. 🌱
If your orchid’s leaves are turning yellow or mushy, the roots may be drowning in excess water. Here’s how to revive it:
#### 🔥 Step 1: Remove the Orchid from Its Pot - Gently slide the orchid out of its container. If the roots are black, mushy, or smell foul, they’re rotting and need to be trimmed. - Pro Tip: Healthy roots are silver-green when dry and green when wet. If yours look like overcooked spaghetti, it’s time for a rescue! 🍝 #### 🍳 Step 2: Trim the Damaged Roots - Use sterilized scissors or pruning shears to cut away any black, squishy, or hollow roots. - Snip only dead tissue—don’t over-cut healthy roots! - Pro Tip: Dip the cuts in cinnamon powder (natural antifungal) or hydrogen peroxide (3%) to prevent further rot. ✨ #### 👨🍳 Step 3: Repot in Fresh Medium - Choose a well-draining orchid mix (bark, sphagnum moss, or coconut husk chunks). - Select a slightly larger pot (1–2 inches wider) with drainage holes. - Place the orchid in the new pot, securing it with fresh moss or ties if needed. #### 🥘 Step 4: Adjust Your Watering Habits - Wait 5–7 days before watering again to let any open wounds heal. - Water only when the roots look silvery-gray and the medium is dry (about once a week, depending on humidity). - Pro Tip: Use the “finger test”: Stick your finger 1 inch into the medium—if it’s damp, wait. If dry, water thoroughly and let excess drain completely. 💡If your orchid’s roots feel slimy or have white/pink fuzz, fungal or bacterial rot is likely the culprit. Act fast!
#### 🔪 Step 1: Sterilize Your Tools & Workspace - Wipe your scissors, pot, and hands with rubbing alcohol to avoid spreading infection. - Work in a clean, well-ventilated area. #### 🌡️ Step 2: Treat with Fungicide (If Needed) - Mix 1 tsp baking soda + 1 quart water (for mild cases) or use a commercial orchid fungicide (like Fungicide 3336). - Spray the roots lightly—don’t soak them. - Pro Tip: For severe cases, soak the roots in neem oil solution (1 tsp neem oil + 1 quart water) for 10 minutes, then rinse. 🌿 #### ⏰ Step 3: Increase Airflow & Reduce Humidity - Move your orchid to a bright, indirect spot with good airflow (e.g., near a fan or open window). - Avoid placing it in humid bathrooms or enclosed terrariums until fully recovered. - Pro Tip: If humidity is high, use a dehumidifier or place a small fan nearby to speed up drying. 💨Once your orchid is back on track, follow these habits to prevent future overwatering:
#### 📊 Watering Schedule Cheat Sheet| Orchid Type | Watering Frequency | Best Method |
|---|---|---|
| Phalaenopsis (Moth Orchid) | Every 7–10 days | Soak-and-drain (10–15 mins in room-temp water) |
| Cattleya or Oncidium | Every 5–7 days | Bottom-watering (place pot in a tray of water for 10 mins) |
| Dendrobium | Every 3–5 days (higher humidity needs) | Mist roots lightly or soak briefly |
With these fixes, your orchid should bounce back in 4–8 weeks, depending on the damage. The key is patience and consistency—orchids are resilient once you give them the right care! 🌟
Frequently asked questions
How can I tell if my orchid's yellow leaves are from overwatering vs. underwatering?
Yellow leaves from overwatering start at the tips and spread downward, often paired with mushy, black roots. Underwatered leaves yellow evenly from the bottom up and feel dry/crispy to the touch. Check the roots—healthy ones are firm and greenish-gray when dry, while overwatered roots smell foul and turn slimy.
What does a foul smell from my orchid pot mean?
A sour or rotten odor is a red flag for bacterial/fungal root rot caused by overwatering. Healthy orchid roots shouldn't smell at all. If you detect this, remove the plant immediately, trim all black/mushy roots, and repot in fresh bark mix. Use a 3% hydrogen peroxide rinse for roots before repotting to kill pathogens.
Can I save an orchid with completely black, mushy roots?
Even with severe rot, orchids can recover if you act fast! Cut away all black/mushy roots down to healthy green tissue, then repot in sterile bark mix with proper drainage. Place the plant in bright, indirect light and avoid watering for 5-7 days to let wounds heal. Many orchids regrow roots within 4-6 weeks with this treatment.
Why does my orchid keep getting overwatered if I'm careful?
Common hidden causes include plastic pots without drainage holes, compacted or water-retentive media, or high humidity slowing evaporation. Try these fixes: switch to terracotta pots, use chunky bark mix, and elevate pots on pebble trays. Also, check your watering method—bottom-watering gives better control than top-watering.
How often should I check my orchid's roots for overwatering signs?
Inspect roots every 2-4 weeks by gently removing the plant from its pot. Healthy roots should be firm and greenish-gray when dry. If you notice any darkening or softening, adjust your watering immediately. For new orchid owners, check weekly until you establish a routine that works for your home's conditions.