
Tools
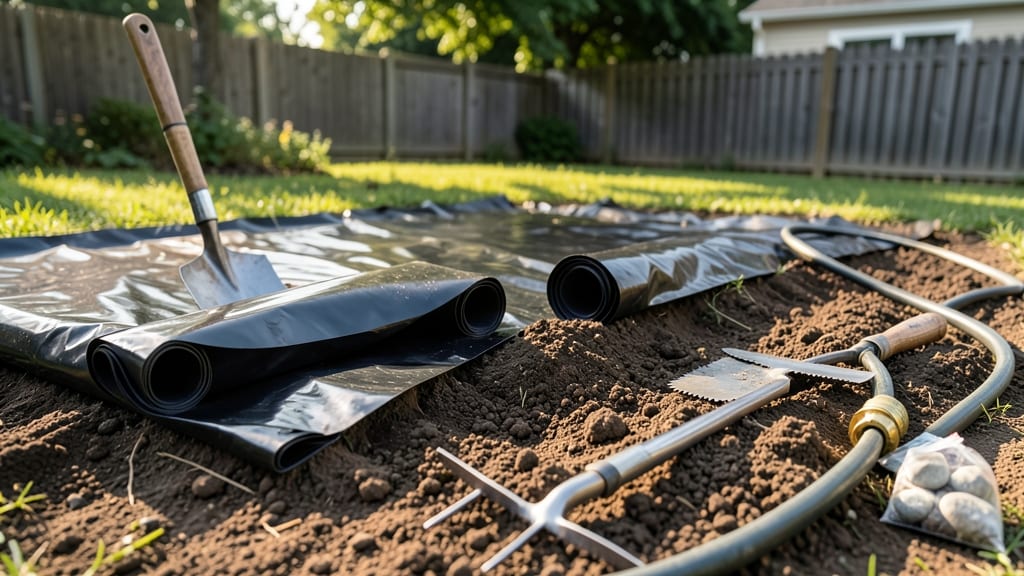
How to lay black plastic in your garden transforms it overnight—no more weeds, just warm soil ready for planting. 🌱 I’ve used it for years to cut weeding time by 90% and get a head start on spring. The secret lies in proper installation, and I’ll show you exactly how to do it right the first time. You’ll need 4-6 mil thick plastic (thinner tears), heavy-duty staples, a utility knife, and a few hours on a sunny day. Timing matters too—lay it 2-4 weeks before planting for maximum soil warming. Most people rush this step and end up with gaps or poor results. Once installed, you’ll see fewer weeds, better moisture retention, and earlier planting—perfect for extending your growing season. The plastic also blocks light from weed seeds, giving your plants a clean start. Just remember to secure edges tightly to avoid wind damage. This method works for vegetable beds, flower gardens, or raised beds, and I’ll cover how to adapt it for different plants. Let’s get that garden prepped!
📚 In This Guide
- What you need
- Instructions
- Tips and common mistakes
- Wrapping up and next steps
What you need
- ● Black plastic sheeting – Choose 4-6 mil thick (the thicker, the better for durability). Measure your garden area and buy 10-20% extra for overlaps and trimming.
- ○ Landscape fabric (optional but recommended) – A 3-5 oz. woven geotextile layer to prevent roots from piercing the plastic.
- ● Staple gun + heavy-duty staples – For securing edges (or use landscape staples if your gun isn’t powerful enough).
- ● Utility knife or scissors – For clean cuts in the plastic.
- ● Garden stakes or rocks – To weigh down the edges and keep the plastic in place.
- ● Gloves – Heavy-duty work gloves to protect your hands from sharp edges and debris.
- ● Rake or shovel – For clearing weeds, rocks, and debris from the garden bed.
- ● Edging material – Metal, plastic, or stone edging to keep the plastic neat and prevent it from curling.
- ● PVC pipes or irrigation tubing – If you want to add drip irrigation under the plastic for plants.
- ● Weed barrier fabric tape – For sealing seams and preventing light gaps.
- ● Tarp or drop cloth – To protect nearby plants or surfaces during installation.
Step-by-Step instructions for laying black plastic in your garden
This weed-blocking method saves hours of weeding—here’s how to do it right the first time.
🪴 Step 1: Clear the Area Thoroughly
Remove all weeds, grass, and debris from the planting area using a hoe or garden fork. Dig down about 2-3 inches to expose soil and eliminate deep-rooted weeds. I like to work in sections about 4 feet square to keep it manageable—this prevents missing stubborn weeds in larger areas.
Rake the soil smooth afterward. Any rocks or clumps left behind will poke holes in your plastic later, letting weeds sneak through. If you spot any remaining weed sprouts, pull them now—you won’t get another chance until you remove the plastic in spring.
💧 Step 2: Choose and Prepare the Black Plastic
Use 4-6 mil thick black plastic sheeting—thinner versions tear easily, and thicker ones don’t let enough light through to smother weeds. Cut the plastic to fit your garden bed with 2-3 inches of overlap on all sides. This extra plastic prevents weeds from growing along the edges where light seeps in.
Roll out the plastic over the cleared area, smoothing it flat. If your garden has slopes, anchor the plastic at the high end first to prevent it from sliding down. I’ve found that using landscape staples (not nails) secures it without damaging the plastic over time.
☀️ Step 3: Secure the Plastic Tightly
Use U-shaped landscape staples or galvanized nails to pin down the plastic every 12-18 inches along the edges and every 2-3 feet in the center. Press the staples into the soil just enough to hold the plastic flat—too deep and you’ll tear it, too shallow and it’ll blow away in wind.
For extra security, especially in windy areas, weigh down the edges with bricks, cinder blocks, or logs. This keeps the plastic from shifting and creating gaps where weeds can grow. Check after the first rain to ensure nothing has moved—adjust immediately if needed.
✂️ Step 4: Add Weights or Mulch for Long-Term Hold
Place 12-inch tall pieces of wood, bricks, or metal edging along the perimeter to hold the plastic in place. This prevents wind from lifting it and creates a clean edge for planting later. In high-wind areas, I’ve even used burlap sacks filled with soil—they’re heavy, cheap, and reusable.
For areas where you’ll plant later, mark the spots with stakes or flags so you don’t accidentally dig through the plastic when prepping soil. Label each stake with the plant type and spacing—this makes spring planting a breeze.
⏰ Step 5: Monitor and Maintain Through the Season
Check the plastic once a month to ensure no weeds have sprouted along edges or under lifted sections. If you spot any, press the plastic back down firmly. After 4-6 weeks, most weeds will be dead—this is when you can safely remove the plastic for planting.
Leave the plastic on until you’re ready to plant. Removing it too early lets weeds regrow. In fall, you can reuse it by rolling it up and storing it flat—just brush off dirt before storing to keep it usable for next year.
Tips & tricks for perfect weed-smothering garden barriers
Real talk: The secret to making this method truly effective lies in the details you might overlook. Here’s what nobody tells you—
Prep Like a Pro: In Step 1, don’t just pull weeds—dig down those 2-3 inches with purpose. I’ve learned the hard way that missed roots mean weeds will pop up right through your plastic later. Use a garden fork to loosen soil first, then pull weeds at the base. Think of it like flossing: You’ve got to get below the gumline (or soil line) to really clean things up.
Plastic Placement Precision: When rolling out your 4-6 mil black plastic in Step 2, smooth it like you’re making a bed—no wrinkles allowed. Even tiny folds create gaps where weeds will grow. Start at the high end of slopes to prevent sliding, and overlap edges by those 2-3 inches as specified. Pro tip: Use a broom handle to press down the plastic firmly after stapling—it creates a smoother, more professional finish.
Stapling Strategy: For Step 3, landscape staples are your best friend, but here’s the trick: Drive them in at a 45-degree angle into the soil, not straight down. This gives you better purchase without tearing the plastic. And when you’re checking after rain (as mentioned in Step 3), lift just one corner of the plastic to peek underneath—this lets you adjust without creating new gaps.
Long-Term Security: In Step 4, those 12-inch tall pieces of wood or bricks aren’t just for show—they’re your windbreak army. I’ve seen plastic lift right off during storms when people skipped this step. For extra insurance, place your weights every 3-4 feet along the perimeter, not just at the corners. Think of it like bracing a sailboat before a storm.
Pro Tips for Lay Black Plastic In Garden
- Real talk: The secret to making this method truly effective lies in the details you might overlook. Here’s what nobod...
- Prep Like a Pro: In Step 1, don’t just pull weeds—dig down those 2-3 inches with purpose. I’ve learned the hard way t...
- Plastic Placement Precision: When rolling out your 4-6 mil black plastic in Step 2, smooth it like you’re making a be...
Frequently asked questions
Got questions about laying black plastic in your garden? You’re not alone!
Here are answers to the most common concerns—from timing to troubleshooting—to help you get it right the first time.
When is the best time of year to install black plastic?
Install it early spring (before weeds sprout) or late summer (after summer weeds die back). Avoid winter—freezing temps can crack the plastic. For tropical climates, any time except peak heat (when plastic may warp). Pro tip: Clear away weeds first—burying them alive speeds up decomposition!
Do I need to secure the plastic with stakes or rocks?
Yes! Use U-shaped landscape stakes or heavy rocks to pin down edges and prevent wind from lifting it. Focus on corners and seams—even a small gap lets weeds sneak through. For slopes, anchor every 2–3 feet to avoid shifting.
Can I reuse black plastic from a previous year?
Only if it’s still intact (no tears, cracks, or fading). Sun degrades plastic over time, reducing its effectiveness. If it’s brittle or yellowed, replace it—your weed-smothering goals won’t work as well. Test flexibility: If it snaps easily, toss it!
What’s a good alternative if I don’t want to use plastic?
Try cardboard (wet it down to prevent decomposition), landscape fabric (with mulch on top), or gravel/sheet mulching. For organic gardens, newspaper + compost works too—but plastic lasts longer (3–5 years vs. 1–2 years for alternatives).
Why are weeds still growing through the plastic?
Check for gaps, tears, or improper overlap (edges should overlap by 6+ inches). If weeds poke through, they likely sprouted before you laid the plastic—remove them and re-seal seams with landscape tape. For stubborn spots, add a second layer of plastic or mulch.
How thick should the black plastic be?
Aim for 1–2 mm thickness (most garden centers sell 2mm). Thinner plastic (<1mm) tears easily, while thicker (>3mm) traps too much heat. For veggie gardens, 2mm is ideal—it blocks light without overheating roots.
Wrapping up and next steps
Laying black plastic in your garden is a game-changer for keeping weeds at bay and protecting your soil—and you’ve got all the know-how now! 🌱 With the right materials, precise steps, and a few pro tips, you’ll have a weed-free barrier in no time.
The best part? This method saves you effort and helps your plants thrive.
Ready to transform your garden? Start by gathering your supplies, then roll up your sleeves and get to work! Once your black plastic is in place, you’ll enjoy a low-maintenance, lush garden all season long. Happy gardening! 🌿