
Tools
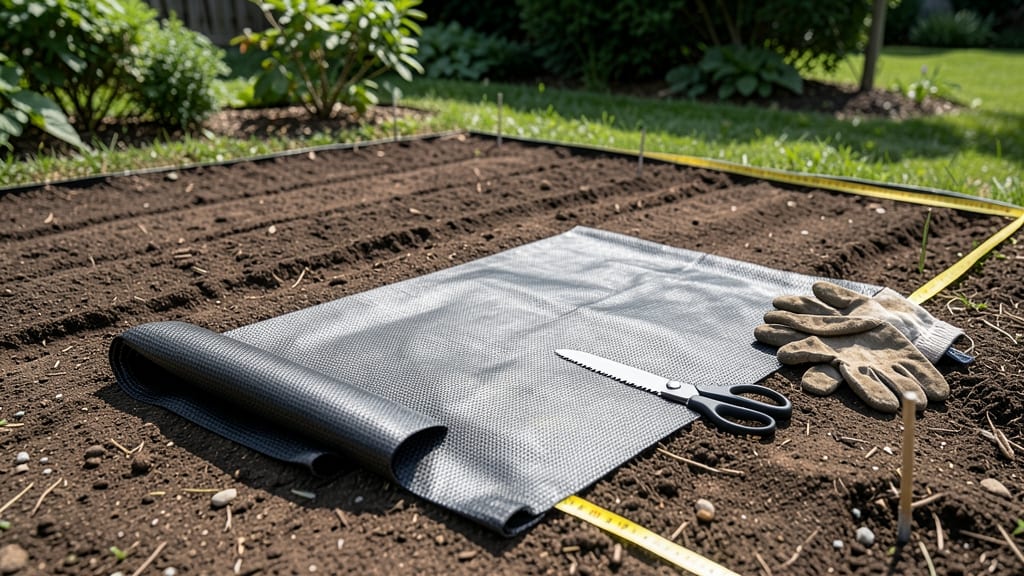
Garden fabric lasts 10+ years—if you lay it right. 🌱 I’ve buried weeds under the same stretch of fabric for eight seasons, and it’s still blocking them like day one. The secret isn’t just in the material but in how you prep, cut, and secure it.
Start with a clean, level area—no rocks or roots poking through. Use a sharp spade to trim grass down to soil level, then lay the fabric loosely before tucking edges under. Overlapping seams by 6 inches prevents weeds from sneaking through gaps.
By the end, you’ll have a smooth, weed-free base that stays put through rain, wind, and even foot traffic. The best part? No more digging up stubborn weeds or watching mulch turn into a weed magnet.
Works for vegetable beds, pathways, or under mulch—just adjust how you secure the edges. Here’s how to do it without frustration.
📚 In This Guide
- What you need
- Instructions
- Tips and common mistakes
- Wrapping up and next steps
What you need
- ● Garden fabric: Choose a high-quality, UV-stabilized fabric (polypropylene or woven polyester) with a weight of 3–4 oz per sq. yd. Measure your garden area first—buy 10–20% extra for overlaps and edges.
- ● Stakes or landscape pins: 6–8-inch galvanized metal stakes (1 stake per every 2–3 sq. ft. of fabric).
- ● Utility knife or scissors: For clean cuts (a heavy-duty box cutter works best for thick fabric).
- ● Measuring tape: 25+ feet for accuracy.
- ● Gloves: Heavy-duty work gloves to protect your hands from prickly edges.
- ● String or chalk line: To mark straight edges before laying fabric.
- ● Edging material: Plastic, metal, or stone to secure fabric edges and prevent curling (e.g., landscape edging strips).
- ● Mulch or gravel: 2–3 inches to cover fabric and suppress weeds long-term.
- ● Staple gun + landscape staples: For extra-secure fabric attachment (especially in windy areas).
- ● Weed barrier tape: Self-adhesive tape to seal fabric seams and prevent weeds from sneaking through.
Step-by-Step instructions for installing garden fabric
Here's how to block weeds for a decade—no more digging, no more regrets.
🪴 Step 1: Clear and Level the Ground
Start by removing all existing weeds, grass, and debris from the area. I like to use a sharp spade to dig out stubborn roots—this prevents future weed growth from below the fabric. Work in sections if needed, but aim to clear the entire space before laying anything.
Once cleared, rake the soil smooth and level. You want a flat surface so the fabric lies evenly and doesn't create high spots where water pools. For sloped areas, create gentle terraces with soil mounds to prevent erosion. A 1-inch difference in elevation is all you need to keep everything stable.
🌱 Step 2: Unroll and Position the Fabric
Lay out the garden fabric on a dry, sunny day—this makes it easier to handle and ensures the ground isn't muddy. I always start at one end and unroll it slowly, smoothing out wrinkles as I go. For large areas, use a helper to avoid stretching the fabric too tightly (this can cause tearing later).
Overlap seams by 6-12 inches to prevent weeds from growing through gaps. If your fabric has a printed side, place that face down—it's usually more durable and resistant to UV degradation. Trim excess fabric with sharp scissors or a utility knife, leaving a 2-inch border around the edges for securing later.
💧 Step 3: Secure the Edges and Prevent Shifting
Anchor the fabric edges with landscape staples or heavy rocks. I use 12-inch galvanized staples driven every 12-18 inches along the perimeter—this keeps the fabric in place without damaging plants later. For areas with high wind, add extra staples or secure with U-shaped pins.
If you're installing fabric under pathways or mulch, create a border with 2x4 lumber or metal edging to hold everything down. This prevents the fabric from shifting when you walk on it or add mulch. For slopes, bury the edges 4 inches deep with soil to lock them in place.
✂️ Step 4: Add Mulch or Soil for Final Protection
Cover the fabric with 3-4 inches of mulch (wood chips, bark, or gravel) to block light completely and prevent weeds from sprouting through. I avoid organic mulch like straw in high-traffic areas—it can break down too quickly and leave gaps. For pathways, use decorative gravel or crushed stone instead.
If you're planting directly through the fabric, cut X-shaped slits in the material (about 4 inches wide) where plants will go. This allows roots to penetrate while still blocking weeds. Water the area lightly after planting to settle everything in place.
☀️ Step 5: Maintain and Inspect Regularly
Check the fabric annually for tears or shifts, especially after heavy rains or wind. I mark any damaged spots with a flag so I can repair them before weeds take hold. Patch small holes with overlapping pieces of the same fabric, secured with staples or landscape tape.
For long-term durability, avoid placing heavy objects directly on the fabric—this can cause permanent creases or tears. If you need to move something (like a planter), use a board or mat to distribute weight evenly. With proper care, your weed-blocking barrier will last 10+ years**—no digging, no hassle.
Tips & tricks for perfect garden fabric installation
These small details make all the difference between a temporary fix and a weed-blocking system that lasts a decade.
Prep Like a Pro: In Step 1, don't just clear the surface—dig out those stubborn roots! I've seen weeds pop through later because someone missed the roots hiding under the soil. Use a garden fork to loosen the soil first, then remove everything down to about 4 inches deep. This gives your fabric a truly clean slate. A level surface isn't just about looks—it prevents fabric bunching that creates weak points where weeds can push through.
Fabric Handling Secret: When laying the fabric in Step 2, work slowly and methodically. I've learned the hard way that rushing leads to wrinkles that create perfect little pockets for weeds. Use a straight board or even a 2x4 to press down the fabric as you go—this helps eliminate wrinkles before they start. And remember those 6-inch overlaps? That's not just a suggestion—it's your first line of defense against weeds finding gaps.
Edge Security System: The edges are where most installations fail, so treat them with extra care in Step 3. I recommend using galvanized staples—they last longer than regular ones and won't rust. For high-traffic areas, consider adding a border of pavers or bricks before securing the fabric. This creates a physical barrier that makes it nearly impossible for weeds to creep in from the sides. Don't forget corners—they're the weakest points, so use extra staples or even small bricks to anchor them firmly.
Maintenance Made Easy: That 3-4 month inspection schedule in Step 5 is non-negotiable. I mark my calendar with reminders because I've seen beautiful installations ruined by ignored tears. Keep a small roll of landscape fabric and some staples handy—you'll thank yourself next year when you're not pulling weeds instead of enjoying your garden. A quick 15-minute check-up now prevents hours of weeding later.
Pro Tips for Lay Garden Fabric
- These small details make all the difference between a temporary fix and a weed-blocking system that lasts a decade.
- Prep Like a Pro: In Step 1, don't just clear the surface—dig out those stubborn roots! I've seen weeds pop through la...
- Fabric Handling Secret: When laying the fabric in Step 2, work slowly and methodically. I've learned the hard way tha...
Frequently asked questions
Got questions about laying garden fabric?
Here are answers to the most common ones—so you can tackle weeds like a pro!
When is the best time to lay garden fabric?
The ideal time is early spring or late fall when weeds are dormant but the ground is workable. Avoid laying it in freezing temps or during peak summer heat—soil prep matters more than rushing! For new beds, lay it before planting to prevent weed growth around perennials.
Do I need to remove all weeds before laying garden fabric?
Not necessarily! While large weeds or thick grass should be cleared first, smaller weeds will die under the fabric. Use a pre-emergent herbicide (like corn gluten) 2–4 weeks before laying fabric for extra protection. Just don’t bury living weeds—they’ll poke through!
Can I use garden fabric under mulch or topsoil?
Yes! Fabric works under mulch (like bark or wood chips) to block weeds while letting water drain. For topsoil, use landscape fabric with a higher UV resistance (rated for 10+ years) and secure edges tightly. Pro tip: Overlap seams by 6–12 inches for a seamless barrier.
How do I keep garden fabric from shifting or blowing away?
Anchor it with landscape staples, U-shaped pins, or heavy rocks along the edges. For slopes, use fabric weights or edging. If fabric shifts, tuck it under soil or mulch—just avoid burying it completely, or it’ll degrade faster. Bonus: A layer of cardboard or newspaper under the fabric adds extra stability.
What’s a good alternative if I don’t want to use garden fabric?
Try these low-maintenance options:
- Gravel or pebbles: Great for pathways but less effective against weeds.
- Wood chips/mulch: Suppresses weeds but may need replenishing yearly.
- Living mulch (clover or creeping thyme): Natural weed-blocker but requires occasional trimming.
- Sheet mulching (lasagna gardening): Layers of cardboard + compost—cheap and eco-friendly!
Wrapping up and next steps
Laying garden fabric is your secret weapon against weeds—saving time, effort, and your sanity in the long run! 🌱 By following these steps, you’ll create a clean, weed-free base that lasts 10+ years with minimal upkeep.
Now that you’re armed with the know-how, it’s time to roll up your sleeves and transform your garden into a low-maintenance paradise.
Ready to take the next step? Grab your tools, measure your space, and start laying that fabric today! Your future self (and your plants) will thank you. 🚀