
Planting
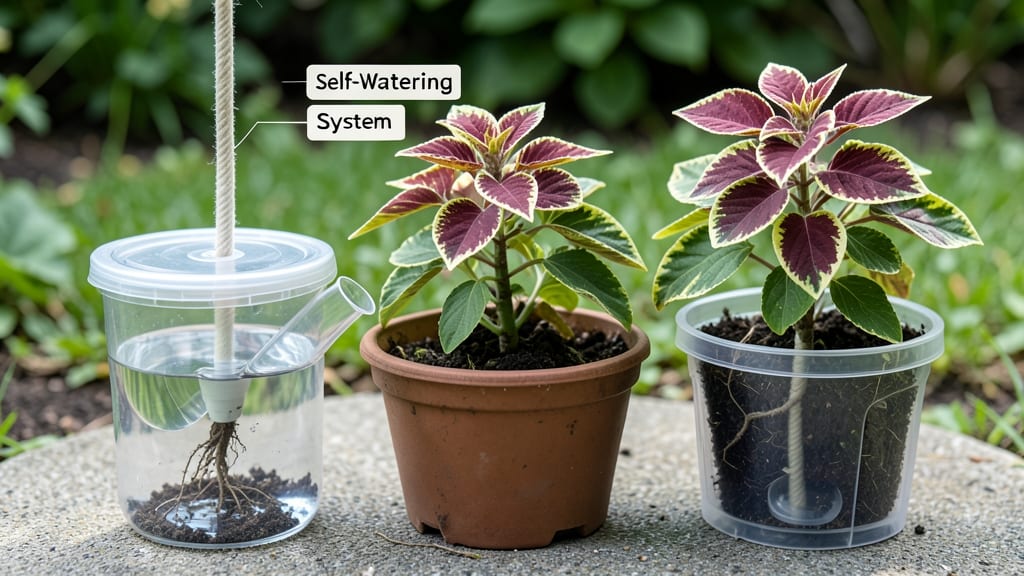
Never water again—literally. 🌱 This DIY self-waterer keeps plants hydrated for 2-4 weeks using just a plastic bottle, some string, and a few minutes of your time. I built mine after forgetting to water my ferns and watching them wilt in a single afternoon.
The magic is simple: gravity feeds water through a wick to the soil, mimicking nature's slow release. You only need a clean plastic bottle, a nail or drill, a piece of cotton string, and a container with drainage holes.
No fancy tools or expensive parts—just repurposed household items. You’ll end up with plants that stay consistently moist, no more guessing when to water, and a system that works for everything from herbs to hanging baskets. The best part?
You can customize the bottle size to match your plant’s thirst. Perfect for busy gardeners, frequent travelers, or anyone tired of wilting plants. Here’s how to build yours in under 10 minutes!
📚 In This Guide
- What you need
- Instructions
- Tips and common mistakes
- Wrapping up and next steps
What you need
- ● Plastic bottle (1-2 gallons) – Clean, food-grade (e.g., soda or water bottle). Pro tip: 💡 Larger bottles = longer water supply!
- ● Wick material – Choose one of these: Cotton rope (¼”–½” thick, 12”–18” long)
- ● Absorbent rope (e.g., pool shock rope)
- ● Old socks or fabric strips (last resort!)
- ● Drill or sharp knife – For making holes in the bottle cap.
- ● Scissors or box cutter – To trim the wick and bottle.
- ● Small container or pot – For your plant (with drainage holes!).
- ● Water – Room-temperature, chlorine-free (let tap water sit 24 hours if needed).
- ● Bottle cap with a valve – For easier refills (e.g., aquarium tube valves).
- ● Decorative cover – Paint or wrap the bottle to match your decor! 🎨
- ● Multiple bottles – For larger plants or multiple pots.
- ● Non-toxic sealant – To secure the wick if it slips.
Step-by-Step instructions for building a DIY gravity-fed self-waterer
Here's the foolproof method I use to keep plants hydrated for weeks without lifting a finger.
🪴 Step 1: Gather Your Supplies and Prep the Container
You'll need a clean plastic bottle (1-2 gallons), a small pot (6+ inches deep), a utility knife, and scissors. Start by removing the bottle cap and cutting off the top third—this becomes your water reservoir. I use a permanent marker to draw a clean line before cutting to avoid jagged edges that could scratch the bottle.
Next, invert the top section and place it inside the bottle neck like a funnel. The cut edge should face downward, creating a narrow spout. Secure it temporarily with tape while you test fit. The goal is a snug fit that lets water drip slowly when the bottle is full. If it leaks too fast, fold the edges inward slightly to narrow the opening.
💧 Step 2: Create the Wick System for Even Watering
Take a cotton rope (1/4-inch thick) and cut four 12-inch lengths. These will draw water from the reservoir to the soil. Poke two holes through the bottle's base—opposite each other—about 1 inch from the bottom. Thread one rope through each hole, leaving 6 inches hanging inside the bottle and 6 inches outside. Tie the outside ends together tightly to form a loop.
Place the bottle upside-down into your pot, positioning the looped rope at the center of the base. The rope should touch the soil surface when the bottle is full. If your pot has drainage holes, cover them with plastic mesh to prevent soil loss while allowing airflow. Fill the pot with moistened potting mix, leaving 1 inch of space at the top for your plant.
☀️ Step 3: Assemble and Test the Water Flow
Fill the reservoir with water (leave 1 inch empty at the top) and place the bottle back into the pot, ensuring the wicks remain submerged. The cotton should immediately start absorbing water. For best results, use room-temperature water—cold water can shock plant roots. Place your plant in the pot and gently press the soil around the roots to eliminate air pockets.
Test the system by tilting the bottle slightly. You should see water drip at a rate of 1-2 drops per minute. If it flows too fast, adjust by folding the bottle's spout edges inward further. If it's too slow, widen the spout slightly. Aim for a steady, slow release that keeps the top inch of soil moist but not soggy. Refill the reservoir every 2-3 weeks, depending on your plant's needs and climate.
⏰ Step 4: Customize for Your Plant's Needs
Adjust the wick length based on your plant's size. For small succulents, use 8-inch wicks to limit moisture. For larger plants like herbs or small vegetables, extend the wicks to 18 inches to deliver more water. Monitor the soil moisture weekly—if the top inch feels dry after a few days, your wicks may need lengthening or the reservoir refilling sooner.
This system works best for indoor plants or containers where you can control water access. For outdoor use, add a small weight (like a rock) on top of the bottle to prevent wind from tipping it. I like to place mine near a window where I can easily see the water level. A clear bottle lets you check the reserve at a glance—when it's half empty, it's time to refill.
Tips & tricks for perfect DIY plant self-waterers
Here's what I wish I knew before building mine—these tricks save time and headaches.
Precision Cutting Tip: When cutting the plastic bottle in Step 1, use a permanent marker to draw your line first. This gives you a clean reference point and prevents uneven cuts that can create leaks. I've ruined three bottles by cutting freehand—don't make my mistake! Also, work on a flat surface to avoid wobbling while cutting.
Wick Placement Secret: In Step 2, position the wick loop exactly at the center of the pot's base. This ensures even moisture distribution to all parts of your plant. If your pot has uneven drainage holes, place the loop slightly toward the side with more holes to compensate. The wicks should just barely touch the soil surface when the bottle is full—any higher and they won't draw water properly.
Flow Rate Troubleshooting: The 1-2 drops per minute rate in Step 3 can be tricky to achieve. Start with the spout edges folded inward slightly, then gradually unfold them until you reach the perfect drip rate. Test by tilting the bottle—if water flows faster than 2 drops per second, you're overdoing it. Too slow? Gently unfold the edges another millimeter. This adjustment is more art than science, so don't stress about perfection.
Outdoor Stability Hack: For outdoor use, place a small rock (about 1-2 pounds) on top of the bottle after filling it. This prevents wind from tipping your self-waterer, especially during storms. I've seen many DIY setups toppled by strong winds—this simple weight keeps everything stable. For extra security, you can also wrap the bottle in bungee cords to nearby stakes.
Pro Tips for Make A Plant Self Waterer
- Here's what I wish I knew before building mine—these tricks save time and headaches.
- Precision Cutting Tip: When cutting the plastic bottle in Step 1, use a permanent marker to draw your line first. Thi...
- Wick Placement Secret: In Step 2, position the wick loop exactly at the center of the pot's base. This ensures even m...
Frequently asked questions
Got questions about DIY plant self-waterers? You’re not alone! Here are answers to the most common concerns—whether you're a beginner or just troubleshooting a project gone slightly awry.
What’s the best DIY self-waterer for small plants vs. large ones?
For small plants (like succulents or herbs), a simple bottle or jar setup with a wick works perfectly—it’s lightweight and easy to adjust. Larger plants (e.g., tomatoes or shrubs) need a gravity-fed system with a bigger reservoir (like a 5-gallon bucket) to hold enough water for days. Pro tip: Add a layer of pebbles or gravel to prevent root rot!
How long will a self-waterer last between refills?
That depends on your setup and plant size! A small bottle system may last 3–5 days, while a large gravity-fed reservoir can go 2–4 weeks (or longer in cooler weather). Monitor soil moisture—if it’s bone-dry after a week, your reservoir might need a boost. Test with a skewer: Insert it into the soil; if it comes out clean, your plants are hydrated!
Why is my self-waterer leaking or not working?
Leaks usually mean overfilling the reservoir or a clogged wick/tube. Check these fixes:
- Ensure the wick or tube is fully submerged in water.
- Rinse the wick/tube with vinegar if algae or debris is blocking it.
- Adjust the height—if the water line is too high, it’ll overflow.
Can I use a self-waterer for outdoor plants in winter?
Yes, but with caution! Freezing temps can crack plastic reservoirs or freeze water in tubes. For winter:
- Use insulated containers (like a foam-wrapped bucket).
- Opt for wick-based systems (less prone to freezing than tubes).
- Move potted plants to a protected spot (e.g., under an eave or in a garage).
Is it cheaper to DIY or buy a pre-made self-waterer?
DIY wins for cost and customization! A basic bottle setup costs $5–$10 (vs. $20–$50 for store-bought). Pre-made systems are convenient but often lack adjustability. If you’re crafty, DIY saves money and lets you tailor the system to your plants’ needs—like adding a solar-powered pump for extra tech!
Wrapping up and next steps
Creating a DIY plant self-waterer is a game-changer for busy gardeners—it’s simple, cost-effective, and eco-friendly! 🌱 With just a few household items and a bit of creativity, you can keep your plants thriving with minimal effort.
Whether you’re using a bottle, jar, or even a repurposed watering can, the key is understanding gravity and wicking to deliver steady hydration.
Now that you’re armed with the know-how, take the next step—grab your supplies and build one for your favorite plants! Start small, experiment, and soon you’ll be the proud owner of a low-maintenance, lush garden. Happy planting! 🌿✨