
Companion Plants
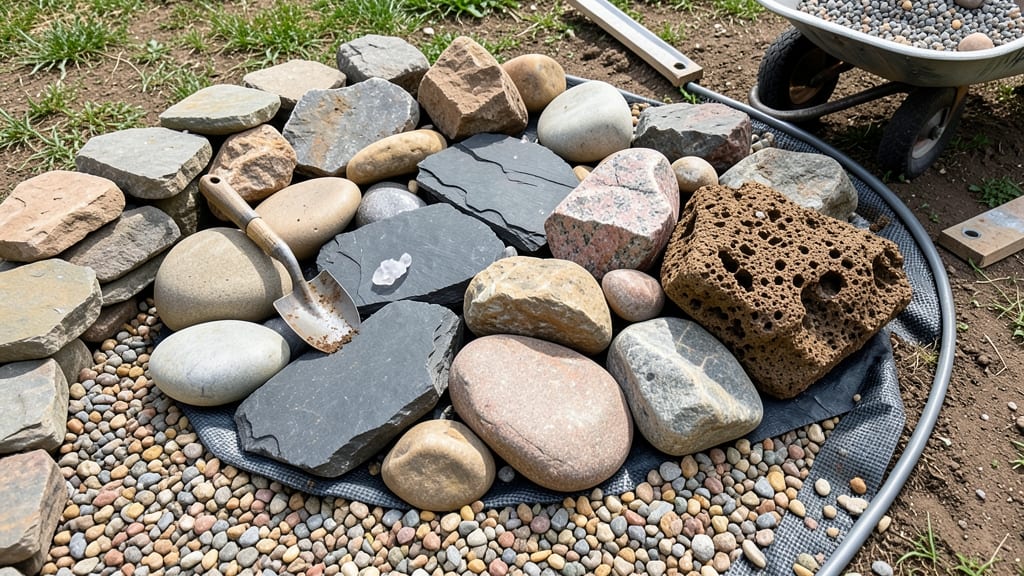
Creating a rock garden without plants transforms your yard into a serene, low-maintenance Zen retreat. 🌿 The key is playing with textures, colors, and natural stone shapes to create visual interest—no greenery required. This design thrives on simplicity, offering a peaceful escape that demands almost no upkeep once established.
Start with a solid foundation: compacted gravel or sand for drainage, topped with a layer of decorative stones in varying sizes. The rocks should contrast in color—think smooth river stones alongside jagged slate—to add depth.
Arrange them in organic clusters rather than rigid rows for a natural, flowing look that feels intentional rather than forced. The magic happens in the details: a winding gravel path invites exploration, while a small water feature adds soothing movement.
Add seating like a single stone bench or a minimalist metal chair to create a focal point. Maintenance is effortless—just occasional sweeping to keep the space clean and a quick check for displaced stones after rain. Perfect for small patios, urban backyards, or even as a border along a walkway.
This design proves that beauty doesn’t require life—just thoughtful arrangement and the right materials. Ready to create your own stone sanctuary?
📚 In This Guide
- What you need
- Instructions
- Tips and common mistakes
- Wrapping up and next steps
What you need
- ● Natural stones: 50–100 lbs of mixed sizes (smooth river rocks, slate, or granite). Aim for a variety of textures and colors for visual interest.
- ● Gravel: 2–3 bags (10–20 lbs each) of coarse or decorative gravel for base layers and pathways.
- ● Sand: 1–2 bags (40–50 lbs each) of coarse or play sand for leveling and drainage.
- ● Landscape fabric: 1 roll (4’ x 50’) to prevent weed growth and stabilize the base.
- ● Shovel & rake: 1 each for digging and smoothing the ground.
- ● Wheelbarrow or bucket: For hauling materials efficiently.
- ● Level or string line: To ensure your garden has a balanced, even look.
- ● Garden gloves: A pair to protect your hands while handling rocks and gravel.
- ● Measuring tape & spray paint: For marking layouts and designs.
- ● Small pebbles or crushed stone for fine detailing.
- ● Water-permeable ground cover (like rubber mulch) for pathways.
- ● Outdoor-safe adhesive or mortar for securing larger stones.
- ● Solar-powered landscape lights to highlight your design after dark.
Step-by-Step instructions for creating a minimalist Zen rock garden
This design focuses on harmony and texture—no plants needed. Here’s how to craft a serene stone sanctuary.
🪴 Step 1: Choose Your Base and Clear the Space
Pick a flat, stable area with good drainage—rock gardens hate soggy soil. I like to use a 4-foot square patch for a balanced look, but adjust based on your space. Remove grass, weeds, or debris completely. A layer of landscape fabric (optional but helpful) prevents weeds from poking through later.
For a true Zen feel, I often outline the space with a 2-inch border of smaller stones before filling the center. This keeps the design crisp and intentional. Use a string line and stakes to mark straight edges if you’re aiming for geometric precision.
💧 Step 2: Layer the Foundation for Stability
Start with a 3-inch base layer of coarse gravel—this ensures water drains away from your stones and prevents erosion. I use ½-inch crushed stone because it’s affordable and works everywhere. Spread it evenly, then tamp it down firmly with a plate or hand tamper.
Next, add a 1-inch layer of sharp sand (not playground sand—construction sand works best). This creates a stable, level surface for your stones. Smooth it out with a leveling rake and mist it lightly with water to compact. The goal is a firm, even base that won’t shift underfoot.
☀️ Step 3: Arrange Stones for Balance and Flow
Gather stones of varying sizes—flat slabs, rounded boulders, and irregular shapes—to create visual interest. I like to start with the largest stones first, placing them strategically to anchor the design. Arrange them in odd-numbered groupings (3, 5, or 7 stones) for a natural, asymmetrical look.
Leave 2-3 inches of space between stones to avoid a cluttered feel. If you’re aiming for a Zen aesthetic, I recommend clustering stones near one corner or along a diagonal line. Step back often to check the overall balance—your eye should rest comfortably on the arrangement.
✂️ Step 4: Refine Edges and Add Finishing Touches
Sweep away any sand or gravel that’s accumulated between stones—this keeps the design clean. For a polished look, I use a hand broom to smooth the surface around the stones. If you notice gaps, fill them with smaller stones or pebbles to tie the design together.
Add 1-2 focal stones—like a smooth river rock or a uniquely shaped slab—to draw the eye. In Zen gardens, these often represent mountains or islands. A small water feature (like a shallow dish with a solar fountain) can elevate the space further, but it’s optional. Finish by lightly misting the stones to settle dust.
⏰ Step 5: Maintain for Long-Term Serenity
Rock gardens require almost no upkeep, but occasional sweeping keeps them looking fresh. Check for weeds once a year—pull any that sneak through the fabric or between stones. If stones shift over time, gently nudge them back into place.
For extra tranquility, I add solar-powered garden lights along the edges at night. The soft glow highlights the stones without overpowering the space. A final tip: rotate stones seasonally if you want to refresh the design—just move them slightly to create a new arrangement.
Tips & tricks for perfect minimalist Zen rock gardens
Creating a rock garden that feels intentional and balanced takes a few key insights—here's what transforms good into truly serene.
Foundation is Everything: The 3-inch layer of coarse gravel in Step 2 isn't just about drainage—it's the secret to stability. I learned this the hard way when my first garden shifted after heavy rain. Use a hand tamper to compact it firmly, especially if you're working with larger stones. This creates a solid base that won't settle unevenly over time.
Stone Selection Matters More Than You Think: When gathering stones in Step 3, look for natural variations in color and texture. I often collect stones from different sources—riverbeds, construction sites, even local hiking trails—to create visual interest. The key is to arrange them so the largest stones anchor the composition while smaller ones fill the spaces naturally. Think of it like a painting where each stone has its own focal point.
Zen Balance Requires Strategic Placement: That 2-3 inch spacing between stones in Step 3 isn't arbitrary—it creates breathing room that makes the design feel intentional rather than crowded. For true Zen harmony, I recommend placing your largest stone near one corner (traditionally the bottom right) to create a natural focal point. This mirrors traditional Japanese garden design principles while keeping the look minimalist.
Optional Lighting Enhances the Vibe: While not required, solar-powered garden lights along the edges (mentioned in Step 5) can transform your garden at night. I use small, warm-white LED lights that cast a soft glow without overwhelming the natural stone colors. The subtle illumination creates a magical effect while maintaining the garden's tranquil atmosphere. This is completely optional but adds that final touch of serenity.
Pro Tips for Make A Rock Garden Without Plants
- Creating a rock garden that feels intentional and balanced takes a few key insights—here's what transforms good into ...
- Foundation is Everything: The 3-inch layer of coarse gravel in Step 2 isn't just about drainage—it's the secret to st...
- Stone Selection Matters More Than You Think: When gathering stones in Step 3, look for natural variations in color an...
Frequently asked questions
Got questions about creating a rock garden without plants?
You’re not alone! Here are some of the most common queries—and their answers—to help you design a stunning, low-maintenance space that’s purely about rocks, texture, and zen vibes.
Can I use any type of rock for a plant-free rock garden?
Not all rocks work equally well! For a cohesive look, stick to one or two types of stones—like slate, granite, or river rocks—with similar textures or colors. Mixing smooth river rocks with jagged lava rock can look cluttered. Pro tip: Collect rocks from your yard or buy them in bulk from garden centers to save money and ensure uniformity.
How long does it take to build a rock garden without plants?
Most DIY rock gardens take 1–3 days for beginners, depending on size and complexity. A small, simple design (like a 4x6 ft bed) can be done in a weekend, while larger projects may require more time for digging, leveling, and arranging rocks. Pro tip: Work in cooler hours to avoid overheating—rock gardens are heavy and labor-intensive!
Is a rock garden more expensive than a traditional garden?
Not necessarily! While high-end stones or custom designs can get pricey, most rock gardens are budget-friendly. Focus on affordable materials like:
- Local field stones (free or cheap)
- Recycled concrete or brick (for pathways)
- Basic tools (shovel, wheelbarrow, gloves)
Pro tip: Skip expensive mulch—gravel or sand works just as well for pathways and borders.
Will a rock garden wash away in heavy rain or floods?
If designed properly, no! To prevent erosion:
- Dig a shallow trench (6–8 inches deep) to hold rocks in place.
- Use larger, heavier stones at the base and edges.
- Add a layer of landscape fabric under rocks to discourage weeds and improve drainage.
Pro tip: In flood-prone areas, elevate the garden slightly or use a retaining wall to keep rocks secure.
How can I add visual interest without plants?
Rock gardens shine with texture, color, and movement! Try these ideas:
- Color contrast: Pair dark slate with light quartz or metallic pyrite (fool’s gold).
- Height variation: Stack larger rocks at the back, smaller ones in the front.
- Lighting: Add solar-powered path lights or spotlights for evening drama.
- Water features: A small bubbling rock or a shallow fountain adds life without greenery.
Pro tip: Group odd-numbered rocks (3, 5, or 7) for a natural, balanced look.
Wrapping up and next steps
Creating a rock garden without plants is all about embracing simplicity, texture, and natural beauty—no green thumbs required! 🌟 By carefully selecting stones, arranging them thoughtfully, and adding subtle lighting or water features, you’ve crafted a serene, low-maintenance space that feels like a Zen retreat.
Whether you’re drawn to the minimalist aesthetic or just love the tactile appeal of rocks, your garden is now a stunning focal point that requires minimal upkeep.
Ready to take it further? Experiment with different stone shapes, add a small fountain, or even incorporate a few decorative elements like lanterns or driftwood to personalize your space. Your rock garden is just the beginning—let your creativity flow! 🚀