
How To
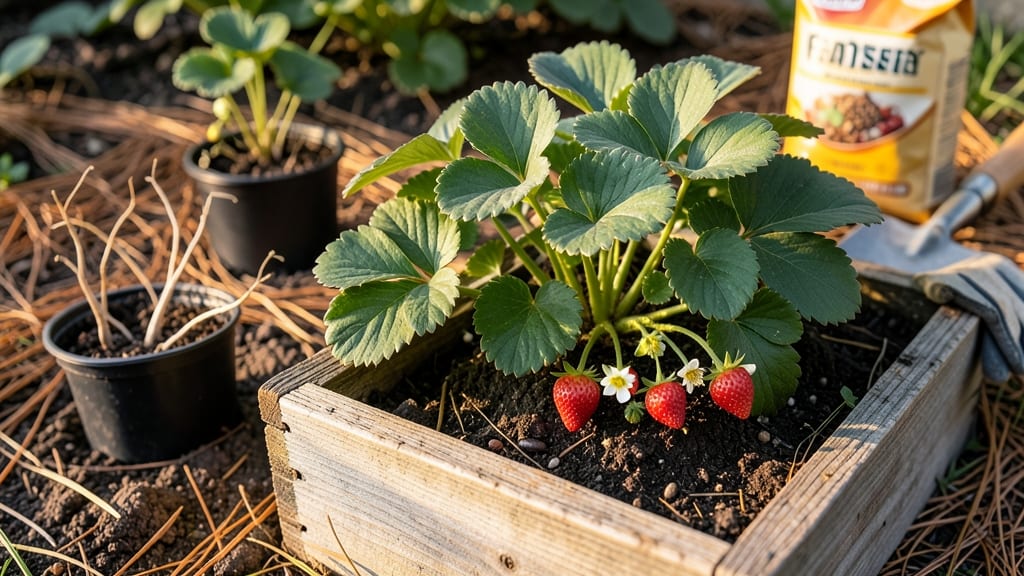
This hanging strawberry planter turns tiny spaces into sweet harvests. 🌱 I built mine after realizing my balcony could grow more strawberries than my entire backyard—if I just hung them right. The secret lies in the right container, soil, and a little clever spacing that keeps berries coming all season.
You’ll need just 5 supplies: a sturdy hanging basket (at least 12 inches deep), quality potting mix, a handful of everbearing strawberry plants, some perlite for drainage, and a watering can with a long spout.
Most people mess up by skipping the drainage layer or overcrowding plants—don’t be that gardener. I’ll show you the exact setup that prevents root rot and maximizes berries.
By the time you’re done, you’ll have a planter that produces continuous harvests from spring through fall, with berries spilling over the edges. The plants thrive because their roots get perfect airflow, and you avoid the weeding and soil compaction of ground planting.
Plus, it looks stunning—deep red leaves cascading with ripe fruit.
Works for patios, balconies, or even a sturdy branch in your yard. The same principles apply whether you use a plastic basket, fabric grow bag, or repurposed bucket—just adjust the drainage holes. Let’s get those strawberries growing!
📚 In This Guide
- What you need
- Instructions
- Tips and common mistakes
- Wrapping up and next steps
What you need
- ● Hanging planter or basket: Choose a durable, breathable container (12–18 inches in diameter) with drainage holes. Pro tip: Look for coconut coir or plastic-coated wire baskets for longevity.
- ● Potting mix: 5–10 gallons of well-draining, organic potting soil (avoid garden soil—it compacts!). Mix in 1 part perlite or vermiculite per 4 parts soil for aeration.
- ● Strawberry plants: June-bearing or everbearing varieties (6–12 plants, depending on basket size). Pick bare-root plants or container-grown ones from a nursery.
- ● Slow-release fertilizer: Balanced 10-10-10 or organic options (follow package instructions for dosage).
- ○ Mulch (optional but recommended): Straw or pine needles to retain moisture and suppress weeds.
- ● Pruning shears or scissors (for trimming plants and cutting mulch).
- ● Gloves (to protect your hands from thorns and soil).
- ● Watering can or hose with a gentle spray nozzle (avoid overhead watering to prevent disease).
- ● Measuring cup or scale (for mixing soil amendments).
- ○ Support stakes or trellis (optional): For everbearing varieties to train runners vertically.
- ● Sunlight access: Ensure your planter gets 6–8 hours of direct sunlight daily (strawberries are sun-worshippers! 🌞).
- ● Watering routine: Commit to consistent moisture—strawberries hate soggy roots but also dry spells.
- ● Patience: Strawberries take 4–6 weeks to establish and 2–3 months to bear fruit.
Step-by-Step instructions for creating a strawberry hanging planter
Here’s how to build a thriving strawberry planter that delivers sweet, continuous harvests all season long.
🪴 Step 1: Select the Right Hanging Basket and Drainage
Choose a 12-14 inch diameter hanging basket with pre-drilled drainage holes—strawberries hate soggy roots. I prefer plastic-lined baskets because they retain moisture better than unlined ones, but add a 1-inch layer of plastic mesh to the bottom if using a fabric-lined basket to prevent soil from escaping. The extra drainage prevents root rot while keeping moisture where it belongs.
Check the basket’s weight capacity—strawberry plants with runners can double in size, so aim for a basket that holds at least 10-15 pounds when fully planted. If your basket has a saucer, remove it or poke holes in it; trapped water at the bottom creates a breeding ground for fungus. Hang the basket where it gets 6-8 hours of sunlight daily, ideally in a spot with morning sun and afternoon shade to prevent scorching.
🌱 Step 2: Layer Moisture-Retaining Materials for Root Health
Start with a 2-inch layer of sphagnum moss at the bottom—this material holds moisture while allowing excess water to drain. I use pre-moistened moss to jumpstart the process, squeezing out excess water before adding it to the basket. Next, layer 3-4 inches of high-quality potting mix (avoid garden soil—it compacts and suffocates roots). Mix in a slow-release fertilizer (look for one with a 10-10-10 or 12-12-12 ratio) to give your strawberries a nutrient boost from day one.
Don’t skip the moss layer—it mimics the natural aeration strawberries love. If you’re using peat-free mix, add a handful of perlite or vermiculite to improve drainage. Press the layers down lightly with your fingers to create a stable base, but avoid compacting the soil too tightly. The goal is a fluffy, well-aerated mix that roots can easily penetrate.
🌿 Step 3: Plant Strawberry Runners or Bare-Root Plants
For bare-root plants, soak the roots in lukewarm water for 10-15 minutes before planting to rehydrate them. Remove any damaged or mushy roots—healthy roots should be firm and white. Plant 3-4 strawberry plants in the basket, spacing them 4-6 inches apart in a circle around the edge. This arrangement maximizes sunlight exposure and airflow, reducing disease risk.
If using runners, snip them from an established plant and let the roots dangle into the basket’s soil layer. Gently press the crown (where leaves meet roots) just below the soil surface—burying it too deep causes rot, while leaving it exposed invites disease. Water immediately after planting to settle the soil around the roots. You’ll see new growth within 7-10 days if conditions are right.
☀️ Step 4: Water and Feed for Optimal Growth
Water the basket thoroughly until water drains from the bottom, then let it sit for 10-15 minutes to absorb excess moisture. Strawberries need consistent moisture, but their roots must never sit in water. I water early in the morning to allow leaves to dry before evening, which prevents fungal issues like gray mold. During hot, dry spells, I add 1-2 inches of mulch (like straw or pine needles) to retain moisture and keep roots cool.
Feed your strawberries every 4-6 weeks with a balanced liquid fertilizer (half-strength to avoid burning). I switch to an organic fish emulsion in late spring to boost fruit production. Watch for yellowing leaves—this usually means either overwatering or nutrient deficiency. Adjust your watering or feeding routine accordingly. With proper care, your plants will start producing flowers in 4-6 weeks, followed by fruit in 6-8 weeks.
✂️ Step 5: Prune and Maintain for Continuous Harvests
Once fruit begins to form, remove the first set of flowers if your goal is larger berries later in the season. This might sound counterintuitive, but it redirects the plant’s energy toward stronger roots and bigger yields in subsequent harvests. I also trim any yellow or diseased leaves immediately to prevent spread. Use clean, sharp pruners to avoid tearing the plant.
As the season progresses, pinch off runners (the long stems with baby plants) unless you want to propagate more strawberries. Too many runners drain the mother plant’s energy. In late summer, reduce watering slightly to harden off the plants for dormancy. If you’re in a warm climate, keep the basket watered but reduce fertilizer to half-strength to encourage dormancy. With proper pruning, your basket will keep producing sweet, juicy strawberries for months.
Tips & tricks for perfect strawberry planter setup
Here's what nobody tells you about creating a thriving strawberry planter that actually delivers.
Basket Selection Strategy: Look for baskets with double drainage holes—some manufacturers only include a single row. The extra holes prevent waterlogging, which is the #1 cause of root rot in hanging planters. I've had the most success with coconut fiber-lined baskets because they naturally wick moisture while still allowing airflow. If your basket lacks a liner, wrap the inside with landscape fabric to prevent soil from falling through the drainage holes.
Soil Layering Technique: The 2-inch sphagnum moss layer in Step 2 isn't just about drainage—it creates a natural air pocket at the bottom that prevents anaerobic conditions. I've found that adding a 1/4-inch layer of coarse sand between the moss and soil mix further improves drainage without compacting the roots. This extra layer is especially helpful in humid climates where water tends to pool. The 3-4 inches of potting mix should be lightweight and peat-free—I mix in 20% perlite to create pockets for oxygen circulation.
Planting Precision: When planting your 3-4 strawberry plants in Step 3, position them so their crowns face outward toward the edge of the basket. This creates a natural funnel for water distribution during irrigation. For bare-root plants, trim any roots that appear brown or mushy—these won't recover and will compete with healthy roots for nutrients. The 4-6 inch spacing is crucial; plants this close together get maximum sunlight exposure while still allowing airflow between leaves to prevent fungal diseases.
Watering Wisdom: The 10-15 minute drainage period after watering in Step 4 is non-negotiable. I've seen beginners skip this and end up with waterlogged roots within days. For the first 2 weeks after planting, water twice daily—once in the morning and once in the late afternoon—to help establish the root system. After that, morning watering is sufficient, but always check the soil moisture by sticking your finger 1 inch deep—if it feels dry, water thoroughly.
Pro Tips for Make A Strawberry Planter
- Here's what nobody tells you about creating a thriving strawberry planter that actually delivers.
- Basket Selection Strategy: Look for baskets with double drainage holes—some manufacturers only include a single row.
- Soil Layering Technique: The 2-inch sphagnum moss layer in Step 2 isn't just about drainage—it creates a natural air pocket at the bottom that prevents anaerobic conditions.
Frequently asked questions
Got questions about creating your own strawberry planter?
You’re not alone! Here are answers to the most common ones to help you get started with confidence.
What’s the best time of year to plant strawberries in a hanging basket?
Plant strawberries in early spring (after the last frost) or late summer (6-8 weeks before the first frost). This gives roots time to establish before extreme temperatures. If you’re in a warm climate, spring planting is ideal for a summer harvest!
How often should I water my strawberry planter?
Water your hanging strawberry planter daily in hot weather—especially in baskets, which dry out faster. Check soil moisture; it should stay consistently damp but not soggy. A self-watering basket or drip irrigation can help maintain moisture without overwatering.
Can I reuse the same hanging basket for strawberries year after year?
Yes, but sterilize it first! Clean the basket with a 10% bleach solution (1 part bleach to 9 parts water) to kill pests or diseases. Replace old potting mix to refresh nutrients. Just avoid reusing the same soil if last year’s plants had issues like mold or root rot.
What if my strawberries aren’t fruiting? How can I troubleshoot?
Lack of fruit often means insufficient sunlight (strawberries need 6+ hours daily) or poor pollination. Try these fixes:
- Move the basket to a sunnier spot.
- Hand-pollinate flowers with a soft brush.
- Ensure balanced fertilizer (high in phosphorus for blooms).
- Check for pests like spider mites or aphids.
Do I need special strawberry varieties for hanging baskets?
Yes! Opt for everbearing or day-neutral varieties like ‘Albion,’ ‘Seascape,’ or ‘Tristar.’ These produce fruit in waves (spring, summer, and fall) and thrive in containers. Avoid June-bearing types—they’re better for in-ground planting.
What should I do if my strawberry plants look wilted or yellow?
Wilting or yellowing leaves usually signal overwatering, underwatering, or nutrient deficiency. Adjust watering first, then check for:
- Root rot (brown, mushy roots = too much water).
- Nitrogen deficiency (yellow lower leaves = add compost or balanced fertilizer).
- Pests (like slugs or fungal issues).
Wrapping up and next steps
Creating your own strawberry planter is a rewarding way to enjoy fresh, homegrown berries all season long! With just a few supplies and a little creativity, you’ve got everything you need to set up a thriving hanging basket that delivers continuous harvests.
Whether you’re a gardening newbie or a seasoned pro, this project is simple, fun, and packed with delicious results.
Now that you’re ready to plant, take the next step—grab your supplies, follow your setup, and watch your strawberries flourish! 🌱 Don’t forget to share your progress with fellow gardeners or tag us in your harvest pics. Happy planting!