
How To
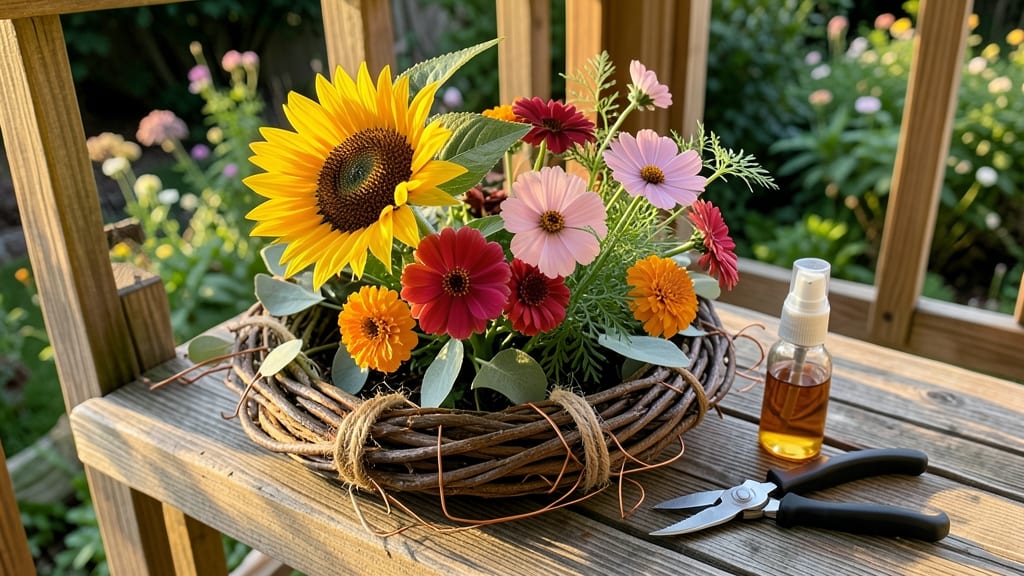
Your front door just got a summer upgrade—how to make a summer wreath—no crafting skills required. ✨ That overgrown bougainvillea or lavender you’ve been meaning to trim?
They’re about to become a lush, fragrant wreath that’ll make your porch the envy of the block. The best part? You’re using what’s already in your garden, not buying expensive supplies.
Start with a grapevine or sturdy foam base (or even a bent wire hanger if you’re thrifty), then gather sun-loving flowers and foliage—roses, hydrangeas, eucalyptus, or even herbs like rosemary.
The key is mixing textures: velvety petals with spiky grasses or glossy leaves. No two wreaths will look alike, and that’s the charm.
By the time you’re done, you’ll have a sun-kissed centerpiece that smells like a summer garden and lasts weeks. Hang it up, snap a photo, and watch your neighbors ask, “What’s that gorgeous wreath made of?”—then tell them it’s all from your own backyard.
Even your blackest thumb can pull this off.
Pro tip: Swap out wilting blooms every few days for a fresh look, or let it dry for a long-lasting keepsake. Now go raid that garden—your porch is about to get a glow-up.
📚 In This Guide
- What you need
- Instructions
- Tips and common mistakes
- Wrapping up and next steps
What you need
- ● Floral base: A foam wreath frame (12–18 inches in diameter) or a wire or grapevine wreath base (for a rustic look).
- ● Fresh or faux flowers: Sunflowers (3–5 stems)
- ● Daisies (6–8 stems)
- ● Baby’s breath (1–2 bunches, for volume)
- ● Eucalyptus or ferns (2–3 stems, for texture)
- ○ Optional: Wildflowers or succulents for a boho vibe!
- ● Greenery: Pine sprigs, ivy, or boxwood (enough to fill gaps).
- ● Hot glue gun + hot glue sticks (or floral wire for a wire base).
- ● Scissors (sharp floral shears if you’re fancy!).
- ● Ribbon or twine (for hanging—choose a color that pops!).
- ● Wooden beads or charms (for a whimsical touch).
- ● Spray adhesive (if securing faux flowers).
- ● Paint or chalk (to personalize your base).
- ● Dried citrus slices or lavender (for a fragrant twist!).
Step-by-Step instructions for crafting a summer floral wreath
Here’s how to create a vibrant summer wreath—no fancy tools or experience needed.
🪴 Step 1: Gather Your Materials and Prep the Base
Start with a foam floral wreath base (12-18 inches wide) and a wire or floral pick for securing stems. I like to use a sturdy foam because it holds flowers securely without falling apart. Cut the foam base in half if you want two smaller wreaths—just fold it carefully and trim the edges smoothly with scissors.
Next, gather your fresh flowers and foliage—think sunflowers, daisies, baby’s breath, and eucalyptus for a classic summer look. Remove any leaves or thorns from stems to keep them clean and tangle-free. If you’re using dried flowers, skip this step—they’re already prepped!
🌿 Step 2: Arrange Flowers for a Natural, Full Look
Start by placing the largest blooms first—sunflowers or dahlias—around the outer edge of the foam. Space them evenly, about 2-3 inches apart, so they fill in the gaps naturally. Press them firmly into the foam until they hold steady. I like to work in sections, moving clockwise, so the arrangement stays balanced.
Fill in the center with smaller blooms like daisies or cosmos, then add filler flowers (baby’s breath or statice) to soften gaps and create movement. Tuck in eucalyptus or ferns for texture—these keep the wreath lush and full. Step back occasionally to check for even coverage; you want a "just-picked-from-the-garden" look, not a stiff arrangement.
💧 Step 3: Secure Stems and Add Finishing Touches
Once the flowers are placed, use your wire or floral pick to anchor stems deeper into the foam. For extra hold, wrap a small piece of floral tape around the base of each stem before inserting it into the foam. This prevents slipping and keeps everything in place for days.
Add a final pop of color with ribbon or greenery—a satin ribbon in a complementary shade or ivy tendrils for a rustic touch. Wrap the ribbon around the back of the wreath base and tie it securely, or weave the ivy through the stems for a wild, organic feel. Mist everything lightly with water if using fresh flowers to keep them hydrated.
⏰ Step 4: Display and Care for Your Wreath
Hang your wreath immediately on a door, fence, or wall hook—the weight of the foam will keep it stable. If using fresh flowers, place the wreath in a shady, cool spot (like a porch or covered patio) to extend its life. Change the water in a small vase every 2-3 days to keep stems hydrated.
For dried flowers, store the wreath in a dry, dark place when not in use. A breathable cotton bag prevents moisture buildup and keeps petals crisp. With fresh flowers, your wreath will last 5-7 days; dried versions can last months with proper care.
Tips & tricks for perfect summer floral wreaths
Here's what nobody tells you about creating stunning wreaths—these tricks make all the difference.
Base Prep Secret: Before inserting stems, lightly spray your foam base with water and let it soak in for 5 minutes. This creates a slightly sticky surface that helps stems stay put without slipping. For extra security, especially with heavy sunflowers, I like to use a small dab of hot glue at strategic points around the base—just don't let it show! This prevents any movement when hanging.
Flower Placement Strategy: In Step 2, work with the foam base upside down on a clean table. This gives you better access to the back side where you'll be inserting stems, and you can easily rotate the wreath to check balance as you go. Start with your largest blooms spaced about 2-3 inches apart—they'll naturally guide the placement of smaller flowers between them. Think of it like a puzzle where each piece finds its perfect spot.
Stem Security: For flowers with particularly thick stems (like sunflowers), I cut the foam base at a slight angle where you'll insert them. This creates more surface area for the foam to grip the stem, preventing any wobbling. For delicate stems like baby's breath, wrap them with a tiny piece of floral tape before inserting—they'll stay put without looking messy. This is especially helpful if you're making a wreath for outdoor display where wind might be a factor.
Fresh Flower Longevity: If you're using fresh flowers, here's my pro trick: After arranging, place your wreath in the refrigerator overnight before displaying. The cooler temperature slows moisture loss, making your flowers last the full 5-7 days. For an extra boost, add a drop of clear floral preservative to the water in your vase—it keeps stems hydrated longer than plain water alone. This is particularly useful if you're making your wreath a day or two before your event.
Pro Tips for Make A Summer Wreath
- Here's what nobody tells you about creating stunning wreaths—these tricks make all the difference.
- Base Prep Secret: Before inserting stems, lightly spray your foam base with water and let it soak in for 5 minutes.
- Flower Placement Strategy: In Step 2, work with the foam base upside down on a clean table.
Frequently asked questions
Got questions about crafting your dream summer wreath? You’re not alone! Here are answers to the most common queries—so you can dive in with confidence and zero stress.
What’s the best time of year to hang a summer wreath?
Aim for late spring through early fall (May–September) when flowers are abundant and humidity won’t wilt your materials too fast. For maximum freshness, swap out greenery every 1–2 weeks or opt for faux flowers if you’re crafting ahead for summer parties.
Can I make a summer wreath on a budget?
Skip pricy florist blooms—garden centers, dollar stores, and even grocery store bouquets (like grocery-store roses or carnations) work perfectly. Forage for wild greenery (ivy, eucalyptus) or use dollar-store ribbons and foam cores. Pro tip: Check Facebook Marketplace or thrift stores for secondhand frames!
How do I keep my wreath from wilting or smelling bad?
For fresh flowers: Trim stems at an angle, submerge in water immediately, and change the water daily. For faux wreaths: Store in a cool, dry place away from direct sunlight to prevent fading. Troubleshooting: If greenery smells musty, spritz with a 50/50 water-vinegar mix or replace it—mold spreads fast!
What’s a foolproof alternative if I don’t have a grapevine or wire frame?
No problem! Use:
- A foam floral ring (dollar stores sell these!) for a lightweight base.
- A sturdy cardboard ring (cut from a box) wrapped in burlap or twine.
- Even a hula hoop or embroidery hoop for a rustic look!
How long does it take to make a summer wreath for beginners?
Plan for 30–60 minutes if you’re prepping materials ahead. First-timers might take longer, but breaking it into steps (like arranging flowers first, then securing greenery) speeds things up. Time-saver: Pre-cut ribbons and stems to avoid mid-project delays!
Still stuck? Drop your question in the comments—we’re happy to help you turn blooms into beauty!
Wrapping up and next steps
Creating a stunning summer wreath doesn’t require crafting expertise—just a little creativity and these simple steps! With the right materials and a dash of patience, you’ll craft a vibrant, nature-inspired masterpiece that brings summer joy to your door. 🌸
Now that you’re ready to wreathify, why stop here? Try swapping flowers for dried lavender or eucalyptus for a fragrant twist, or experiment with a boho-chic look by adding feathers or ribbons. Share your masterpiece on social media—tag us and let your creativity shine! 📸✨