
Tools
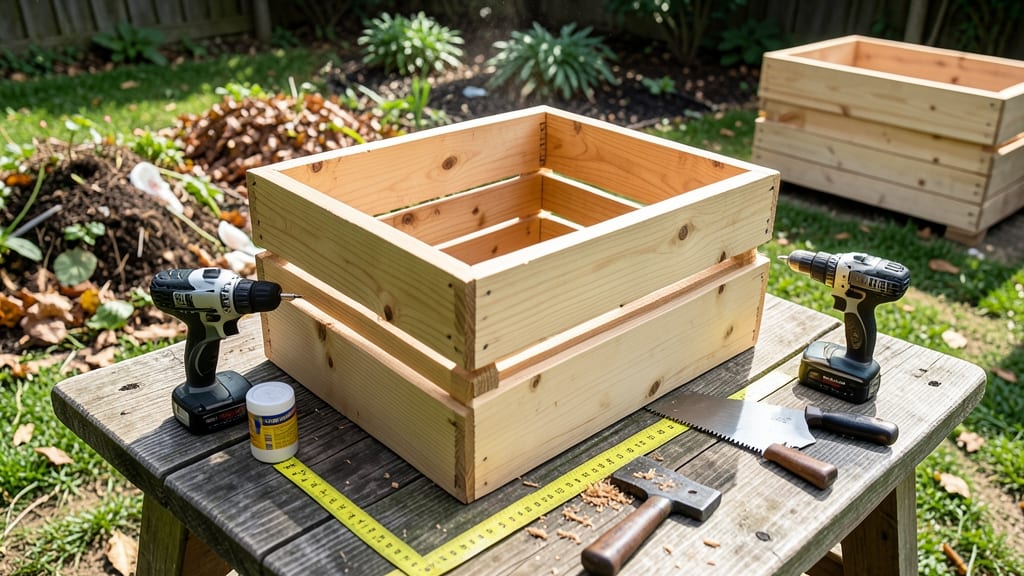
Your garden’s future starts with a few boards and screws. 🌱 Building a wooden compost bin turns kitchen scraps into rich soil—no fancy tools or expensive kits required.
I’ve built three over the years, and the right design keeps it sturdy through rain, critters, and heavy loads while breaking down scraps faster than store-bought bins.
The beauty of this project is its flexibility: you can build a simple 3-sided open bin for quick decomposition or a fully enclosed version to deter pests and control moisture. Cedar or redwood resists rot, lasts 5+ years, and won’t leach chemicals into your compost.
Most home centers stock the lumber, and the entire build takes under 2 hours with basic tools.
By summer’s end, you’ll be turning coffee grounds, veggie peels, and yard waste into dark, crumbly compost that transforms your garden beds. The soil stays moist longer, plants thrive with fewer fertilizers, and you’ll cut household waste by 30-40%. Plus, the bin blends into any yard—no eyesores here.
Whether you’re a first-time builder or refining your setup, this design adapts to urban balconies or rural plots. Ready to turn trash into treasure? Let’s get those measurements squared up and start building.
📚 In This Guide
- What you need
- Instructions
- Tips and common mistakes
- Wrapping up and next steps
What you need
- ● Wood: Pressure-treated lumber (cedar or redwood recommended) or untreated hardwood like oak or pine. 1x 4x4 post (4 ft long) – for corner posts (4 total)
- ● 1x 2x4 board (8 ft long) – for framing (cut to size as needed)
- ● 1x 1x6 or 1x8 board (8 ft long) – for slats or solid panels (6-8 boards, depending on design)
- ● Hardware: 3-inch exterior wood screws (1 lb box) – for assembly
- ○ Galvanized nails (16d or 10d, small box) – optional for extra reinforcement
- ● Stainless steel or galvanized hinges (1 set) – for lid (if adding one)
- ● Exterior-grade wood glue (small bottle) – for extra strength
- ○ Extras: Wood stain or paint (exterior-grade, optional) – for longevity
- ● Landscape fabric (10 ft roll) – to line the bin and prevent pests
- ● Drill bits (1/8”, 3/16”, and 1/4” for screws)
- ● Circular saw or handsaw – for cutting wood to size
- ● Drill/driver – for screws and pilot holes
- ● Measuring tape – precision is key!
- ● Speed square – for accurate angles
- ● Clamps (2-4) – to hold pieces in place while assembling
- ● Sandpaper (80-120 grit) – for smoothing rough edges
- ● Level – to ensure your bin stands straight
- ● Work gloves – because splinters are no fun
- ● A flat, level spot in your garden or yard – avoid soggy or low-lying areas
- ● Basic woodworking skills – or a willingness to learn!
- ● Time to dedicate – a few hours for cutting and assembly
- ● Composting materials ready – greens (nitrogen) and browns (carbon) on standby
Step-by-step instructions for building a wooden compost bin
Here’s how I build a sturdy, long-lasting compost bin that actually works—no fancy tools or woodworking experience needed.
🪴 Step 1: Gather Materials and Cut Wood to Size
You’ll need untreated cedar or redwood (resists rot) for the frame and plywood or pallet boards for the sides. Cut four 2-foot-long 4x4 posts for the corners and four 3-foot-long 2x4 boards for the frame. For the sides, cut two 2-foot-wide x 3-foot-tall panels and two 2-foot-wide x 2-foot-tall panels—this creates a 3-foot-tall bin with a 2-foot front opening. I mark measurements directly on the wood with a pencil before cutting to avoid mistakes.
If you don’t have a saw, borrow a circular saw or miter box—just take it slow. Sand all edges smooth so they won’t splinter and create sharp corners. Here’s the thing—rough edges mean rough handling, and compost bins get dragged around a lot.
🪴 Step 2: Assemble the Frame and Attach Side Panels
Start by screwing the 4x4 corner posts together in a square using 3-inch exterior-grade deck screws. Pre-drill holes to prevent splitting—this is where most beginners mess up. Next, attach the 2x4 frame boards along the top and bottom edges, creating a rectangle. Double-check that all angles are square by measuring diagonally from corner to corner—they should be equal.
Now, attach the side panels. The two 3-foot-tall panels go on the back and one side, while the 2-foot-tall panels go on the front and remaining side. Use 2-inch screws to secure them, leaving a 2-inch gap at the bottom for airflow. I like to countersink the screws slightly so they don’t snag gloves or tools later.
✂️ Step 3: Add Ventilation Slots and a Removable Lid
Drill 1-inch-wide ventilation holes in a staggered pattern along the sides and bottom—this keeps air flowing without letting pests in. Cover the holes with hardware cloth (sold in garden sections) to block rodents. For the lid, cut a 2x4 board to fit the top and attach hinges on one side. A simple latch or bungee cord keeps it secure.
Here’s where it gets fun—add optional wire mesh to the front opening if you’re dealing with determined raccoons. I’ve seen compost bins raided in minutes if they’re not secured. Test-fit the lid before finalizing screws to ensure it opens and closes smoothly.
💧 Step 4: Weatherproof and Position Your Bin
Seal all wood with outdoor-rated wood sealant to protect against moisture and rot. Let it dry completely before moving the bin. Place it on level ground near your garden but at least 5 feet from your house to avoid odors or pests. I like to position it on a gravel base to improve drainage and prevent wood rot from sitting in damp soil.
Fill the bin with a mix of browns (leaves, shredded paper) and greens (vegetable scraps, grass clippings) in equal parts. Keep it moist like a damp sponge—not soggy, not dry. Turn the pile every 2-3 weeks with a pitchfork to speed up decomposition. You’ll see it shrink and darken within a few months—that’s your reward.
⏰ Step 5: Maintain and Troubleshoot
Check the bin weekly for balance—too much green scraps will stink, too much brown will slow it down. If flies or odors appear, add more dry leaves or shredded cardboard to absorb moisture. A well-balanced pile should smell earthy, not rotten. I keep a small shovel nearby to mix layers as I add new scraps.
Every 6-12 months, inspect the wood for cracks or rot. Sand down rough spots and reapply sealant if needed. With proper care, this bin will last 5+ years—far longer than flimsy store-bought models. When it’s time to harvest, scoop compost from the bottom and use the fresh material at the top for next season’s batch.
Tips & tricks for building a sturdy wooden compost bin
Building a compost bin is easier than you think—here are the tricks that'll keep yours standing strong for years.
Material Selection: Cedar and redwood are my go-tos because they resist rot naturally, but if you're on a budget, pressure-treated pine works too—just seal it extra well. The 4x4 posts are the backbone of your bin, so don't skimp on their quality. I've seen bins collapse when cheaper wood was used for the corners.
Precision Cutting: Measure twice, cut once—especially for the 3-foot-tall panels. I use a pencil to mark measurements directly on the wood before cutting, and I always double-check with a tape measure. A miter box helps keep your cuts clean and square, which makes assembly so much easier. Rough edges aren't just annoying; they'll splinter and create sharp corners that are dangerous when handling compost.
Assembly Tricks: When attaching the 2x4 frame boards, use a scrap piece of wood as a spacer to keep everything perfectly aligned. For the 2-inch screws securing the side panels, I like to pre-drill pilot holes to prevent splitting—this is where most beginners mess up. And here's a pro move: countersink the screws slightly so they won't snag your gloves or tools later. It's a small detail that makes a big difference in how smooth your bin moves.
Ventilation Strategy: The 1-inch-wide ventilation holes should be staggered in a pattern that looks like a checkerboard. This creates airflow while still keeping pests out. Cover them with hardware cloth—it's sturdy and won't rot like wire mesh can. For the front opening, if you're dealing with raccoons, add that optional wire mesh. Trust me, it's worth the extra effort to keep your compost safe from determined critters.
Pro Tips for Make A Wooden Compost Bin
- Building a compost bin is easier than you think—here are the tricks that'll keep yours standing strong for years.
- Material Selection: Cedar and redwood are my go-tos because they resist rot naturally, but if you're on a budget, pre...
- Precision Cutting: Measure twice, cut once—especially for the 3-foot-tall panels. I use a pencil to mark measurements...
Frequently asked questions
Got questions about building your wooden compost bin? You’re not alone! Here are answers to the most common queries to help you compost like a pro.
What’s the best wood to use for a compost bin?
Use untreated cedar, redwood, or pressure-treated lumber (with minimal chemicals). Avoid pine or chemically treated wood, as they can leach toxins into your compost. Cedar resists rot naturally, making it a top choice for longevity.
How long does it take to build a wooden compost bin?
For a basic 3x3 ft bin, plan 2–4 hours if you’re experienced with tools. First-timers may need 4–6 hours, especially if cutting wood or drilling holes. Break it into sessions if needed—composting patience applies to building too!
Will pests like rats or flies be attracted to my bin?
Not if you balance greens (nitrogen-rich) and browns (carbon-rich) and keep the pile moist (like a damp sponge). Ventilation holes (2–4 inches) deter pests by reducing odor. Avoid meat/dairy—stick to plant scraps, coffee grounds, and yard waste.
Can I make a compost bin without power tools?
Use a hand saw, drill (battery-powered or manual), and screws/nails. Pre-cut lumber at a hardware store, and assemble with a hammer or wrench. A staple gun works for securing hardware cloth (if adding a base). Time-consuming but rewarding!
How do I compost in cold climates?
Insulate your bin with straw, leaves, or a tarp cover to retain heat. Smaller piles (3x3 ft) compost faster. Add manure or finished compost as a heat booster. In freezing temps, pause adding wet materials—focus on dry browns until spring.
What if my compost smells bad?
Bad smells = too much nitrogen (greens) or lack of oxygen. Fix it: Add dry leaves/straw, turn the pile weekly, and avoid meat/dairy. If soggy, mix in more browns (shredded paper, cardboard). A well-aerated bin should smell earthy, like a forest floor!
Wrapping up and next steps
Building your own wooden compost bin is a rewarding project that not only reduces waste but also enriches your garden naturally! 🌱 With the right materials and a little effort, you can create a durable, long-lasting bin that turns kitchen scraps and yard waste into nutrient-rich compost.
Start small, stay consistent with your composting routine, and soon you’ll be enjoying homegrown garden gold—all thanks to your handmade masterpiece!
Ready to take the next step? Grab your tools, gather your scraps, and let your compost bin work its magic! 🚀